86 how to make a coloring page
how to make a coloring page
Create coloring book pages by Aktanova | Fiverr 0

How to Make a Coloring Book | Coloring books, Coloring pages, Kids coloring books 1

Make Any Picture A Coloring Page With iPiccy - iPiccy Photo Editor Blog | iPiccy Photo Editor Blog 2
Make Your Own Coloring Pages For Free at GetColorings.com | Free printable colorings pages to 3
Make Your Own Coloring Pages From Photos Free at GetColorings.com | Free printable colorings 4
Instant PDF Digital Download Coloring Page Hand Drawn | Etsy 5

Making a Coloring Page - YouTube 6
How to Make a Coloring Book in 5 Steps 1. Open an 8.5" x 11" blank canvas in PicMonkey. Open an 8.5" x 11" blank canvas in PicMonkey to get started. You'll... 2. Turn on crop and bleed … 7
How To Vectorize your drawing with Inkscape. When you open up Inkscape, go to ‘ File ‘ at the top left of the screen > ‘ Import ‘. Select your drawing and it will appear in the middle of the page. If … 8
Create Your Own Coloring Pages With Your Name at GetColorings.com | Free printable colorings 9

113 best images about Coloring pages on Pinterest | Adult coloring pages, Coloring pages and Day 10
Create a stunning adult colouring page in vector for you by Tehmeena_a | Fiverr 11
Kids-n-fun.com | Coloring page Quiver dragonfly 12
Instant PDF Digital Download Coloring Page Hand Drawn | Etsy 13

Kids Coloring Contest Rules – Emperor Kids 14

Coloring pages on Behance 15
Kids-n-fun.com | Coloring page Quiver Bumblebee beetle 16
Kids-n-fun.com | Coloring page Quiver toys 17
Lisa frank animals coloring pages download and print for free 18
Free Valentines Day Coloring Pages for Adults - Easy Peasy and Fun 19
Holidays Coloring Pages - Best Coloring Pages For Kids 20

Coloring pages on Behance 21
Butterfly Coloring Pages for Adults - Best Coloring Pages For Kids 22
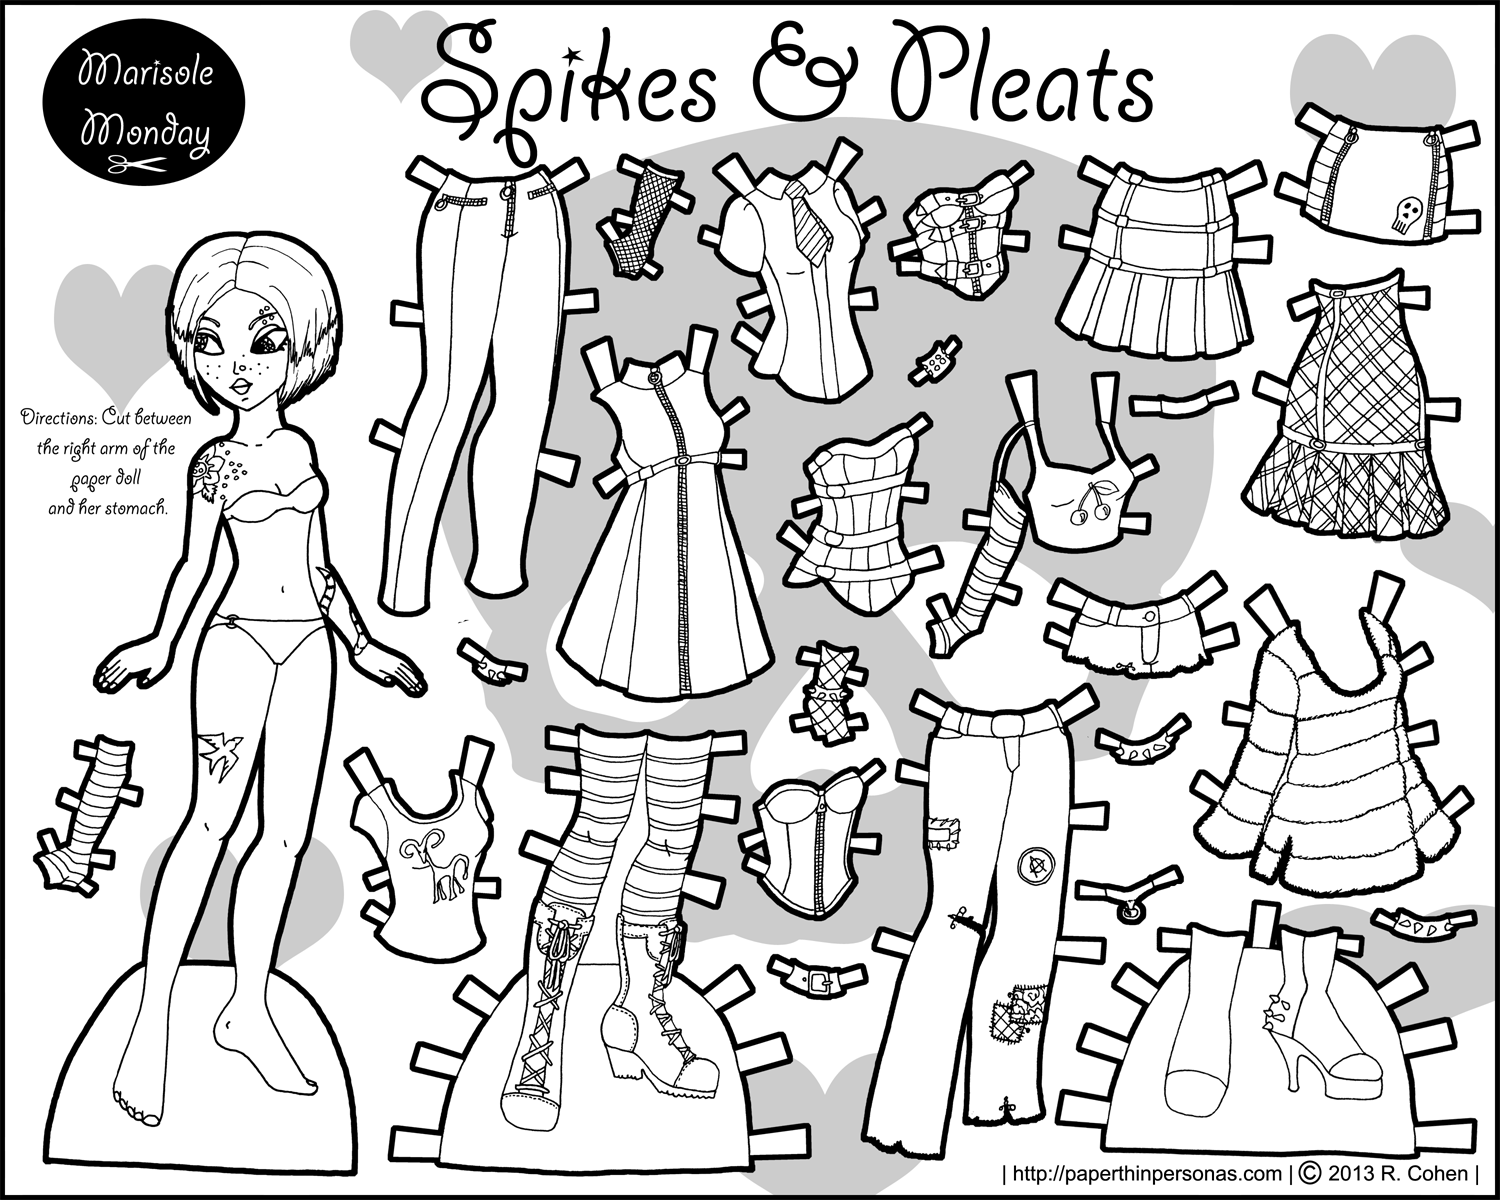
Paper doll coloring pages to download and print for free 23
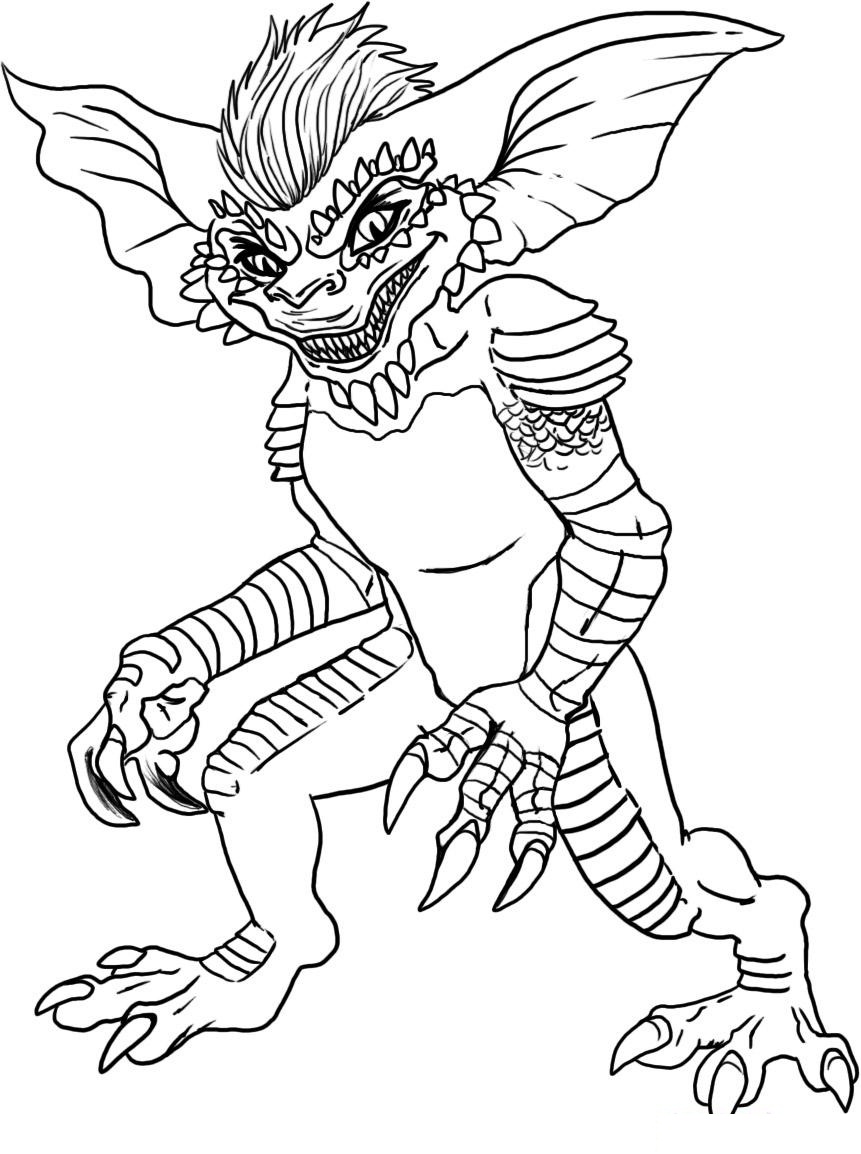
Ghostbusters coloring pages to download and print for free 24
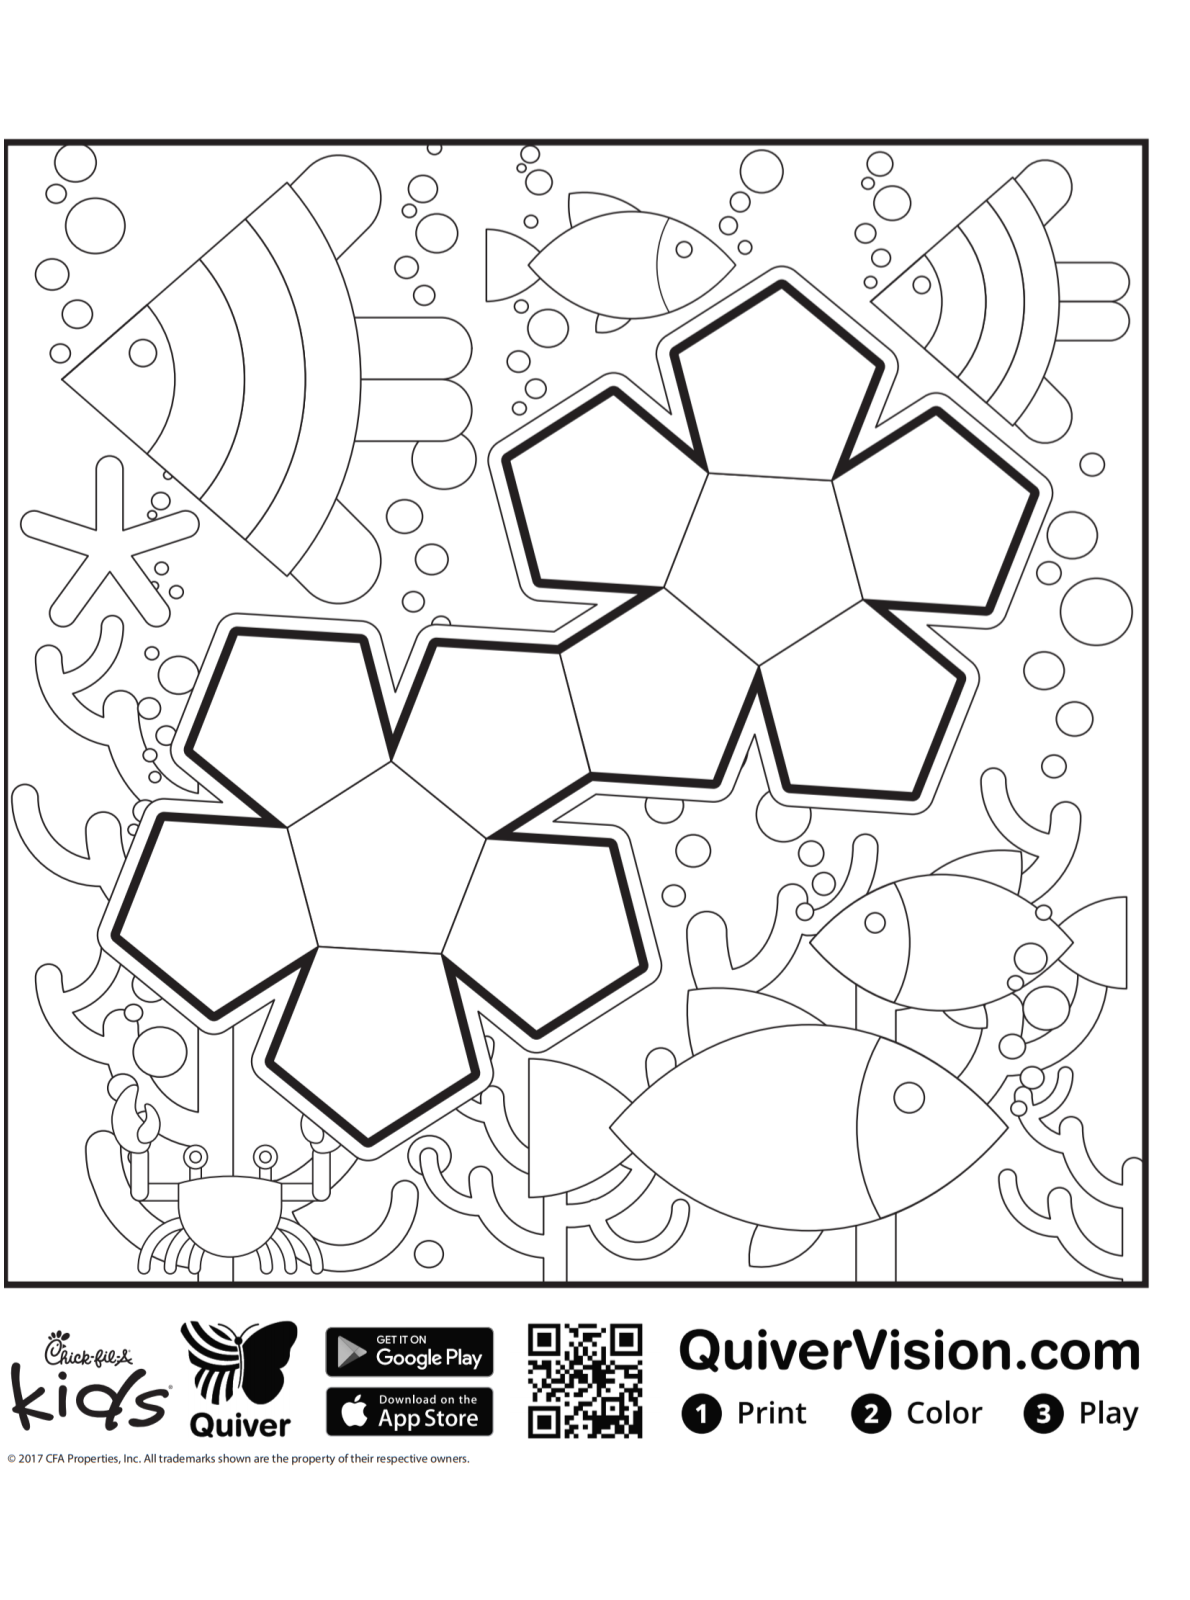
Kids-n-fun.com | Coloring page Quiver shapes 4 25

Free Printable Tangled Coloring Pages For Kids | Cool2bKids 26

Free Coloring Pages for Girls and Boys | 123 Kids Fun Apps 27
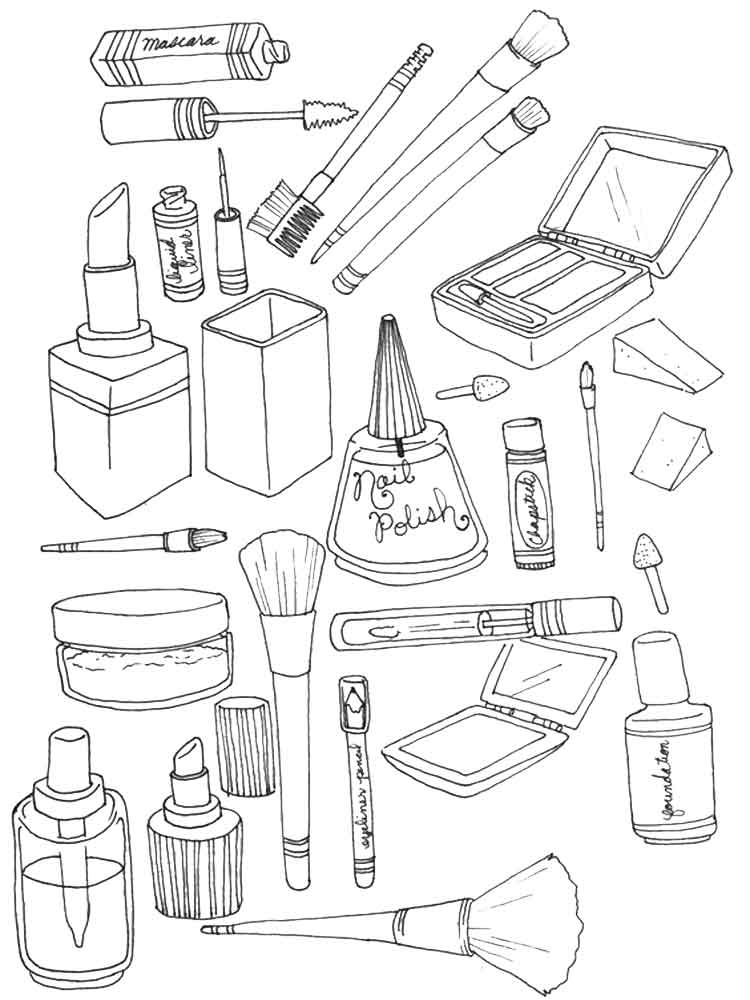
Cosmetic coloring pages to download and print for free 28
Crafts,Actvities and Worksheets for Preschool,Toddler and Kindergarten 29

Pin on aramalar 30
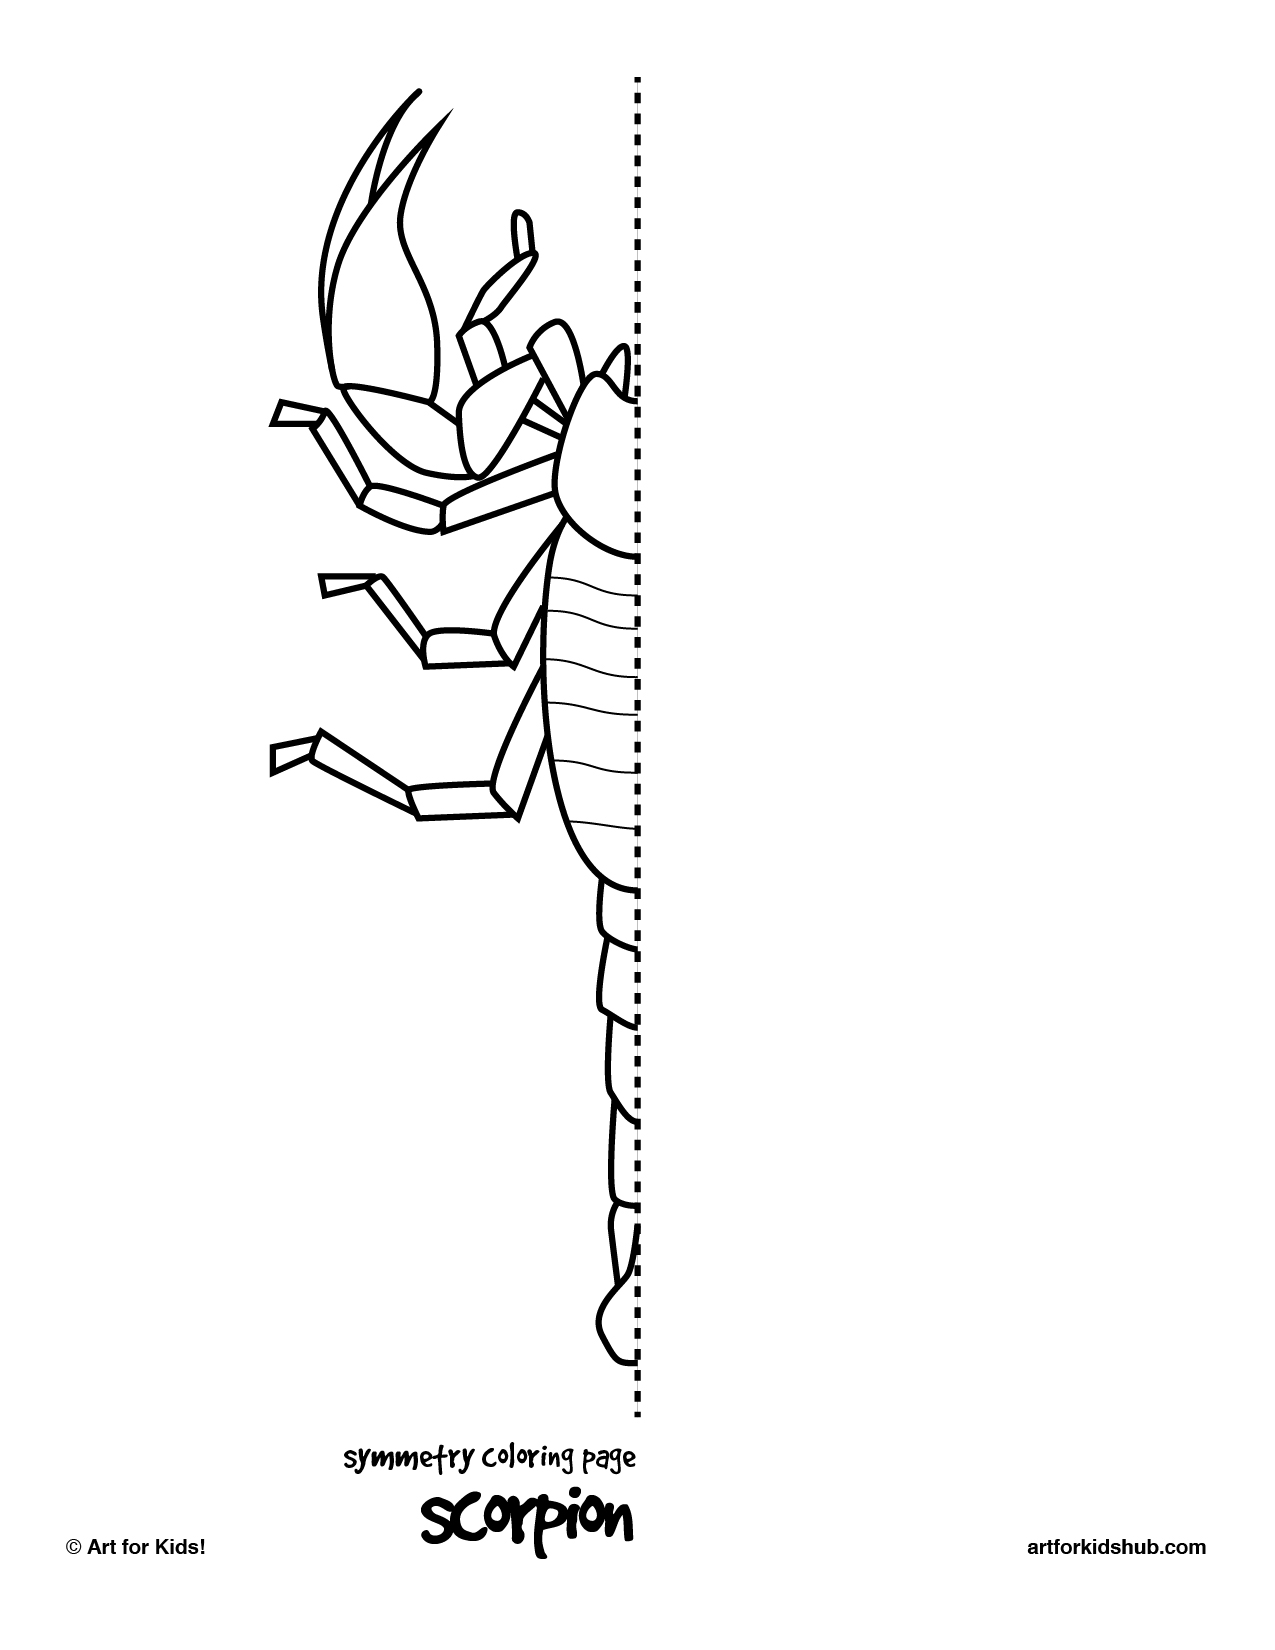
10 Free Coloring Pages - Bug Symmetry - Art For Kids Hub 31
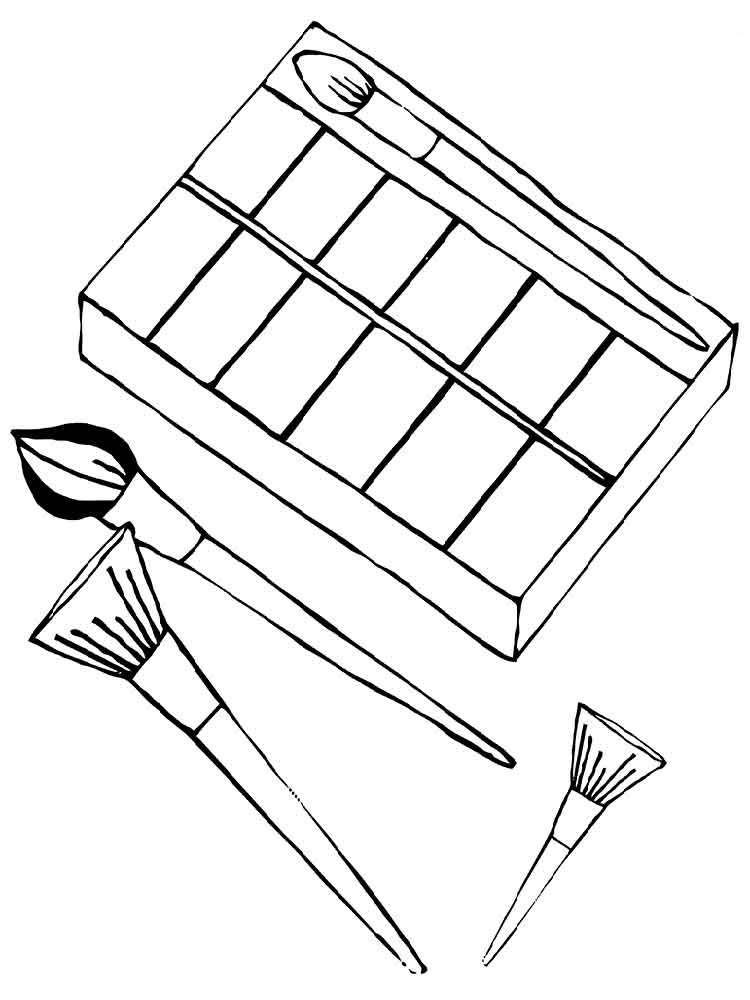
Cosmetic coloring pages to download and print for free 32

Shape Coloring Pages House Shaped | Shape coloring pages, Owl coloring pages, Coloring pages 33

Ice Cream | Coloring Page | Frogburps 34
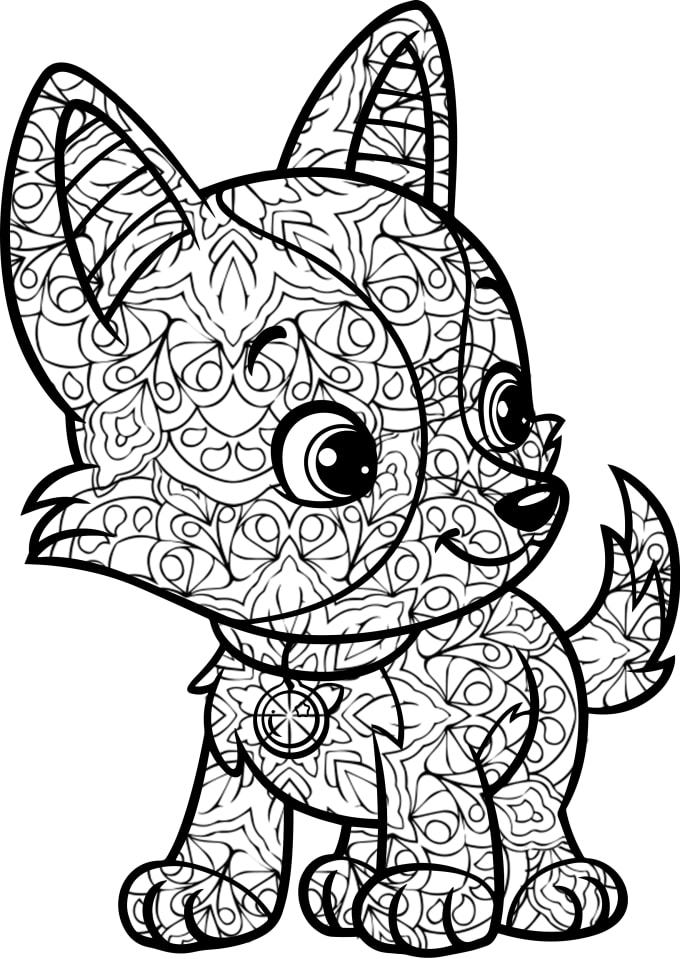
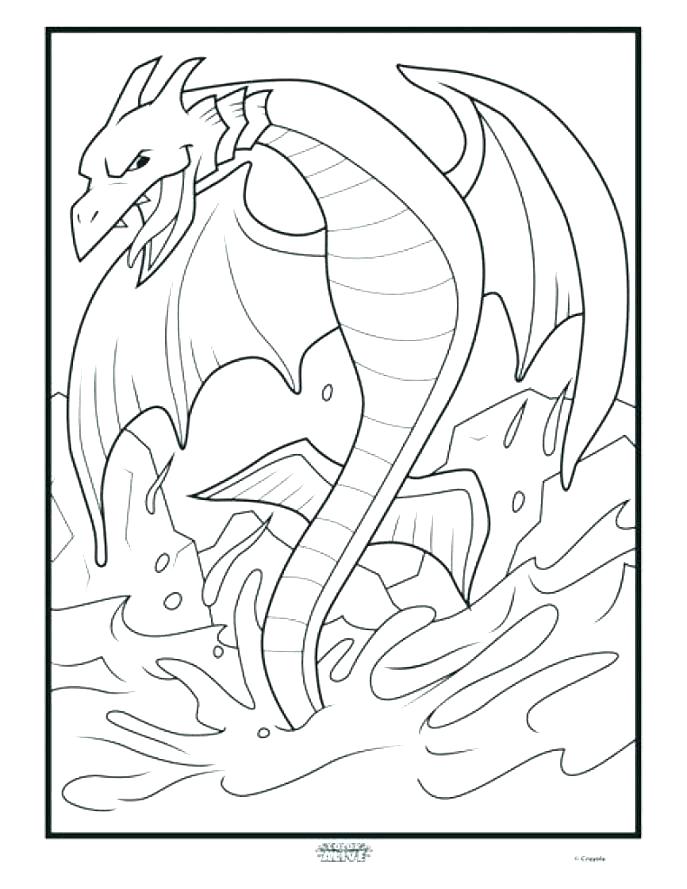
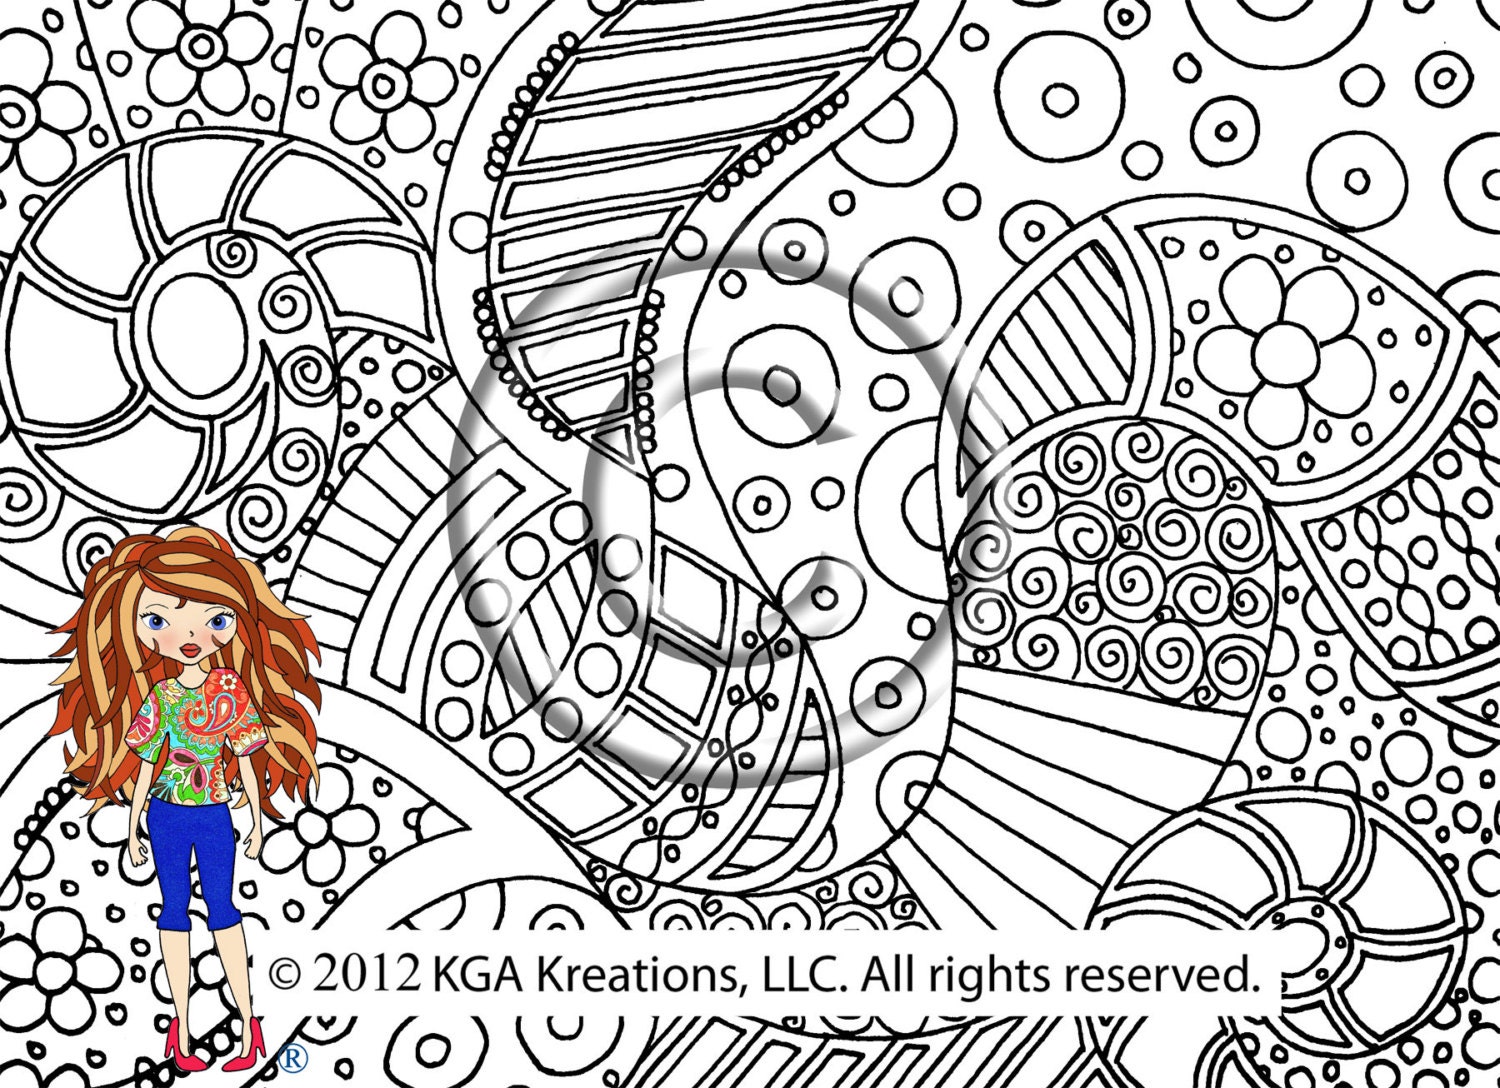
hey there and welcome to another edition, of low content publishing for beginners, my name is Rachel Harrison son so today, we're going to be talking about coloring, books coloring books have been a hugely, popular style of low content book on KTP, the last couple of years really really, started to explode a couple of years ago, especially in the adults coloring book, niche and you know this is something, that a lot of low content publishers, have really wanted to get into and the, thought of actually having to outsource, it can feel like it might actually be, really really expensive and you know, just cost prohibitive to do so but today, I'm gonna show you a little tutorial and, teach you how to create your own, coloring books in a really short amount, of time and you can even do this at zero, cost just by using a free imagery that's, already out there and a free vector, editing software like the one I'm going, to show you in this tutorial so let's, just dive right into the tutorial okay, so you're gonna need three things, to make your own coloring book the first, thing is you're going to need a vector, graphic that's what you're going to be, editing you're going to need a vector, editing program I'm going to show you a, free one here and of course you're going, to need a program to put it all together, and for a free version I'm going to, recommend canva so vector Z is a pretty, good free site to get free vector images, from they've got a really wide selection, and they've got some free and paid, options available and they're free, options are pretty decent so once you're, here at vector Z you can just type in, whatever you're looking for and I do, recommend choosing some sort of a theme, at first you don't create a really, generic coloring book you want to have, some sort of a theme whether it's, animals or dinosaurs or you know, whatever it is I'm just going to use, animals as an example, so whatever you're looking for you can, just type it right into the search bar, and then what you're gonna want to do if, you're looking for a free imagery then, just go over to the left menu here and, just click on free license and that's, going to filter out anything that's paid, now you do want to keep a few things in, mind when searching for images to choose, for your coloring book you want to, choose images that are simple and, preferably already have an outline, around them and just have a solid color, on the inside anything that's more, complex than that, even though it may actually be workable, it's probably just gonna be a little bit, more hassle than it's worth so you want, to find something that's already simple, at the outset so that you don't have to, put a ton of work into it so just as an, example here I'm just going to click on, this guy this is a pretty complex set of, illustrations there's a lot of shading, in there a lot of gradients and things, like that that's just going to be too, tricky to deal with so we want to steer, clear of anything like that things, that'll work well are things like this, this one has just got outlines and solid, fill colors so that would be workable, something like this would probably be, pretty easy, if you wanted to go a bit more complex, you could even do something like this, this obviously looks like a far more, complex illustration than the last, couple I showed you but this one still, has solid fill colors and outlines so, this would still be workable now I've, already gone through and I have selected, this illustration for myself now there, are two ways you can go about this one, is you can select files that only have, one illustration per file you can decide, how many pages you want your coloring, book to be and then you can just round, up that many images if you want to make, this even easier then you can look for, files like this where there are multiple, illustrations in one file then you can, just download the one file and the great, thing about something like this is that, all the illustrations in the file are, going to be a similar style so that's, something to kind of think about if you, are just downloading files with a single, illustration on each file you're really, going to want to pay attention to if the, Styles all look cohesive between them, one way you can do that is you can just, look for images that have been created, by the same artist and then oftentimes, even though they may have multiple files, with a separate illustration on each, each file because they've been done by, the same artist they will actually have, a similar style to them because you do, want this to look cohesive at the end of, it oftentimes though you can find a file, that has five ten or even twenty or more, smaller illustrations within the file, and those are great if you can just, download one of those and have enough, images in there to create half or even a, full coloring book that's fantastic okay, so once you've chosen your image we're, going to download the image now you are, able to edit images directly in vector Z, they've got the back DZ editor and if, you wanted to do that you could just, click on this button right here and that, would take you to in in browser vector, graphics editor but I'm not going to, recommend it for this because there are, a couple of key features that the vector, Z editor is missing and that's going to, just make things a little bit more, difficult for us so we're going to, ignore, that for now it does have some good, features though so if you wanted to play, around with it be my guest but for now, I'm just going to download this vector, okay so the next step here is we need to, have a vector graphic editing software, now if you've got illustrator at home, that's great that is definitely the, industry standard when it comes to, vector editing software but if you're, looking for a free alternative there are, a few different options out there some, definitely better than others now for, this tutorial I tried out probably about, five or six different ones and each one, seemed to have a different failure at, some step of the process the one I did, find that's probably going to be the, most useful that does everything that we, wanted to do is grab it this is a pretty, powerful vector editing suite and it's, got everything that we are going to need, there is a free version and a paid, version but the free version does offer, everything that we need so that's great, now if you're looking for something that, is a true replacement for illustrator, that is free you can check out Inkscape, I did not do that because Inkscape is a, bit of a pain to use with a Mac so if, you are using a Mac it's gonna be a, little bit of a pain you have to, download additional software to allow, Inkscape to work on your Mac so I just, didn't even want to go there, this I thought was kind of a nice, compromise it's got everything we need, and we're totally gonna be able to get, by on the free version so once you're, here you can just click try it now and, then you can just go straight to get, started now first thing we're gonna do, is we're gonna set the size of our, document so it's a good idea to just, keep in mind what size you want your, final coloring book to be for me when I, think about kids coloring books anyways, they're usually about an 8 by 10 or an, eight-and-a-half by 11 or something like, that so I'm just going to go ahead and, I'm going to choose 8 by 10, going to hit create, now just a quick side note here you're, gonna see at the bottom this trial 15, days left don't worry about that, as soon as you sign up for this Gravett, designer it's gonna just kick you, directly into the pro version and then, when the 15 day trial is over you're, just going to have some of the features, removed you don't have to enter any, information on this you're not entering, a credit card or anything like that so, you're just being given, you're just being given the full suite, of features for those first 15 days and, then at the end of it you'll be asked if, you want to sign up for pro and off the, top of my head I can't remember I think, it's a monthly subscription and if you, don't want that fine you can just stick, with the pared down version and you, should still have all the options that, we are going to be using for this, tutorial so now what you're going to, want to do is you're going to want to, import that file that you just, downloaded so I'm going to go to file, open local file I'm going to click the, folder that I download it and you're, gonna see a dot a is VG and a jpg you're, going to want to use the dot SVG and, we're gonna click open and now our file, is ready to be edited, now one thing you'll notice is even, though we set our initial page size as 8, by 10 once you upload an image it's, going to just take on the size of that, image so unfortunately we are going to, have to set that size again not a, deal-breaker just a little bit of a pain, so we're just going to go over to the, right here - page size and first make, sure the unit is in inches and we're, going to go over to here and we're going, to have 8 by 10 again now we're just, going to select that and resize it to, fit, next thing we're going to do is just get, rid of this cream-colored rectangle we, don't need that and because I'm not, super keen on working on a transparent, background all the time I like to have a, solid color I'm going to go back over, here and I'm just going to click on the, white background color and now I've just, got a solid background to work against, next thing we're going to do is we're, going to create the amount of pages that, we're going to need here so in my file, I've got six separate illustrations I'm, going to want one of these on each page, so I'll go to create six separate pages, that's going to be really handy when it, comes time to export all of these, illustrations it's going to export them, all individually and then we can place, them all individually into our actual, coloring book file so I'm going to go, over to the pages palette here and I'm, going to hit the create new page button, five times so I've got six pages then, I'm going to toggle this switch which, puts us into multi-page mode and I'm, going to go up to this button fit all, and now I can see all the different, pages all at once, and then I'm just going to put each, illustration on its own page, now we can toggle in and out of, multi-page mode whenever we want so I'm, going to be working on this page now so, I'm gonna toggle out of multi-page and, now I'm just on single page, next thing I'm gonna want to do is I'm, gonna want to scale this up now this is, where I'm just gonna mention another, little bit of a quirk here because we're, using a bunch of free software's it's, not going to be as seamless of a process, as if we were just using illustrator, straight into InDesign so just a couple, of things to be aware of because we're, going to be using canva to create our, actual coloring book file canva does, accept SVG files but they're pretty, finicky with them so what I recommend, when it comes time to export this we're, going to export it as a JPEG so that is, why we need to scale this up to the size, that we want at the end of it now so I'm, gonna scale that right up if a coloring, book is about 8 by 10 then I'm gonna, want it probably at about that size once, I'm happy that the final size is about, what I'd like it to be now I can go, about actually turning this into, something that we can use for a coloring, book so first I'm gonna select the, illustration then I'm going to go up, here to the ungroup button I'm going to, click that and now all of its separate, components are going to be available for, me to edit individually so I'll just, select the first shape that we're going, to work with here okay so we're going to, just go over to the fills button here, don't click on that eyedropper we don't, need to worry about that right now, you're just going to click on the actual, colored circle and we're just gonna go, down to white then we are going to go to, borders same thing but we want that to, be black color fill is the default, option so we're going to hit that and we, are just going to choose black, now that black line is pretty weak so, we've got to want to beef that up a, little bit probably to about 3:00 we'll, see how that looks you may even want to, try four you can just play around with, that depending on your illustration so, this is essentially what we're going to, do to each one of these components and, that is how we're going to get the nice, black outlines for our illustration now, if you want to speed up the process what, you can do is just select all of the, objects at once and do what I just did, with that first object now chances are, some of these objects are going to be, treated slightly differently so you'll, then want to go in afterward and make, any small adjustments that you see fit, so I'm just going to grab them all we're, going to go to Phil's we're going to, make all of the Phil's white and then, we're going to go to borders and color, Phil will make all of them black, and again we're going to choose think I, had four all right so that's a great, start but as you can see there are a, couple of things that don't quite look, right here so the eyes and the nostrils, those actually look better as solid, black with no border so let's adjust, those again actually I think the mouth, as well so we've selected all five of, these separate shapes here we're going, to go back to fill we're going to choose, black we don't want any border at all so, we're going to hit zero all right so, that's looking good again now another, thing you'll notice is that the ears are, now appearing to be in front of the face, when we want them to be behind the face, so we're going to select all of the, components of both ears you're going to, go to the top toolbar here, and there's these send forward and send, backward tools we are going to send them, backward now depending on how many, layers this particular illustration is, made of you may have to hit this, multiple times until it gets behind the, layer that you want it to so if nothing, happens with the first couple of clicks, just keep going and it will happen, eventually and you'll see to the left in, this layers palette you'll see them, actually moving down okay so now they're, finally sitting behind the head so now, this first illustration for your, coloring book is finished and we can, move on to the next one so again you can, just toggle a multi page here and if you, want you can go to fit all okay and now, you can just move on to your next page, so let's look at something a little bit, more complex we'll head down to this, bottom page here we'll just toggle out, of multi-page mode so that it just, brings up this one page and again the, first thing I'm going to do is I'm just, going to scale it up to how big I think, I want it on my 8 by 10 page, so that looks about right again I'm, going to click it and I'm just going to, ungroup it and again if you want you can, just select all the components at once, apply the same a fill and border and, then just go back and fix anything that, doesn't look quite right so once all the, components are selected I'm going to go, back to fill I'm going to choose a white, fill and a black border, and then I'm going to make the border of, four points, okay so again it's a good start but we, need to do a little bit of manipulation, here so I'm going to start by grabbing, those eyes, you, and this portion of the beak and I think, this grass too, I'm going to choose a black fill for, those, and I'm going to get rid of the border, altogether now I've just taken a, screenshot of the before of this picture, so I can kind of compare it to what I've, got going on with my edited illustration, here so as you can see this green patch, was actually consisting of two separate, shapes so that looks a bit off so what, we're going to want to do here is just, combine those to make it one shape like, it is in the one below and to do that, we're going to use what an illustrator, would be called the Pathfinder tool but, in Gravett, you're going to choose create compound, shape, and you're going to click that and that, will instantly combine the two shapes so, I'm going to get rid of this now I'm, just going to zoom in a little bit and, just take a look and see if anything, else needs fixing here so that's looking, a bit weird it looks like there's some, sort of layer order thing going on there, so again I'm going to bring that to the, front, there we go now that's sitting on front, I'm just actually going to nudge that up, a little bit this is sort of a weird, thing that was going on here now that's, covered up okay so now that we're, getting into the nitty-gritty detail, here I'm going to zoom into this area, you can kind of see it's not quite, attaching quite the way we want it so, I'm just going to click that and I'm, going to head over to the borders panel, here and I'm just going to click on the, advanced stroke settings I'm going to go, to joins and I'm going to hit round we, do that that just kind of caps off that, edge there you can see before it was, just kind of cut at an awkward angle, straight up and down when you hit around, it just gives a nice round end to it and, that obviously looks a little bit better, again we've got a little bit of an, awkward area in here, so I think I'm just gonna move the shell, down a little bit just to get rid of, that and then that top part of the shell, can come down as well so that now looks, pretty good and now I'm just going to, move on to the next illustration now, what you can do before you export these, is you can select the page and we're, gonna head over to the page palette over, here and we're gonna click this button, trim canvas that's just going to trim, the canvas down to the size of our, illustration now you might be confused, at this point because we went to the, trouble of actually creating pages that, were the size of our coloring book the, only reason we did that is because of, the challenge I talked about earlier, where if we're importing this into canva, we're going to have to do it as JPEGs so, I wanted to create 8 by 10 pages in the, beginning just so I knew how much to, scale up these illustrations if you're, working in a program other than canva, then you wouldn't have had to worry, about page size at all throughout any of, this process but since we're going to be, using canva today I created my pages at, 8 by 10 so I could scale them up to the, size I wanted them to be so that when I, export them as JPEGs they're going to be, at the final size and the reason I'm now, fitting the page to the selected artwork, is just to make the file smaller so, these are the two that I've done so, these are the two were going to work, with now a good idea before you export, all of these as well is to just name, your pages which we can do in this, palette so the two I'm really concerned, about are the pig and the chicken and, then we're going to go to export so file, export advanced export you're going to, have all the different pages here with, the names that you've given them we're, going to select jpg only because we are, going to be using canva if you're using, a different program that isn't finicky, with SVG you can just keep it as an SVG, what you don't want to use is PNG PNG is, not for printing so that's not going to, be suitable for us, keep the size as is JPEG quality we want, to the highest possible and background, we'll just leave that as is and we'll, hit export all and that's just going to, wind up your downloads folder so next, thing we're going to do is we're going, to head over to canva and if you haven't, signed up for canva go ahead and sign up, for a free account we're going to create, a design with custom dimensions again, I've decided to choose 8 by 10 I'm going, to hit create design, and I'm gonna start uploading my files, so we'll go to uploads you can either, drag your images right into here or you, can click upload an image it's going to, be in the zip file so you'll have to, unzip that first and I'm going to choose, Pig and I'll just plop that in there, once it's in this panel I can just drag, it right onto my page so if you just, drag it you'll know that it's centered, because you're going to get this, vertical line here same with if you kind, of move it up and down slowly you'll get, that pink crosshairs that's going to, tell you that it's perfectly centered in, your page and then we're going to add a, new page, we'll throw our chicken in there, you, you, alright that is centered, and if you want you can just select all, of them at once, we'll just grab these other pages that, we didn't complete and then you'll get, all of them uploading at once and again, you're just going to hit add new page, for each page of your coloring book and, of course if you want to add a page it's, beginning with some sort of you know, this coloring book belongs to or any of, your copyright information you can do, that in here so I've added this blank, page if I want to put this at the, beginning I can just click this move up, button here now that's at the front I, can click the text icon here and we'll, get a bunch of different type treatments, that I can choose from which is great, these type palettes are great for, getting some really nicely, professionally designed font pairings, without actually having to do any of the, work yourself so once you've found a, type treatment that you like you can, just click on it and it'll end up right, in your book and then you can just click, right in there and you can change the, text to whatever you want now obviously, you're gonna want to choose something a, little bit more exciting than that but, just for example say can you get the, point and of course if you want to add, anything else to your coloring book, pages while you're in here feel free you, know maybe instead of just having the, illustration maybe you want to have a, word in there as well, for this one I don't know what is this a, chicken we will just call it the chicken, for now anyways you get the point you, can just add whatever you want in here, and I just keep in mind the minimum, number of pages for a book published, through KDP is 24 so you're gonna need, at least 24 of these illustrations and, then obviously keep in mind you're gonna, want to do a cover as well which I also, recommend doing in canva and you can, check out my video on how to create a, cover in canva if you're not sure and, once you're ready to download this you, can head up to the publish button here, first off you could change the name of, the file here the coloring book or, whatever you want to call it and then, we're going to hit publish and you're, going to want to download this it's, going to suggest PNG which you, definitely don't want scroll down to PDF, print high-quality you're probably not, going to want a bleed on this because, most of the images are going to be, contained within the document and you're, going to want to make sure that all, pages are selected then you are going to, hit download, so here it is here is our coloring book, the first couple of pages anyways so I, hope after this tutorial you can see, that it's probably not as difficult as, you might have thought it is to create a, coloring book on your own using, completely free software and free images, now I showed you a pretty basic version, here using really simple illustrations, you can absolutely get a little bit more, complex than this you might have to, spend a little bit of time just playing, around in whatever program you're using, to get the hang of it but this is kind, of you know the bare minimum of what you, can do and if you're doing something, geared towards kids like this one then, simple illustrations like this are, perfect of course adult coloring books, are all the rage now so you might want, to think about slightly more complex, illustrations which obviously still, doable it's just going to take a little, bit more time to edit all of those, outlines and fills and get the outline, of the drawing and removing those color, fills but at the very least I hope you, now feel confident in your ability to go, out and attempt one of these for, yourself no matter how simple or complex, you want the final product to be again, after trying probably about five, different free vector editing software's, over the last couple of days Gravett was, the one that I thought was the best in, terms of its functionality and the, different features that it offers I have, heard that Inkscape is probably closest, one to illustrator that you'll find for, free but again if you're on a Mac like I, am there's some third-party software, that you've got to download which just, was a bit of a pain in the butt so I, just didn't want to go there if you have, questions on anything I've done in this, tutorial feel free to just leave them in, the comments below and if you attempt, this on your own then you know let me, know how it goes and if you run into any, problems or whether or not you are happy, with the final results alright thanks, guys
How not to get on covered on TechCrunchI launched my startup officially last week (Eureka Science News - http://esciencenews.com - intelligent news aggregator, fully automated, similar to techmeme and Google News, but with full content on the site - check out the /about page if you want to know more). I got amazingly positive feedback from it; got covered on the front page of Drupal with a full write-uo on how I built the site, in details(http://drupal.org/node/261340); Drupal is the open-source CMS I built my site with, so it was my way of giving back to the community.
After that, I figured 'hey! Maybe I actually have a chance with TechCrunch!'. In my mind TC covers only very high profile, tech-related startups, so at first I didn't think that they would be interested by a science news site started part-time by a PhD student in retrovirology ;) So I submitted my story via the form on their contact page. No answer for two days, so I submitted it to Mashable, which wrote a post about the site very quickly (http://mashable.com/2008/05/21/eureka-science-new/). Cool, but the traffic this link generated was much lower than I expected (< 200 views, Drupal gave me > 6000).
I then looked back at TC contact page and noticed a the 'newstip' email link at the top of the page; the contact form is much more visible, but now I can tell that the newstip email link is much more efficient; I wrote a quick mail about my site and the coverage that we got so far on Drupal and Mashable, thinking that it would help getting covered on TechCrunch.
This time they answered promptly; I was very excited! But they said that while my site was very interesting, they like to cover news first and that they were going to pass on this one since we got covered by Mashable, even if they love science.
It's very sad because Eureka Science News is the first vertical I used my intelligent news aggregator for - copyright-free press releases are readily available for most news published daily; I'm looking for VC funding to license Associated Press content to build a website covering all news categories. Getting on TC would have helped for sure!
So don't make the same mistake, submit to TechCrunch FIRST via the newstip email link, not the contact form! At worse, you'll get rejected and you can give the exclusive to someone else ;) I sure wish I did, now I won't know the kind of traffic TC can send (but I'm sure its more than the 200 hits I got from Mashable!). I even had nightmares about it last night, a thing you sure want to avoid ;).
,Another AirBnB Host Horror StoryQuoraQuora connects you to everything you want to know about.
LoginSign UpAirbnb:
Has anyone had the experience of your Host listings being turned off by AirBnB due to bringing to their attention problems with their platform and procedures?
John Cohen, NYC HostYes
AirBnB recently hid all my listings. At the same time they cancelled over 19 bookings adding up to over $7000 dollars most likely more. Here is a copy of the email sent to those inconvenienced persons.
Dear xxxx,
We were just informed by John Cohen that your accommodation starting on xxx, April xx, 2012 (reservation xxxxxxx) is no longer available. You should know that hosts are penalized for canceling reservations and removed from our site if they do so frequently.
I am no longer able to access my account to see my future payouts -- approximately $2000 dollars -- or when I will recieve $954.
At the suggestion of an experienced attorney I have backed all information that was in my account including changes that were occurring after AirBnB shut off my listings.
I cannot prove what the customer service supervisor said over the phone but I will quote 'We have discussed it among ourselves', 'There are simply too many customer service requests from your account', 'You can apply in two months to be re-instated.'
After careful review of the backups it appears to be 21 bookings not 17. As of this date several guests are living in my home. Booked through airBnB. I have no idea if I will be paid for their stay. Here is a short list of my Complaints that resulted in AirBnb hiding my listings.
1) Peer review process as implemented is being used by a few guests as a threat of a 'Bad review' if I do not bend to demands for services not offered. Or if I attempt to enforce the House rules such as under age drinking or cleanig up after themselves.( Threse guests have no reviews of their own.)
2) Security Hole. Apparently airBnB does not maintain any information of the Guest of the guest.
3) CSR who answer the phones are given extraordinary power to rush to a judgement without giving the Host the benefit of the doubt.
4) Reservvation panel is a Mess if you are a busy Host. Dificult to make heads or tales from this. Even the CSR.
5) Bad reviews which are not opinion but statements of Fact. Say about the cleanliness of a Host. 'Place smells like Garbage' Bathroom's are dirty' by a guest who frequently broke house rules.
6) A clear and convincing connection between Guests who them selves have no reviews making a complaint or bad review on a Host who has asked them courteously to obey House rules.
7) Repeatedly blocking out up to 10 days or more on a room until an investigation is complete. Finding the Host acted properly
8) Many of my customer service calls were about parts of the WebSite not working or learning how to nagivate it properly. I have bad eye sight and need new glasses. EG recently a part of the listings page failed to show up where
prominently it states Host has PETS. Two guests allergic to Cats appeared.
. Though my listing clearly states CATS. I had to have my House keeper Vacume 2,000 square feet. So that the guests could finish their bookings. My cats were trapped in my bedroom for two weeks.
9) Security deposit is not a security deposit. Never in my Life have I been
compelled to negotiate with a petty thief
Their is a lot more. 24/7 is not 24/7 due to the lack of enouph Human Infrastructure to handle the Volume of calls. Resulting in knee jerk reaction's
and bad decision making.
I cannot help get the feeling that AirBnb in my opinion would like low end Hosts to quietly fade and disappear in to the night.
This one will not.
The average star rating of my spare bed rooms was 4.5 Stars.
Skirting around the Franchise laws of the State of New York and the Federal Franchise Laws.
Skirting around the case law in New York State concerning Defamation and Slander.
And who knows what else. (SPIONS)
I am a fundamentaly good New Yorker. I am confident that my fellow New Yorkers will hear my cry for HELP.
I have been crippled financially by AirBnB's actions. Humiliated. Down but not out. I have nothing to loose. I am old sickly.
In my youth in basic training at the USMC. You learn the history of this Institution.
Lt. General Chesty Puller.
'You don't hurt 'em if you don't hit 'em.'
Below this you can read my reviews. It was AirBnB who cancelled the bookings
and Defamed and Slandered this host. I removed most of the cancelations as the web page would have been to long.
The host canceled my reservation
11 days before arrival.
Emily
The host canceled my reservation 46
days before arrival.
Alex
The host canceled my reservation 16
days before arrival.
Katharina
The host canceled my reservation 12
days before arrival.
Djamila
The host canceled my reservation 32
days before arrival.
Amy
The host canceled my reservation 22
days before arrival.
Wai
The host canceled my reservation 5 days
before arrival.
Dora
The host canceled my reservation 15
days before arrival.
Melanie And
Claas
The host canceled my reservation 4 days
before arrival.
Trevor
The host canceled my reservation 18
days before arrival.
Liudmila
The host canceled my reservation 90
days before arrival.
Jana Fabienne
The host canceled my reservation 139
days before arrival.
Alisia
The host canceled my reservation 3 days
before arrival.
Francesca
The host canceled my reservation 14
days before arrival.
Alonso
I stayed here because I didn't want to
spend a fortune in a hotel, so I booked at John's place. My room was
pretty cozy, clean and had air conditioner (which was really helpful
on those cold nights). The living room/kitchen/dinning room was ok,
and I liked the fact that there were other guests living there as
well and I met a lot of interesting people. I would recommend your
stay here if you want to save money, socialize with other cultures
and know how to clean after yourself (important part). It is up to
you if you want a clean room. The walls are really thin and sometimes
you can hear everything from the room next to yours, but overall, it
is good place for low price.
Lauren
Don't expect luxury & do not come
here if you're allergic to cats as John has 2 (very cute) or if you
don't know how to clean up after yourself (you will get told!). This
place is secure and very affordable for those on a budget, the
beds/toilets/towels are clean and John offers coffee every morning.
All in all, if you can forego any frills and live in a hostel
environment, this is a good deal. If not, try the Waldorf Astoria.
Viola
The place is just two blocks from the
subway stop and it really takes 10 minutes to get to Manhattan so is
ideal if you don't want to waste your day travelling. I have found
quite a friendly bunch of people living in John's loft and John
himself is a very helpful person. I would suggest to guests who have
never seen NYC to ask him tips on what's worth seeing in the City.
The constant presence of coffee in the place was, also, very much
appreciate!!! My overall experience was pretty positive and I would
recommend it.
Peter
John was a very nice host. The room is
great value for money. Expect no luxury, 'this isn't the
Waldorf-Astoria', as John would say. But it's a room, more or
less private, allthough you can hear everything that's going on in
the livingroom. But if you're in NYC for a few days, it's a great,
cheap spot. The room I rented had some temperture-issues, the heater
was a bit hard to control, and made some loud noises sometimes, but
John told me this in advance. He was helpful all the way.
Kyle
It was a nice private room! John was
very helpful in getting me acclimated to New York City, and he even
made me a nice BLT sandwich right when I arrived!
David
Relacin calidad precio muy buena.
Barrio'aburrido' pero el piso est muy bien conectado
(parada de metro cerca). Spermercado cerca. Lo recomiendo
positivamente para pasar ah unas vacaciones. John personalmente me
trat muy bien. Incluso cuando tuve problemas con la habitacin
S-9, la cual no recomiendo en invierno porque estn dentro las
mquinas de la calefaccin central (mucho ruido y calor), fue fcil
llegar a un acuerdo para que me diera otra habitacin que tena
libre. No s que hubiese pasado si no hubiera habido alguna
habitacin libre. En definitiva es un buen sitio para pasar tus
vacaciones en NY a muy buen precio.
Johannes
Best bang for the buck. Don't expect
luxury and don't be too picky, but there's everything you need and
it's a private room at a great rate. Quite uncomplicated, I could do
some short notice extension as I decided to stay one night longer,
and then even one more.
Iveta
I've recently stayed at the shared room
for 5 nights. It was a great experience, I can recommend this rental.
John is a great host, he is going out of his way to accommodate
everybody's requests. He is friendly and he is a great cook too! I am
planning to be back in New York at the end of April and I will stay
at this place again. I think that says a lot! it is a great place for
a great price.
New
Johns place is as described, a huge
and quiet loft that he built. Not luxury but its a good way to save
money if youre going to expend the whole day exploring the city.
Its close to the subway station wiht direct line to manhattan (A
and C line). John makes coffee every morning for the guests and he
cleans the bathrooms every morning as well.
Veronika
Great way to save money on a trip to
NYC. Bring your own blankets because it gets very cold at night and
there are none for you to use. The area is safe enough but it gets
very deserted at night. Coffee in the mornings was great. Don't
expect any privacy or luxury staying here but it is a cheap way to
see NYC. FYI, smoking is allowed indoors and there are two cats.
Average age of other guests is 22-25.
Camille
Another host nearby could not host me.
He sent me to John's place. As a young 18 year old french woman
traveling alone I am careful. The accommodations were incredible for
just $10. per day. $11. with the AirBnB fee. It is a medium size
room. Very bright. Sun drenched as the host John says. Though it has
4 twin beds on 2 wooden bunks and one twin it is not cluster phobic.
It is meant as a budget shared room to sleep in. The vanity was nice.
Storage that I locked with a padlock. The rest of the Loft is large.
Balcony's, gigantic rear deck and a giant private roof with nice
views including Manhattan. I had the room all by myself. But met
several interesting Europeans from Germany and Italy renting the
private rooms. The common area is large. Nice kitchen dining area.
Unusual. The large refrigerator is in the same room as the shower.
John is an artist. The shower room is large. The host was very
helpful. He showed me how to use the MTA Trip planner to efficiently
travel to my activities in Manhattan. John has to be the best Host on
AirBnB and possibly all of NYC ! Twice he made me a delicious meal !
3-4 Minute walk to Subway. A metro. 20 minutes 34 street Manhattan
off peak ! I am glad the other host cancelled. $10. nightly. safe,
clean convenient, food. #1 host and place to stay in NYC. Oh it is
$10. for thirty day stay. The price is more expensive for 3 days or a
week but still cheapest in NYC ! Thank you John. 5 stars. He deserves
10 stars !
Guido
John is a very good host... the loft is
in a good neighborhood just short walk from a supermarket and utica
subway station... and just 20 minutes far from Manhattan with public
transprtation!!! Sure i would be back there next time i'm going to
NYC! and if you are a good traveler who really wants to discover the
real life of the place you are visiting sure you'll enjoy this place.
Very safe, good wi fi connection, clean and easy! see you next time
John!
Patrick
This accomodation is by far the best
value for a short-stay room in New York that I have seen. The cost
for my own room per night actually worked out even cheaper than a
hostel where a person would share a full dormitory of 6-8 people.
This place was great value - and I had my own room. The host was very
helpful. My first experience of his helpfulness was when I noticed
that my computer cable had broken. When I asked him if he knew where
I could get a replacement in the city, he actually went out of his
way to fix the cable for me! He saved me a number of bucks doing
this, and also saved me the time it would have taken to locate the
replacement. Big thanks to him for that. And that was just the first
day. The host has coffee on the stove every morning. It is also
likely he will cook something for you a few times during your stay.
It could be a roast, or it could be a big breakfast sandwich that
will keep you going for a number of hours. The crowd that I came
across in the place was mostly young and vibrant and interesting. It
is a good place for you to meet up with like-minded adventurers in
the city of New York. The host has a large amount of very practical
local knowledge. He has a large willingness to share very useful
knowledge with you. This was invaluable for me because, as a
soon-to-be qualified attorney, I was in town to find out the
possibilities of locating a long-term apartment lease and a job in
the city. The host went out of his way to share his valuable
knowledge with me about these things. The host is worth listening to
carefully. The quality of the place was very satisfactory. If you are
a complainer or nit-picker, or have impossibly high standards, don't
waste anybody's time and get a 150 buck a night hotel instead.
However, if you want something with great value and have realistic
expectations of what great value is, then you will really benefit
from staying in a place like this. Even though I give a 4-star rating
(which is very good), I actually give the extra 5th star in the
rating when I factor in the price and all the extras. Again, have
realistic expectations for a place in this price range, and
appreciate good value when you see it, despite being a little rough
around the edges. Furthermore, as time goes on, the host continually
makes improvements to the place and has a genuine commitment to
creating accomodation that adds value to the people who stay there. I
expect the place will only become better and better in the future.
Matthew
5 stars! I had a great stay with John
in his loft apartment. His description of the living space is very
accurate. My room was clean and spacious, the loft was quiet through
the night (had no disruptions from flatmates in other rooms), the
bathrooms were clean and John even cooked 2 meals for me during my
stay (quite the chef I might add)! For the price range and location,
this listing can't be beat!
Stephanie
John is a welcoming friendly host.
Staying at his place in a private room beats staying at a hostel
sharing with 3-11 other unknowns. Also he makes sure he only rents to
non-sketchy people, which can only be a good thing. It's close to
Manhattan, the neighbourhood doesn't look safe but is actually
really ok and I doubt you can get a better deal than this. Peace out!
J. B.
John is a gracious and welcoming host.
The property is as described, and the bed is very comfortable. The
place (as stated) is rough-hewn, but clean, quiet., and comfortable.
The A train express is just two blocks away, so this is very
convenient to Manhattan.
Stephanie
We transferred to another room because
it was cheaper. But it's not that small - still a good size AND it's
private after all. John offered us some dinner one day which was
pretty darn good. He does keep things clean around here (but a lot of
it depends on other guests here too) so he's a good host.
Bettina
John's Place is very close to the train
station and in a safe area. I never felt insecure during the whole
stay. The rooms are in a loft and have all the advantages of a loft:
the common room, that everybody can use, is big and there are several
very big patios which is great for summer. You are welcome to use the
big kitchen and because John is a great cook, you should accept his
weekly invitation for a meal. John also knows a lot about New York
and has a lot of material and information to share. He answered my
E-mails amazingly fast and helped us a lot to find the way from the
airport to his place. On the other side, you should be aware, that
the walls in the loft are very thin and you can hear everything.
During the night it sometimes became very cold in the rooms, because
the rooms are very high and the heat accumulated under the ceiling.
There is just one shared shower for all. Altogether it's a nice place
to stay. But if you want to stay in New York for several weeks, you
should first test this place for some days and then decide if this is
the right place for you. Best wishes, Bettina
Isabella
The place is really nice and clean and
super close to the subway. My room had a beautiful view and a comfy
bed. John can be a little intense, on the first night he was quite
annoyed with me for catching a cab as he said cab drivers were
'crooks' but after that he was very helpful and pleasant.
Even gave me some delicious roast he made and let me hang out past
check out time. All in all it was a good experience.
Stephanie
Really nice spacious room which I
shared with my cousin and we had ample space for all our stuff. The
location is pretty near to the station, about five minutes walk away.
John is a really helpful host and made sure we had a place to stay on
New Year's night when he found out that we didn't have anywhere to go
for that night. And honestly I don't think you'll find a better deal
for the price you pay, especially if you're travelling alone in NYC
:)
Yoojin
I couldn't agree more with Nacio's
exact review. Close distance from subway station and warm rooms are
good. However, if you are sensitive to cigarette smoke, I don't
recommend this place. He smokes inside the house and rooms for guests
have a big glassless hole facing kitchen where he usually smoke.
Considering the cheap price of room, you may bear some shortcomings..
but I don't think it's comfortable to live for a long time in this
house.
Ling Sum
Great stay, great location! John is a
perfect host. The room is big enough. The neighborhood is safe!
Adam
Hey travelers! I stayed at john's space
in crown heights, Brooklyn for 10 days & would recommend it to
any of you out there on a budget who don't need many frills. It feels
like a cross between a hostel & a friend's place - there were
long term & short term guests here - everyone was respectful &
quiet. Excellent value for money & steps away from 24 hour
transit anywhere in NYC. The shower needs improvement but it's a
great place to hang yer hat. Would/will stay here again. Thanks John,
Merry holiday everyone!!! Adam
Cristina
I wouldn't choose Jonn's in matter of
the size of the room. But it was comfortable and the practical
facilities all right. Besides the room there is a ' shared space'
where it is possible to spend time/ do activities if the space of the
room isnt 'satisfying' which works fine. The bed was fine.
Transport to Manhattan is easy.
Carmen
If you are considering a hostel, this
would be a much better choice. The rooms are private; there is a
fridge, basic cooking facilities and John makes coffee every morning.
John gives fair warning about the neighborhood and I certainly
wouldn't walk around late at night, but it is very near the train,
the grocery store and laundromat are walking distance and the
neighborhood folk are generally friendly. It is definitely worth the
price.
Giorgio
Nice room, close to subway station and
to everything, few minutes to Manhattan. Mattresses, sheetes and
pillows where new when we arrived. John is funny and very helpful, he
gave us a lot of advices.
Nirmal
Good place overall. Pros: own room with
lock and key, on A express line, cheap Cons: My clothes smelled like
smoke, cats kept me up 3 nights, the fridge is in the bathroom for
some reason. the area is a little ghetto but overall safe since very
close to the main road. John and everyone in the house is friendly
and keep the place clean, though i bought my own cleaning wipes and
cleaned the toilets few times. I expected that since the place has 9
rooms and just 2 toilets and 1 bathroom. john was very gracious and
offered dinner on more than 2 occasions. for $29 a night it was a
bargain.
Isabell
It's a good place to stay for a few
weeks if you need an affordable homebase while you're exploring the
city The subway is just a short walk away, it takes about 20 minutes
to get to the west side of downtown Manhattan, which for New York is
very okay. John is a helpful host, often offering his guests food and
good advice or tips on where to go and how to get there. There is a
large common area with a kitchen that holds everything you need; the
bathrooms and shower are also shared by all. Rooms have loft beds,
drawers, chairs, tables, lamps - in short, everything you need. If
anything's missing, just ask; John is quite good at providing
anything extra (for example the extension cord and socket adapter I
needed to get comfortable in bed with my laptop). If you have any
more questions, just ask, I'll be happy to help you out.
Adam
I stayed at Johns place for just over a
week. The location of the place is great, only a short walk to the
train station and ~10 min to lower Manhattan. There was also on the
street parking easily available. John was a great host, provided me
information on how to get around and also recommended some places to
check out. Its great value for money, would stay here again if I'm in
NYC. Room was sun drenched and clean. He offered coffee every
morning. The complimentary BLT he made for me was delicious. If
anyone has any questions just send me an email.
Elena
Yo y mi amigo nos hospedamos en una
habitacin preciosa baada por el sol. La casa situada en un barrio
seguro y autentico newyorkino estaba a pocos minutos del metro. John
es muy simptico y habla espaol nos ayudo mucho ofreciendo su
ayuda para organizar nuestro viaje mejor. Gracias John!
Rhona
Very helpful when we had a last minute
emergency, my daughter was in New York without internet and I was in
Scotland and I had to find her somewhere quickly. He replied
immediately and made up the room for her. She says it was great to
have a private room and room to open a case and hang up clothes. Easy
to come and go as you get your own key and it's close to everything
you need especially the subway. She says she felt safe in the house
and the neighbourhood, even as a solo female. Complimentary coffee
was also nice as was the BLT he made one day.
CommentLoading... Repost 1:16 on Tue Mar 27 2012
Cannot add comment if you are logged out.
View Answer Change LogLoading...Follow QuestionAnswer Author
FollowJohn Cohen
NYC Host.
Reddit Images 71
I didn't even know this existed! I went to B&N to get a coloring book to keep me busy on a trip I'm taking tomorrow. Of course I'm going to watch every single episode (again) and make sure that I color each page to match the actual episode it came from. 0
Drew this, tried to make it look like a manga page, how’d i do? 1
Haha I found some coloring the page reads Leo,Donnie,Mikey love to go to library Raphael is a little confused on his book he can't figure out how to read yes Nikita is my real life name 2
Adding new elenents to my doodles. I'm going to make this into a coloring page. 3
Check out how sock-tastically gorgeous this purple color-way - Supergarne Aktiv Lace actually is! Cuff Down Mock Rib Shortie Socks pattern. Ravelry socks #241 under my username: Karenramel Make these socks yourself using a pattern/video on my website “Socks-Cuff Down” page. 4
Colored a page from my wife’s book. 3 observations: Very relaxing, I need more colored markers (good ones), I need to learn how not to have the darker areas :) 5

How to Make a Christmas Cracker | FREE Printable Template and Tutorial for a DIY Christmas Cracker with a Coloring Page Twist! 6

How do I knit a contrasting heel? I got the back of the heel and the turn- but I couldn’t figure out how to make the gusset the contrasting color. 7
How to make Floral Coloring Page in Photoshop 8

Anyone here know how to make a mod that recolors vultures model to give him the spectacular Spider-Man colors 9
WIP Artist Jennifer Stay for Coloring Bliss; Medium Qili QL-150 Artist's Pencils. I'm trying to give these pencils a little workout for a review, thought I'd do a quickie page. Still not sure how I feel about them. Will post a completed pic when I'm done. 10
I just wanted a PURPLE egg.. red/blue food coloring, hot water, vinegar. Tried to make it look not terrible by wiping it off a little. Came back to spots! 11

Hi! Any tips on how to design this attic room. We plan on removing the carpet and replace with laminate or LVP (not decided yet!). We want to use this room as a guest bedroom. Any suggestions on paint colors and what I can do to make it cosy? Please help! (*Cross Posted*) 12
How to Make Floral - Flower Coloring Page in Photoshop - How to Make coloring pages, floral, flowers and leaves, simple and easy by VRDesign Coloring pages are very popular right now, and here is an easy way to make your own. 13
A made this lilac coloring book page, had to add the bee to break up the minutiae of the flowers. 14
While it's not A coloring book page, I am a cardmaker and I love to color what I make...it's actually my favorite part! 15
I made a new background, coloring and learned how to make glow thing. I hope you like it. I worked hard. What if everything okay/good,(if the tragedy had not occurred.) 16
How do you create your own coloring pages?, How do you create your own coloring pages?, How to make your own inspirational coloring page?, How to make your own inspirational coloring page?, How do you make a coloring page from a photo?, How do you make a coloring page from a photo?, How do you print a coloring page?, How do you print a coloring page? , How do you create your own coloring pages?, How do you create your own coloring pages?, How to make your own inspirational coloring page?, How to make your own inspirational coloring page?, How do you make a coloring page from a photo?, How do you make a coloring page from a photo?, How do you print a coloring page?, How do you print a coloring page?


Comments
Post a Comment