21 jessica rabbit coloring page
jessica rabbit coloring page

Jessica Rabbit Coloring Pages Printable - Barry Morrises Coloring Pages 0

We have chosen the best Jessica Rabbit coloring pages which you can download online at mobile, tablet...for free and add new coloring pages daily, enjoy! Home; New Coloring; Top Coloring; Search through more than 50000 coloring pages. Home / Cartoon / Jessica Rabbit. Jessica Rabbit Coloring Pages. 1

Jan 15, 2018 - Explore S Roy's board "Jessica rabbit coloring page", followed by 104 people on Pinterest. See more ideas about jessica rabbit, jessica rabbit cartoon, coloring pages. 2

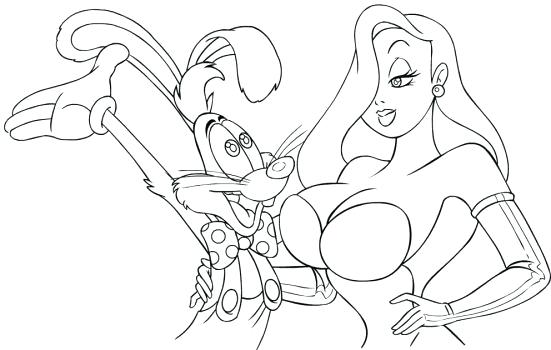
Roger Rabbit ; Jessica Rabbit coloring page; Print Coloring Page Download PDF. Tags: Jessica Rabbit, Roger Rabbit, Cartoons, Characters. More Roger Rabbit Coloring Pages. Jessica Rabbit. View All Roger Rabbit Coloring Pages. 3

Jessica Rabbit by Luis Carlos | Jessica rabbit, Coloring books, Art 4

Jessica Rabbit black and white. How to draw Jessica Rabbit tutorial. Disney color shit # 5

Pin on Jessica rabbit 6

Jessica Rabbit coloring page | Free Printable Coloring Pages 7
Jessica Rabbit Coloring Book Coloring Pages 8
Jessica Rabbit Coloring Page 9
Disegno jessica_rabbit_14: personaggio cartone animato da colorare 10
Jessica Rabbit Coloring Pages at GetColorings.com | Free printable colorings pages to print and 11

Jessica Rabbit lineart by angela808 on DeviantArt 12

Pin by April Dikty ( Ordoyne) on Jessica Rabbit | Rabbit coloring pages, Rabbit coloring 13

Jessica Rabbit Line Art by Eiraina on DeviantArt 14
Jessica Rabbit Coloring Pages at GetDrawings | Free download 15

Lineart: Jessica Rabbit by OginZ on DeviantArt 16
Jessica Rabbit Coloring Pages at GetDrawings | Free download 17
Jessica Rabbit by tuhio on DeviantArt 18

jessica rabbit 10 gratis Malvorlage in Comic & Trickfilmfiguren, Looney Tunes - ausmalen 19

Let it go, baby! by darkodordevic | Jessica rabbit cartoon, Jessica rabbit, Jessica rabbit tattoo 20
jessica rabbit coloring pages 21

Jessica Rabbit Burlesque - Coloring by MordsithCara on DeviantArt 22
Jessica Rabbit Drawing at GetDrawings | Free download 23

Learn How to Draw Jessica Rabbit (Jessica Rabbit) Step by Step : Drawing Tutorials 24

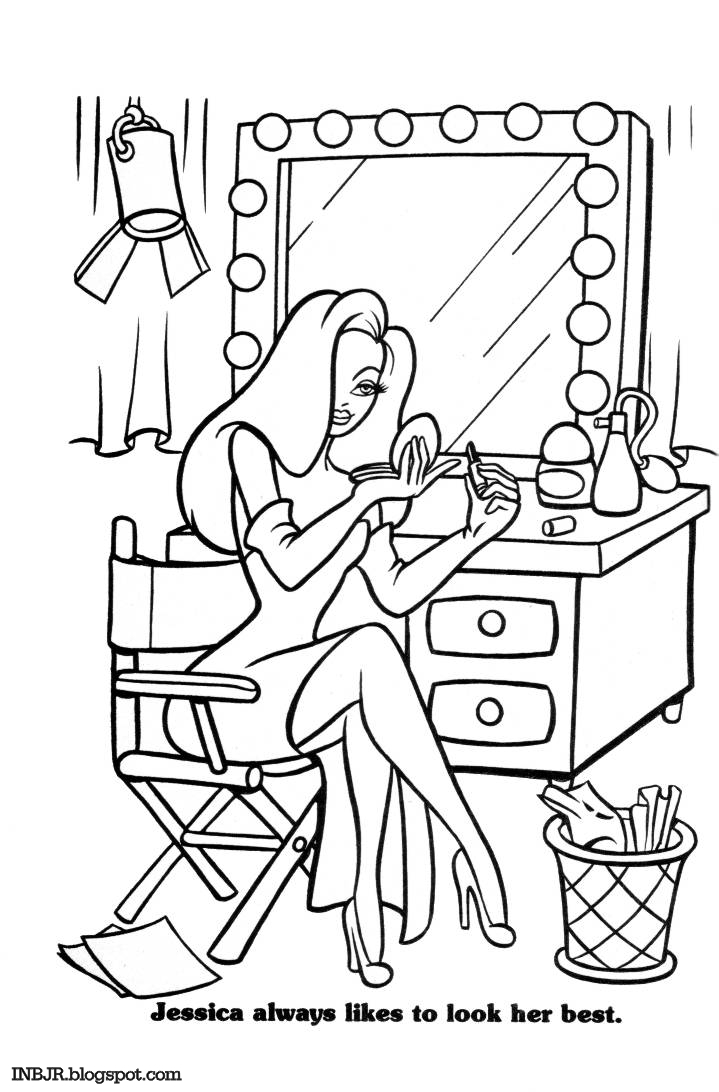
ImNotBad.com - A Jessica Rabbit Site: Coloring Book - Jessica and Roger Rabbit 25

ImNotBad.com - A Jessica Rabbit Site: Coloring Book - Jessica and Roger Rabbit 26

Pin on drawing 27
Jessica Rabbit Coloring Pages at GetDrawings | Free download 28

Effortfulg: Jessica Rabbit Coloring Pages 29
Roger Rabbit Drawing at GetDrawings | Free download 30
Jessica Rabbit Coloring Pages at GetColorings.com | Free printable colorings pages to print and 31

how to draw jessica rabbit easy step 7 | Rabbit art, Rabbit painting, Jessica rabbit cartoon 32
Jessica Rabbit Coloring Pages at GetDrawings | Free download 33

Jessica Rabbit Coloring Pages - Coloring Ideas 34
hi guys welcome back to my channel now, after doing the flip through four year, of this beautiful book volume 2 of multi, Manzano's coloring book it took me a, long long time to choose an image to do, her color with me for you and so I went, on her website and Google and Facebook, money runs out now has a Facebook page, too because the image I've chosen I, wanted to get the colors right now just, before I get started with our coloring I, want to let you know that Mandy has some, free pages if you go to her website, which I will link down below or her, Facebook page she's got some free images, that you can download to color in while, we're all in isolation which I thought, was really lovely of her and there's, some lovely images so let's get started, the image that I chose to do a color, with me is not bad just drawing that way, just to korabik excuse me you know I, went through all the images but she, again time and time again I kept coming, back to her I thought we can there's so, much that we can do with her beautiful, dress and the background yes leaves he's, going to attempt to background but I, just yeah she just kept coming back to, me so I have like I say I've looked at, the images of my own demons all-news, finished works and I'm going to try and, replicate one of those as best I can, now I'm not going to show that on camera, because I'm worried that for copyright, for my demands our minds work that, somebody might try and copy it or I, don't know I just don't feel comfortable, with with showing the finished piece of, hers so what we'll do is replicate it, together now as you're probably all, aware jessica rabbit rabbit is a cartoon, character and she was in, a Karthik Roger Rabbit the fit of the, movie and she was like one of the first, animated characters that when the first, animated movies that we had alongside, humans and she stole the hearts of lots, of young men I can tell you so if the, colors I've selected they're not, necessarily going to be what we used to, seeing in our usual beautiful portraits, but because she's a cartoon character, but it does work and then health, practice day I haven't just thrown, myself into doing this video I have, practice the colors that I'm going to be, using so I'm going to zoom you in a, little bit I do have a new camcorder so, I'm learning the ropes with that but, it's an awful lot easier on us should be, able to get images up and videos up for, you a lot quicker so I'm going to zoom, you in and we'll go and get started on, her face, all right so the first color that I've, chosen to put in where we want the, shading is rosy beige PC 101 9 now in, Mandy's image she's got a lot of her, face here is in shade and she would, imagine because of her beautiful hair, over her face and down her neck here so, I'm going to use rosy beige to put in, all the places where we want shadow so, I'm going to start up here just a very, very light hand I'm likely to turn her a, little bit I'm going to fit all the thin, with rosy beige just very lightly I know, you're probably thinking oh my god Lucy, you've lost your mind particularly when, I show you the other colors that I'm, going to be using but honestly it really, does work I have practiced and I have, practiced and it does come out really, well so sorry about setting the page I, just I can't reach okay we're gonna do a, little bit round this cheek here, okay we will go back over that but okay, the next color I've chosen you're going, to scream at me so now you might use, that maybe you will maybe you've already, found this combination for your self or, the like it so I'm going to be using, beige so PC 997 now I'm not lifting the, prisoners up to the screen because last, time it caused the camera to go in and, out of focus and I really don't want, that it's very frustrating when you're, watching it so we're we've done the rosy, beige we're going to do a very gentle, join the line I'll fade out line that, I've been talking about and go over the, rosy beige and I've been the beige - you, don't need much because it's just such a, very small area okay ba-bang know, another probably controversial color but, you have to remember like I keep saying, that she is a cartoon characters so I'm, going to an actor in cream that's gonna, go over the beige and over the fade-out, area now this is going to be to give us, that highlight, we are going to use some more, traditional colors that were all used to, using in our portraits in a minute, give her a bit more of a human look she, might be cartoon but we don't want a, lien okay so cream if I can just change, my lighting event it's nighttime when, I'm filming and like I've said to you, before if you've watched my other videos, I can't but the overhead light on, because it's directly above me and make, it cough such terrible shadow right, we're going to use a bit of peach you'll, be thinking thank God for that Luci you, know all these random colors you're, putting in okay and we just turned, through a little bit now we're gonna go, over all the rosy beige and beige areas, with our peach just lightly no pressure, just joking you can see everything okay, and we're still leaving that area but I, haven't gone over yet we just still, leaving that with a cream edge okay, sorry, no she's right now we're gonna go in, with peach just to give it a bit of a, sharpener it's another one of my little, mascot small ones this is light peach, and this is nine to seven and we're, gonna go over where we put the cream and, bring that in very lightly, going over all the areas that we've, covered in its entirety, so she's looking a little bit pasty so, I'm going back in with my peach I'm, actually even see, we go putting cream on now again and, this is just - I don't blend it out, with my brush with light, peach, yeah, then okay that way let me lift her up, see if the Lighting's any better some, good shade on her face if we want to, just bring out that highlight a little, bit more we can just blend with a white, and that also works really well all, right I'm gonna try turning the overhead, light on because I've got the lamps on I, just want to see if that does well it's, not sunny but that might be actually, okay so there she is, that's the idea behind her skin so I'm, just going to put oh looks like I've, missed a little bit of them so I'm just, gonna put a bit of rosy beige in know, what not too worried about going in the, black lines at the moment because from, the pencil will sort of dull them out, peach again the pencil will dull the, black lines up but you could use on a, pasta or a bar or anything like that, you've got that will will deepen up, those lines okay I'm gonna leave her, face alone because I always fight from, fart about and spoil things so should we, start let's start on her her body on her, arm now she's wearing gloves these are, this line here is in it's indicating, that she's got a glove on and going down, here so we've only really got to, concentrate on this top half and then, she's got her bare leg here and a tiny, bit of her leg showing at the back there, okay so let's do her body again I'm not, changing the colors I'm using the same, I'm going to put the shading around her, neck rosy beige and the rosy beige is, going to be used for all the shadow, areas and actually having having, practiced this combination to do this, color with me, I really like it if you blend it in, really well it does actually make a, really nice skin tone and I've said, before in my videos that I'm not, particularly great at doing anything, other than very very pale complexion, skin tones and so this one with the, beige on top of the rosy beige adds a, really nice depth to the skin color I, hope you can, I hope the big light on is better so I'm, just really outlining her where I want, the shadow very very lightly, Thundra wrong and when we go to do her, dress I can zoom in a bit closer I'm, just at the moment a bit where we, thought I'm gonna because this area is, so tiny that I'm going to lose you in in, shock collar bones making sure that you, go under our arm and this part under, here in minders image is all quite, shadowed so I'm going to fill that all, in with rosy beige around her shoulder, here because I love seeing her hair when, we kick seem a bit darker, there's the rosy beige you might need a, little bit more around her cleavage, there okay now we're going back in with, beige which is 9 9 7 and it's the things, we did with her face we're going to go, over our blender line around everything, that we've previously covered, moving for the rosy beige as well and, just going to turn it so I can get to, her neck and this will help to blend, that rosy beige out and leave a blend, line for our next color I'm just doing, it very lightly, in this collarbone, see I don't know if you if you didn't, catch the flip flip through of this book, so he can't speak you'll know that I, contacted Mundy Manzano to get her, permission to use her images because, she's had such difficulty with people, stealing her images and turning them, into German paintings and such like so, when she replied and giving me, permission to use the coloring books, that I purchased I was just I couldn't, believe my luck, it was just amazing so I'm going back in, now with peach and I'm going over the, rosy beige with the peach very very, lightly I'm into that area of beige so, that all three colors meet and start to, blend together same here, not pressing hard a little bit more, pressure than before but not hard, okay I'm gonna get the cream I'm gonna, fill those soft edges in with a bit of, cream going over the entire thing, to knit rather than get our shot, she looks a little bit like she's got an, angelic glow about her okay now back in, the peach, mm-hm sorry, okay then we're gonna bring in our light, peach we're gonna go over the cream I'm, bringing that in in the area that we, haven't filled in yet, we can start to blend those out to meet, so a little bit more crusher which we, you're using before and we can always go, back over any areas that we feel need, more blending I'm often in skin we have, to do it over over and over to get a, smooth appearance even in a small area, although I do keep doing that, she's beginning to come together, now if any areas don't feel like they've, blended out well enough a little bit of, beige back over the animal seems to sort, right out so round here right now go, back over with a little bit of beige you, think yeah, and what I've listened to people while, I'm learning people saying um you know, they've opted they've often been asked, questions like why did you go over that, color you're just it's a waste of time, you're just coloring over it but having, done this for a while now I'm practicing, those techniques they really don't just, color over it they blend together almost, like mixing paints and it changes the, color that you're laying down right now, I might off-camera do a little bit more, blending but you don't want to sit here, all day and watch me filling her in so, uncle egg here, I need this other piece of black I'll do, off-camera and complete like that so, should we start on her dress let's do, that we just have a sip of tea right, let's start her dress so the colors are, I've chosen for her dress are crimson, red 19 for Scarlett Lake 93 and carmine, red nine to seven so I'm going to use, the crimson red as the darkest I've got, Mandy's picture up here on the computer, and I'm referring to which where Mandy's, put in the dark so everything that I'm, coloring in is how Mandy runs on who's, got it in well as best I can, how man demands our lives got it in the, on her image, so I'm going round the bodies with the, deepest of my colors which is crimson, red just checking, no not the crimson red now I'm gonna go, in with a scarlet Lake and I'm gonna go, over my plunge line sorry, keeping the shape of the bust area, filling it in and then leaving a blend, area now I'm going to take the lightest, of all the Reds which is carmine red, nine to six and I'm going to fill that, in, these white spaces, you get back to crimson rage and we'll, go back over them deepest of our colors, feeling all the Whitecaps and like I, said the the black lines will get dulled, out by your pencils but if you've got a, steady enough hand and you trust, yourself I don't know that I do you'll, be able to go back over those with a, pasca or some other kind of black pen, okay then the lightest of our colors, again oh no just put a big streak on to, rub around carmine red sorry, mm-hmm you know what I might just want, to change that I think I need a bit of a, small of a subtle blender give it a bit, of a brush let's see if I can grab that, streak out steady the comb okay so the, other part of her bus top is going to be, done the same as that one and then her, body bodice here comes down here we go, into her dark underneath and dark at the, bottom so here I'm going to bring that, our deepest coloring we're gonna film, that you're not too far then underneath, the bust area checking you can see you, know have crimson red and darkest color, come down a little bit further so we've, got to leave our room blend line okay, then we're gonna go in with our next car, which is Scarlett Lake doing problems, line you bring that down, okay bring this one up, and then meet them together with the, Conrad, strain out now go overall fill all those, white spaces, okay I'm gonna go back in a deep in them, up so this song, crimson red oh yeah and down here - okay, in with the scarlet link, you see, okay coming, okay so that's part that's that part of, my dress so here she's gonna be dark, here it's wife deep is cool, you probably will screaming at me that, you know what color is without looking I, can't retain it while I'm doing the the, filming as well I just can't hold out, the color theme I have I knew which ones, they are, I know which ones to pick up but I just, can't hold it in my head okay so that's, nice and deep we're going in with, Scarlett Lake, it's gonna look like that as well and, then we're gonna bridge the gap with a, common rat, okay I'm just gonna go over that with, the midtone just to give it a bad bland, it's a bit of line, mmm now rather than for you to tears, with coloring each section of my dress I, thought we could do a bit at a time if I, just show you where each of the deep, parts is going to be on a dress then, you'll be able to to fill in the rest by, yourself so in this section it's going, to be our deepest color at the top here, and then we're going to carry on with, the usual colors and here this is the, deep deepest section and that's going to, come round here, this big large section that's coming off, her bodice here that's going to be dark, at the top kind of meeting up with that, section that we've already done and, we're going to come down with it to this, swirl let me just make sure this well, here so we're gonna come down not, forgetting to leave yourself a soft line, for blending those other color thin, okay man, that's her lag bar so this bit here is, quite dark in this in these bits here so, quite a little bit of that quite a lot, rather of the dark tone, and then round her hip here this piece, we're gonna put deep okay, and then the bottom sections of the fur, dress here this is going to be deep, where you would expect the folds in her, dress to be, mmm that's nothing again this piece here, I'm all along this edge it's not here we, come down with some chat, [Music], some just kind of mapping out the deep, areas for you so you all know where, don't help to carry on and then here, we're going to come up here too because, you'll then just blend in your other, colors might want to come down a little, bit here okay let's stop that just, checking this bottom bit is there's, quite a lot of dark in this bottom going, to come up, kind of following the arc shape, I'm going to trim the bottom of this, page off so I'm not too worried about, that's deep colour and you can still see, all the white in there like I said I've, just mapping it out for you so before I, go off and finish it off you know water, to go with the colors this bits dark a, tiny section there for blending in and, then over here be careful to remember, but it's her leg that little bit there, just there that's a like over here in, front of her leg I've got this job don't, fit here and that's gonna come all the, way down there searching you'll see all, the way down until it yeah until it kind, of touches that swirl and then keep the, arc, and then remembering that like it's her, leg, we need a dark bit here okay leaving, ourselves enough to blend in with this, piece here is also dark so following on, from that one follow the shape that, Monday's giving you and fill that in and, where it goes in thin here we're going, to add some dark in there too, okay, let me zoom it looks terrible oh no, because we're gonna just done a very, much out for you let me zoom back out, [Music], there is the mapping of where her darks, are going to be I've missed a little bit, down here look she needs some dark here, a little bit and obviously you can do it, however you want to but I'm just trying, to copy the image that we've got I've, got from Monday in front of me so that's, where I'm going to put the darks in the, rest of the colors will be the same as, we've used for the the bust area and, blend them all in together so you'll go, from crimson lake in to see children, couldn't remember, scarlet lake and then into crimson red, so I will finish up that dress and I'll, meet you back here in a minute okay see, in a second bye okay guys so I'm back, and I've colored in and as I said I, wrote her dress and I've done both parts, of her legs, let me bring her up to you I've done a, bit of smoothing out on her skin with, just the same colors like peach and then, a little bit of peach there's her dress, and her legs so she's beginning to look, more like the Jessica Rabbit that we, know okay so in the image I've got in, front of me, she's got purple gloves on and purple, eye shadow and her lips are bright red, so I thought we'd use the deeper of our, Rex the Scarlett Lake to fill in her, lips so let me zoom you in and, we'll do that I'll plant it over the, zoom there we are, okay now I've tried to shore up my, camera a little bit I noticed when I, checked the the last clip that it was, quite wobbly so I'm sorry about that, okay very tiny area to color around, quite fiddly okay so she's no problem, some bright red lips that was scarlet, like no the Purple's that I selected to, do her gloves and our eye shadow Oh, Palmer violet which is I'm just going to, click sharpens phony space in Palmer, violent which is one zero zero eight, I'll put up here we brush that to stop, it rolling off Palmer violet lie look, which is nine five six and the final, color is grayed lavender 102 six well, that works better doesn't it Glenn was, not gonna keep going in and out of focus, okay so there's the three colors now on, her eyelid and I did notice on the clip, I hadn't done around her eye and I I, went back in like I said smooth the skin, out and blended that out and I'd just, put a little bit of light peach above it, to keep it quite light okay so going in, with the primer like that I'm just going, to do the very base of her, holy it now I'm going to go in with my, luck, and then the grade lavender I'm glad, though though we brushed that off okay, doing the game and we in your way I, don't know, the great lavender okay it's a toilet so, I'm wondering how many of you are doing, any of these color alongs with me and I, I'm going to have to get a lesson from, one of my sons on how to use Instagram, so I can set up an account I'm not, really sure much sure about it I think I, could set up a Facebook page I do you, have facebook a private Facebook but so, because I'd really love to see some of, the images that you've colored do you, feel that you can email me if you've, done a picture in your pleased with it, and you've followed along with anything, that I've done I'd love to see them, okay so palm of violet we're going to go, around at the top of her glove, come down a little bit just to give it, the illusion around this is how glove, here thankfully I can clear over that, red I had gone out of the lines and then, come down the side and this will give us, the illusion that the item is round, rather than just flat okay if you forget, to leave a bit of blend out space okay, and then we're going to go back in with, line up go over that, or to say a huge thank you to all my new, subscribers the channel was growing, quite quickly which I never in a million, years thought that it would and I'm so, so pleased and thankful to each and, every one of you because it's given me a, real purpose and in the weeks preceding, me doing this channel I've kind of felt, a little bit lost for one reason or, another which you guys don't want me to, go into but I'm waking up even in the, situation we're all in at the moment I'm, waking up in the morning and thinking oh, wow what can I do for the channel today, or who subscribed have I have any, comments and it's it's just it's lovely, to be part of the community so yeah a, massive thank you to everybody has that, glass I'm gonna go back in with the, deeper color so the Palmer viola I'm, just joking that I'm aware that this, camera this new camera is so efficient, it's showing up all the little spaces, that you would never even noticed if you, weren't so zoomed in that you haven't, colored in so making me a bit paranoid, about, people thinking that I haven't colored, it improperly okay we're going to do the, same there's that glove there shares, we're going to do the same with this one, here so I'm going in with Palmer violet, I'm going to give her a deeper bond, around here I'm going to go up here same, as we did before giving ourselves color, and a fade out line same up here, around here, gotta follow that little bit of curve, because that would be the crease of her, elbow and along here too, now you know this I think I mentioned in, the last video that this image was a lie, look this this image was I think it, still is available through dime dark, club's website I did link it in my last, video for as a diamond painting where, she's called not bad just drawn this way, and she was hugely popular of the, diamond painting I'm sure she still is, just everything you could want really in, a diamond painting glamorous and glitzy, we go and then backing with the great, lavender, now I'm going to go back over again fill, in the white spaces this is card stock, that I'm coloring in there is a link to, the card stock I'm using in the color on, color along the I did of a very nice, coloring book if you find that video the, links in there so it's a hundred and, sixty grams cut cardstock I mean it's, incredible to color on it really is but, you will need to well it helps with with, with layering so that you're not so, happy for me anyway, not so heavy-handed because it does, leave those white spots behind you then, go in and unfilled them in so it really, helps with me with blending it's really, nice classic um so yeah check out that, video if you wish and the link is in, there below, there she is okay she's really beginning, to look glamorous and glitzy so, Jessica's hair see I've got four colors, this time but Jessica's her let me do, the same as I did last time and neither, round was i given whatever charlatan she, is a redhead so I'm gonna be using, mineral orange let me make sure that you, can see there you go mineral orange last, time why does it never work again when, you want it to it will in a minute hang, on I'm using goldenrod and then I'm, using yellow ochre yellow ochre and the, final color my lightest color is oops, sound okay, let me leave those on the screen for a, second just have a sip of coffee okay, no the way that I'm sorry I'm just, looking at my practice page here the way, that Mandy has drawn it she's doing the, lightest part up here which is you in, charge the lightest part up here as if, the lights coming down around her and, then this bit is going to be our, lightest bit now I've got some bar, soundbar Brown I don't know if I'll use, it but just in case that I want to, deepen up that orange so I'm just going, to leave that there just in case we do, need it so I'm going to go in with our, mineral orange and we're going to I'm, going to start on this outside bit I, think, this bit here I think that's probably, the easiest to tackle to start with and, as we've done with all the other things, before I'm gonna do a light touch of a, mineral orange I don't want it I don't, want to do too hard because I want to, blend the colors in so it's not really, obviously bright orange okay so that's, mineral orange then we're going to go in, with goldenrod I love this color it's a, really pretty golden color okay, same as that making sure I've got a, blend line now we've got four colors to, fit in each of these sections this time, so you have to kind of be aware of where, we're placing them yellow ocher so, that's going to go over the whole thing, we're making sure that you've got a, blend line, and then our final color is sound and, I'm going to go in and go on top of, everything blend that out, I think that looks good okay so let's do, the crown here where mandy is indicating, that there's most light so what I'm, going to do is work up from the base, here upwards so on this piece of hair, here this this section which is lovely, it's why I love doing mangas paintings, because they're these divisional lines, make it really good okay so we're going, to have our mineral orange at the bottom, did you get that, I remembered the color mineral orange, over that with goldenrod, and that golden watch just seems to sort, of dull down that really bright it's not, bright but really orangey color okay, then we're going to take the yellow, ochre and we're going to go over that, and we're going to get lighter as we go, up and this will give hopefully give us, the impression that um the light is, hitting it from the top I think in the, original shot of this if you look it up, on the internet the original image of, this just could stood under a spotlight, but I want to do it as Bundys done it, and then we're going to take our final, color which is sand go over everything, okay and then we're going to do the same, for this piece here so I'm going to do, it, oh sorry let's put you in shot Lucy that, would help wouldn't it, okay let's do a tiny bit of mineral, orange a hint goldenrod, just a hint again because this is just a, small section yellow ochre, we can show to go over that on range, give a blend loving and then get the, sound okay go over all of that, look at that she's a knockout all right, now down this piece I'm going to do a, darker edge so I'm going to give her, here a lot I'm going to follow this line, round, and in here okay making sure I've got a, blend line you know let me take, goldenrod I'm gonna start to fill this, in with goldenrod making sure we just, give a soft edge to that mineral orange, okay, then I'm going to get my yellow ochre, I'm going to go over that, and then I'm gonna fill them all in with, the sand, okay, fill in all those gaps, yeah I was wondering whether to use the, sandbox and Bob Brown is a very subtle, Brown in that dark area there but I'm, not sure that I well what do you think, there's an option for you if you want to, deepen up a hair but I quite like it, other lens to that cartoon aspect so, again same here with our hair I'm going, to make sure your in shot and I'm going, to cover that in mineral orange the base, here of our hair I mean real orange not, too much I don't want to get carried, away I'm going to do very very carefully, around her face here mineral orange just, a little bit I mean here because this, would be darker because it's underneath, the rest of her hair and covered by her, face so they have mineral orange layer, okay then I'm gonna get my goldenrod, we're gonna go see him as we did before, okay with that bring that down, back over the mineral orange boats in, this little cap, I'm gonna get a yellow ocher finish that, cap off we're gonna bring that down, okay and final is the sound, but in all that captain okay I'm gonna, go over that summer I miss that little, bit okay let's let's repeat no sorry, mineral orange I knew I'd have to mess, it up by mineral orange and I'm just, doing it lightly careful round oh you in, shock can you see being down a bit, [Music], especially with my shaky hands being, here okay girl John Brant, it's beginning to deepen up again now is, the building going on in that dark bit, to Goldenrod at Barton, get on yellow ocher get rid of all of, that you know we put the top here too, someone's playing the trumpet outside, okay let me bring you out there she is, she's really beginning to come together, so she's got her eye shadow on her, gloves and typically cartoon yellow hair, now I'm hoping that that shows that, where the light would have been on her, I'm not very good at that but I not, followed minded image okay so I'm going, to go off finish my cup of coffee and, then wait for it, yes we're going to come back and I'm, going to do a neo color to background, with you okay I'll see you in a second, bye okay so one black I've had my cup of, coffee and a bit of a rest and went back, no we're gonna check all this background, together now I've laid these and these, are our Neos the coasts I'm going to use, I'm going to zoom you in so that you can, see okay I mean even laying of course, they're gonna turn out your phone a lot, like nevermind, okay so we're starting from the lightest, is pale yellow then we've got Sahara, yellow then we've got lime green light, olive and Jade, now what I want to do is create a let's, go back our gain because there's only, two ways to go and you still get it, wrong I want to create a, a haze around her so starting from the, lightest going out to the darkest so I'm, going to start with I'm just checking, that you are recording yes starting with, the lightest which is pale yellow we're, gonna we're gonna go around Jessica okay, so we'll come back in get it wrong okay, so I'm gonna use the edge of the neo and, I'm just going to color in very scary, for me because you do realize if I get, this bit wrong I'm gonna have to color, all this again and come back on on, camera as if nothing's happened that I'm, ready to do the background with you I'm, sure it'd be fine okay so I'm just and, you can't see I'm just literally side of, the crown putting some color down this, is very pale as a beautiful yellow okay, don't I had some scruples you actually, don't need that much of Neos to get good, color down unfortunately it's not gonna, cover that a little bit of pencil mark, that I accidentally did, let's move it on all right, so that should give us a bit of a haze, and I'm going to wave back out roll and, keep moving the package that's in okay, so that was was pale and yellow now I'm, going to be using Sahara yellow and I'm, gonna go round that a haze same, principle and I'm just going to combine, the two colors, and I'm not adding all of them and I'm, not adding too much solo if you can say, you think that just literally scribbling, color on I'm following that initial haze, that I put down okay so that was Sahara, yellow now I'm going in with this lovely, color and a lime green and doing the, same a little bit of crossover where the, yellow was following Jessica's shape, down a bit round when are you just, checking bit round the top, okay a little bit of a crossover, following Jessica's shape round that's, literally just scribbling now I'm going, in with light olive and the same thing, bit of a crossover not too dark not too, much but don't litter eight that lovely, line following following Jessica's shape, down I might just put a little bit more, lime in there bring that out a little, bit, following Jessica's shape and again I'm, gonna put in more lime it's quite right, pair of color on I don't I don't want it, to completely obliterate it and then, just as a final light touch I'm using, jade green and I'm gonna fill the rest, of the page in very lightly just, scribbles the side of the pencil crayon, a little bit of on the top here not much, crayons along the edge of here that's, right I'll lift her up here she is what, a mess, you're thinking I know right now I'm, gonna get my trusted water brush it's, just a cheap one from Amazon I don't, think it's got brand on that no it was, just it's like a set of five I think and, I've got a dishcloth but I keep Roundy, for this so I'm gonna going with the, pale color first and I'm gonna go in, round circles I'm going to bring that, very pale yellow as closed into Jessica, as I can go yeah, I'm not worrying about any of the other, colors for a minute just this pale, yellow follow in Jessica down okay well, this bit going to wipe off my cloth wipe, off my brush on the cloth and I'm, literally just like circular motions, brush it off again and following that, filling in that color and following the, line of Jessica's dress okay yeah let's, go into the brighter yellow and I'm like, swirling it in together I'm pushing it, out towards that next green, go in from the pail and out towards the, darker yellow, I'm keep going, while the winter transfer and there we, go and we've got this side let's do this, side from the pale yellow where we'd, left it push that out into the sahara, yellow so show can you see just pushing, those colors in together from the pale, into the brighter yellow and again just, following down okay just going to make, sure that's saying okay now we're going, into our lime green and our light olive, and we're gonna do the same just gonna, push out gonna clean off when I get too, much of the dark on push out from the, light to the dark and I want it to be a, hazy background, I don't want solid chunks of color on, this I just want it to settle this off, blend so I'm keeping it moving and, always going from the light color into, the dark, give my brush a bit of a squeeze get, some more water in okay and then I'm, gonna stick with this side and we're, going to work that out behinds I don't, really mind that just don't take some, off the edge, I might need to go over and give that, last turquoise a bit more color so, instead of soaking the whole page and, not having enough I'm just going to put, some in as I don't think there is enough, okay okay just blend, I will go but I'm going to let it dry, off a bit because I'll start peeling the, paper otherwise going to let that, section dry off like at that blender, wrong approach, so one thing I did learn about using, news to do a background is patience so, you're gonna see those marks there but, if I keep working at it it's just gonna, pull the paper and you're gonna spoil, the image so you're gonna have to let, that drawing in between adding any more, color I'm just going to turn that side, and then let's come over to here make, sure got enough water as we go I'm not, gonna keep going, go back to the pale and bring it out, oh yeah just clean off my brush stick, just on a plain cloth, okay so I don't know if you can see but, outside the papers quite wet so I have, to wait both sides blend it back to if, you can't say that we move on it might, be splashing chittering but there's, still places that need working on but, you've got to wait in between so I'm, gonna have to let the paper dry she says, still fiddling with it I'm gonna have to, let the paper dry and then I'm going to, come back to you when the background, finishing we're going to put some extra, details on Jessica's dress okay see in a, sec okay so I've done my background I've, trimmed the paper down as I said I would, that's why I didn't worry about the, bottom of skirt so there we are, there's my hazy background now the one, final detail I want to add I mean we can, all use Stickles too and like I might do, at a later date, but I want to add a few white dots using, the uniball signo impact and I just, wanted to give the illusion of a bit of, sparkle, so let's come in let's see if I can, manage to do this so I'm just literally, gonna put some put some little white, dots on her dress to indicate sparkles, so I'm just going around we're going to, keep it upright as you know my hand, shakes, really badly so, there we go she's working now, so I'm just putting a few dots you see, that just to indicate her dress is a bit, sparkling okay where else we're actually, put around our hips I think we're making, a mash of this out oh you can't see a, thing can you say so if you want her, hips and let's do some detail here, okay, well let's a few that few here, no no skill involved just a few dots, let's put some up here, you don't want to go overboard so that, she becomes like a polka-dotted dress, but if I then when this is all fully dry, then get back over with some Stickles, [Music], just unclear or some clear glitter, acrylic paint and that will give us the, shine and Justin in just enhance the, look of it okay so I'm going to do a few, more up here I'm just gonna follow, Mandy's lines in the middle up here, just give us some sequins a few drops in, here I might just do a little bit round, honey okay let me come back out I'm, saying closely and there we are one, finished Jessica Rabbit I'm really, pleased with how she came out I like I, might add some Stickles to her I'm not, sure yet or glitter acrylic paint like I, said I've got some folk art glitter, acrylic paint but you will see that of, the almost finished pages at the end of, the month, so there she is in all her glory Jessica, Rabbit thank you to all my new, subscribers and thank you so much for, following along with me take care of, yourselves and until next time bye bye, well I guess it's not goodbye cuz I, can't turn my camera off so don't forget, while I'm thinking about it that if, you've got any of the images that you've, done while you've colored along with me, don't forget please email them to me I'd, be more than happy to look and I'd be so, grateful okay take care of yourselves, buh-bye
Reddit Images 44

How to Draw a Camera and a Rabbit | 123 Number Coloring Page 0
Jessica Rabbit anyone? 1

My Favorite Color Challenge! I love reds/burgundy’s! My sim is currently dressed in #4 and #3 reminds me of Jessica Rabbit. 2
So, number 5 on Chandler’s celebrity cheat list is Jessica Rabbit, who is voiced by… his own dad, a.k.a. Kathleen Turner. What would Freud have to say about that? 3
Jessica Rabbit booobs!!! 4
my Jessica Rabbit Cosplay 5

Had some fun with a coloring page from Alices Nightmare in Wonderland. Turned the time keeping rabbit into a Joker inspired loon! 6

Jessica Rabbit (Park Ranger). Colored polymer clay. How do you like it? 7
![[self] Jessica Rabbit cosplay!](https://i.imgur.com/A42Ajpa.jpg)
[self] Jessica Rabbit cosplay! 8

...i typed in Jessica Rabbit...and.... 9
![[self] Jessica Rabbit cosplay by n1mph, photo by kurokiamaya](https://i.redd.it/5185opf83pm91.jpg)
[self] Jessica Rabbit cosplay by n1mph, photo by kurokiamaya 10
![My Jessica rabbit cosplay [self]](https://i.redd.it/u0y3lrzb86q91.jpg)
My Jessica rabbit cosplay [self] 11
Jessica Rabbit irl 12

i was today years old when i found out that jessica rabbit is ace 13

Hey so today I learned that Jessica Rabbit is not just headcanoned, but confirmed as one of us! And she's a strangely important form of representation, for breaking stereotypes, not just for us, but for sexualised women of any orientation, and how the way someone looks doesn't define their actions. 14

254 - Jessica Rabbit Cosplay Trimmed 15

Perfectheart in the Jessica Rabbit dress 💖 16

Jessica Rabbit vs Lady D - both are famous characters who people simp over 17

Jessica Rabbit (By neyuhsama) 18
![Jessica Rabbit cosplay by CashmereTart [self]](https://i.redd.it/t062s6sa3fv91.jpg)
Jessica Rabbit cosplay by CashmereTart [self] 19
,


Comments
Post a Comment