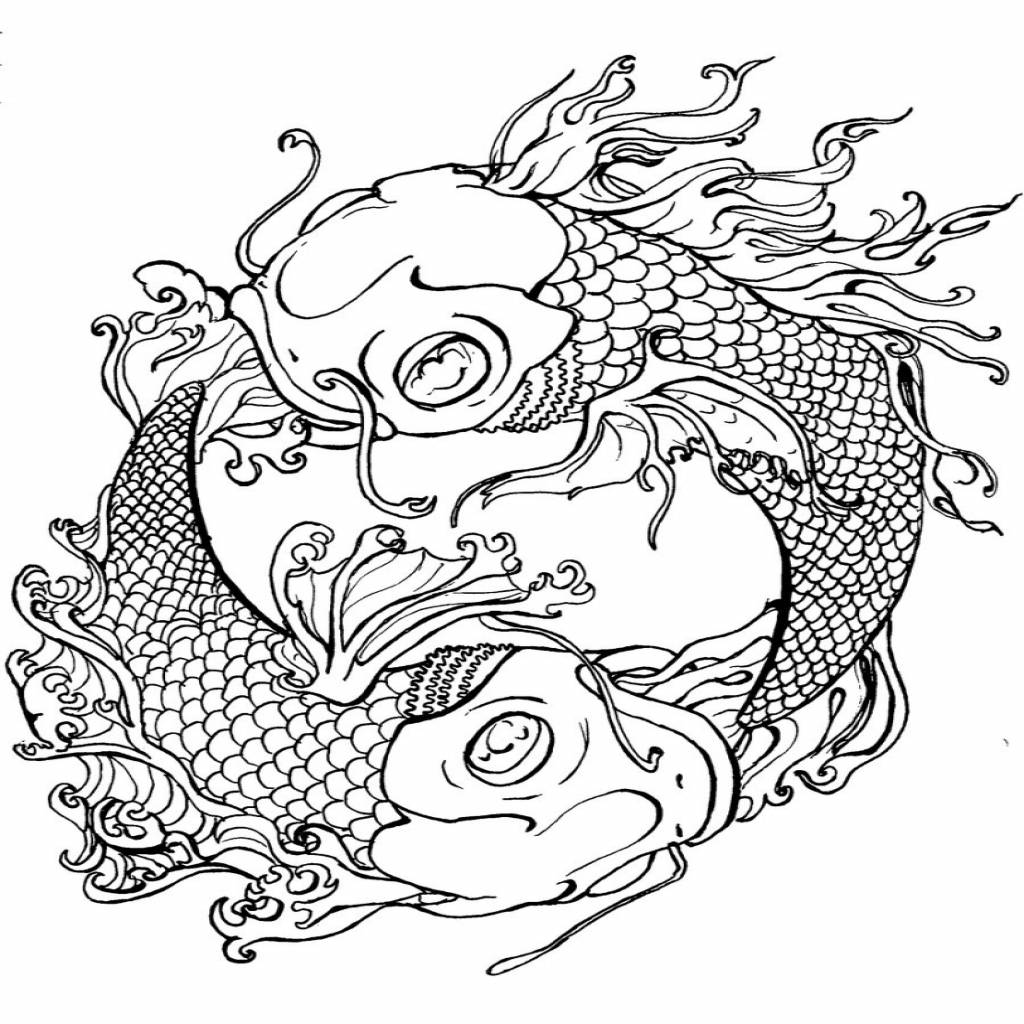
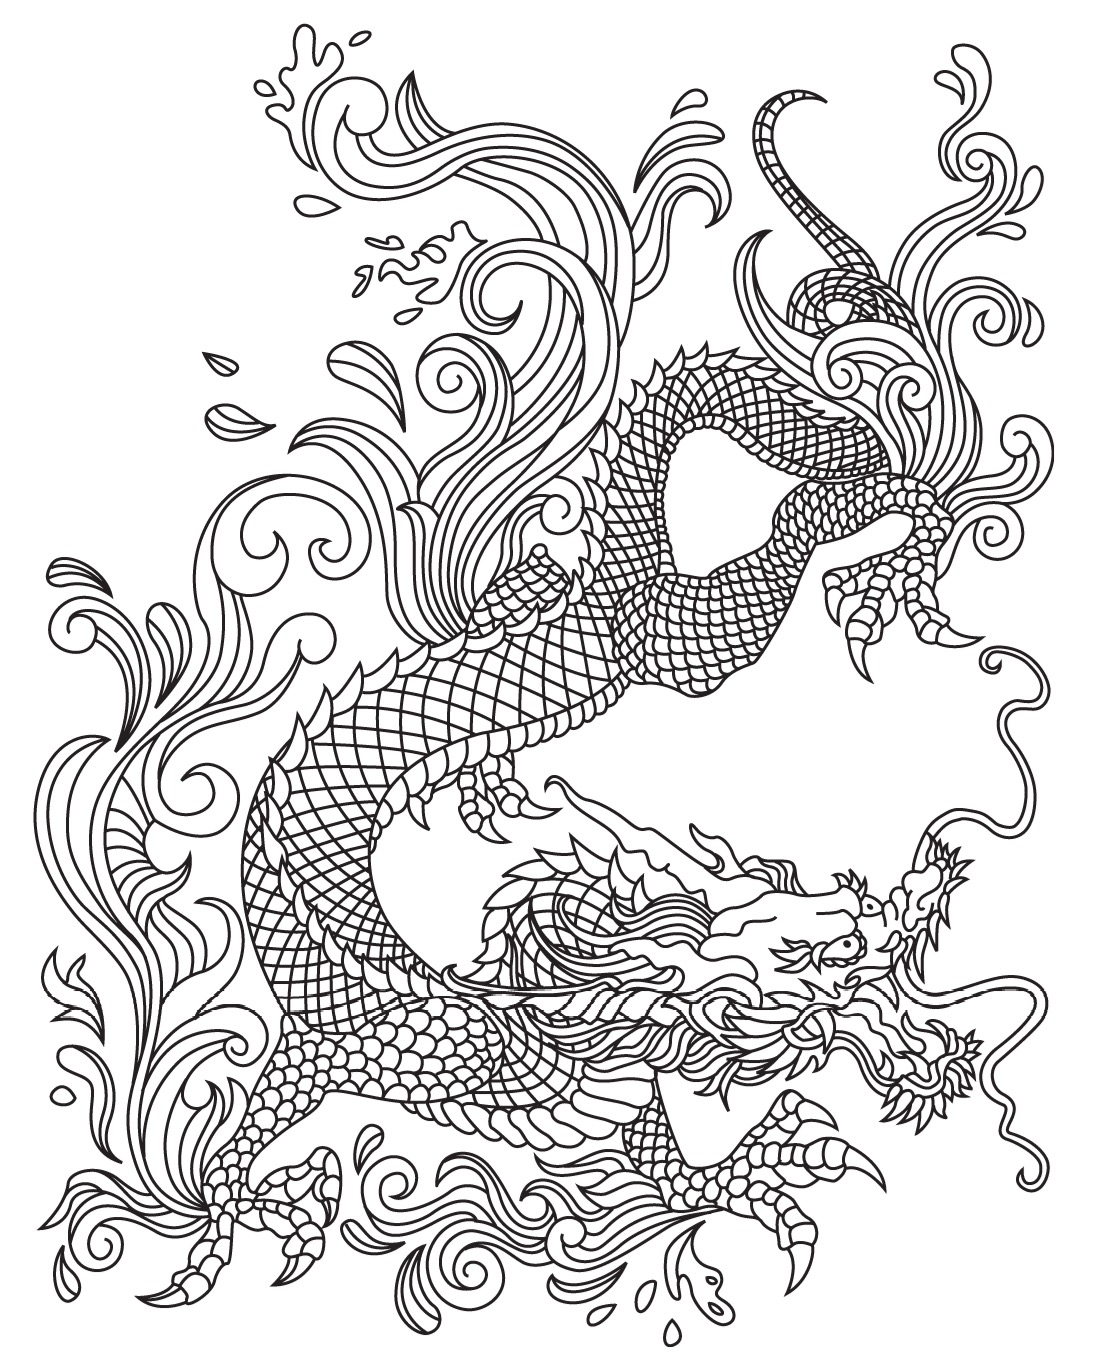
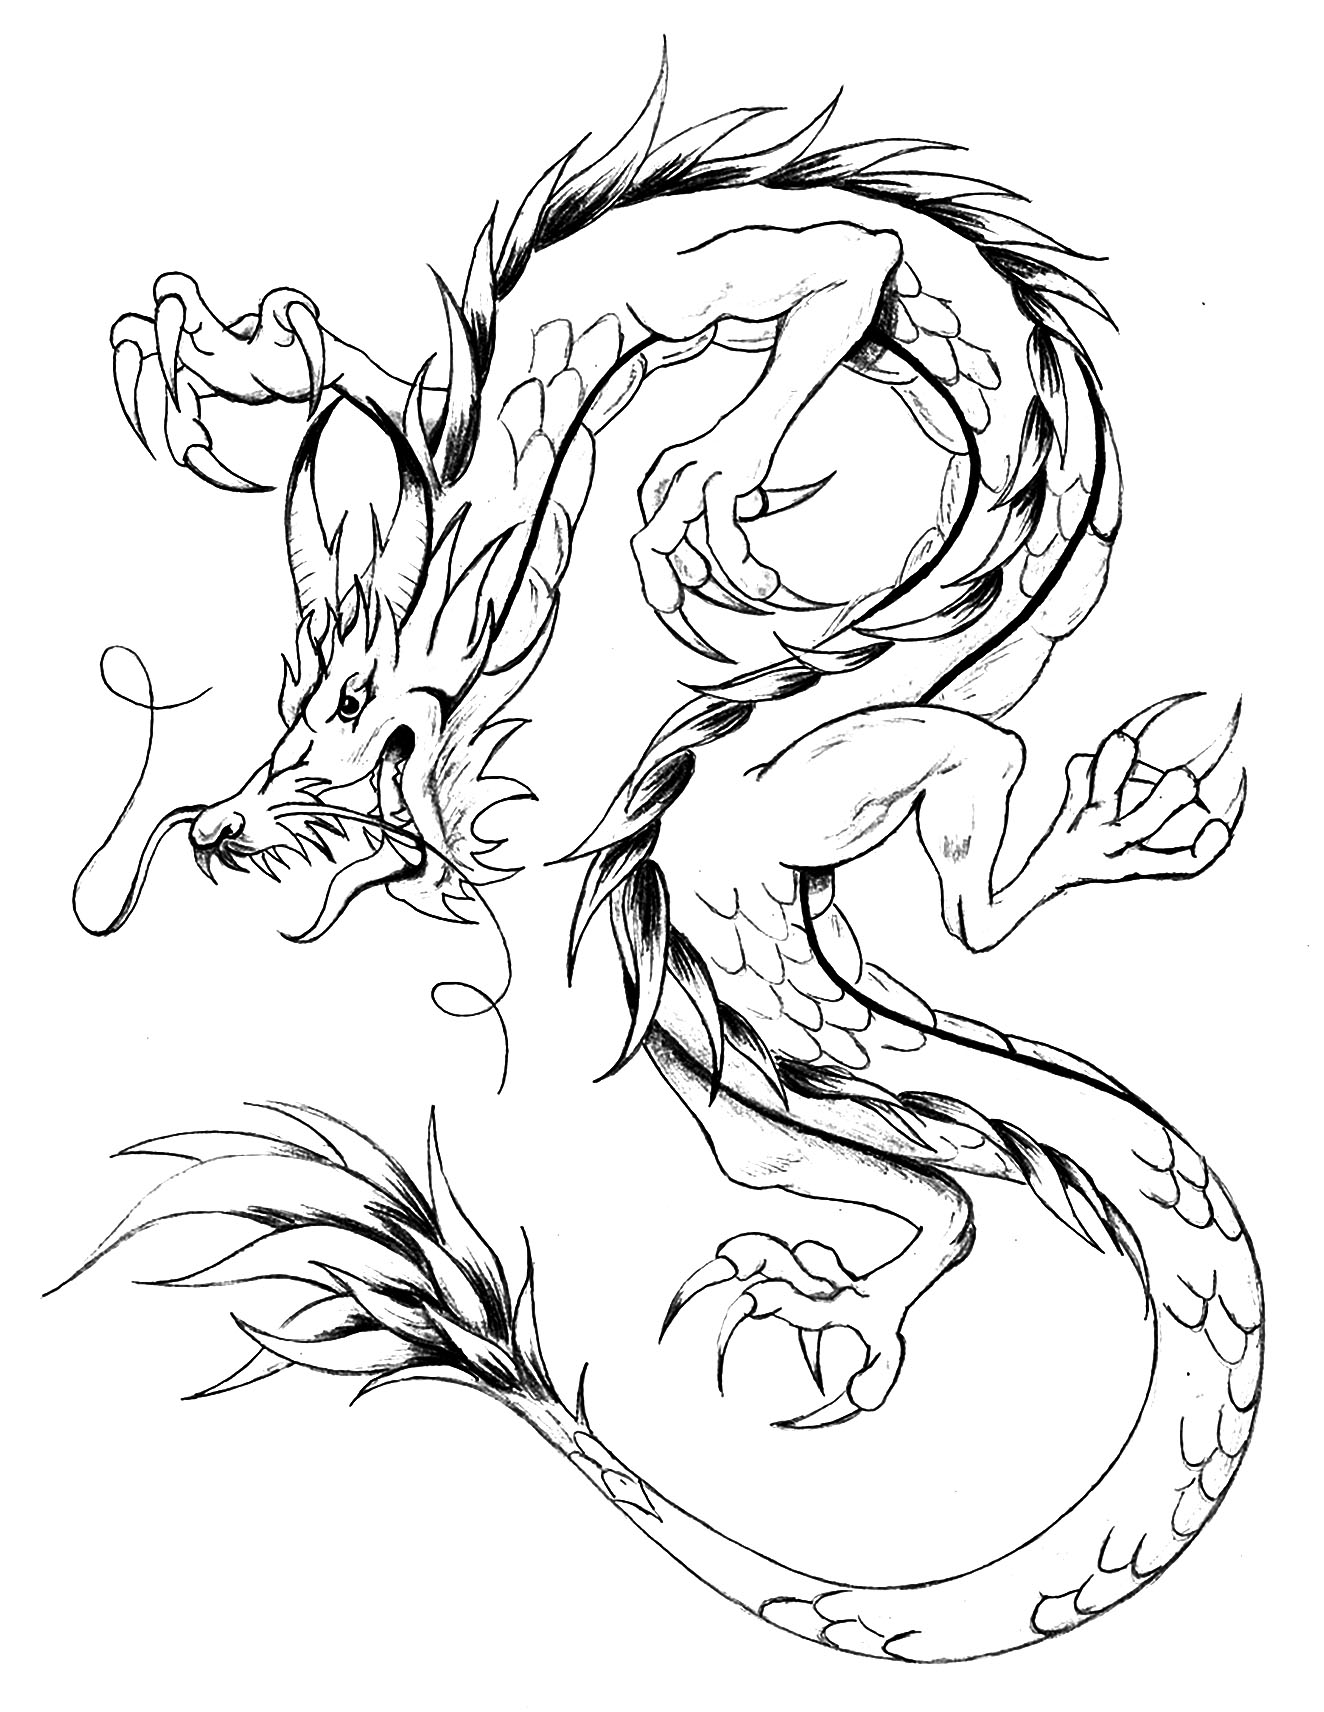
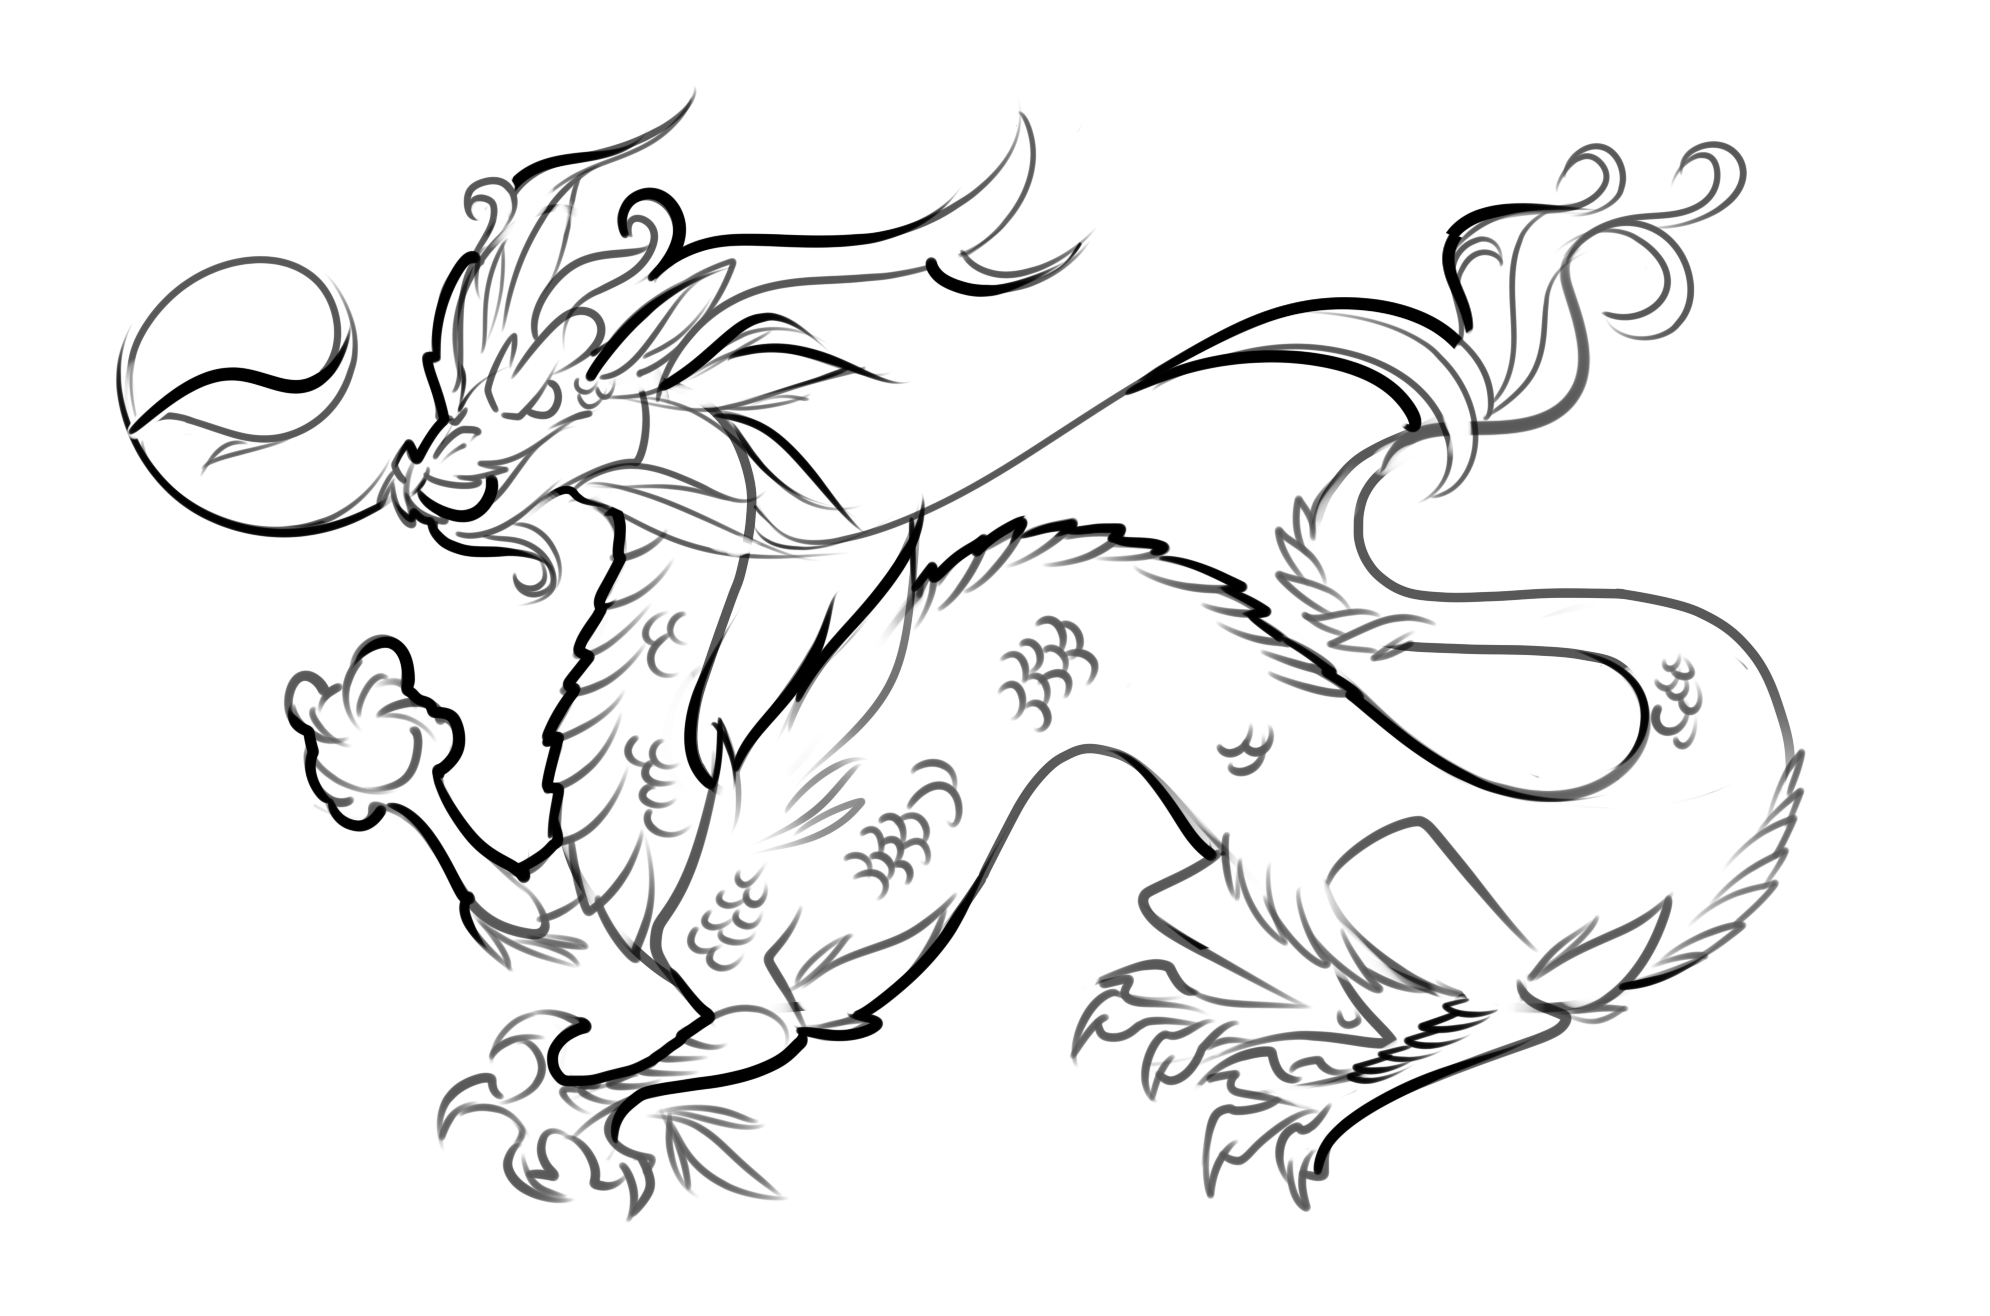
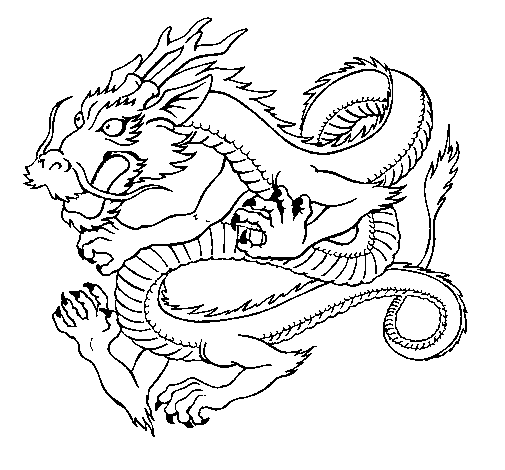
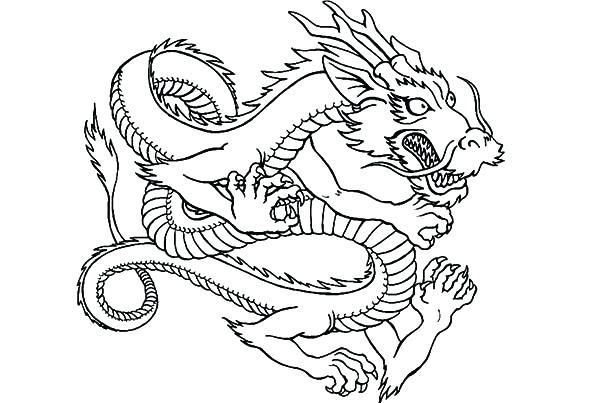
53 japanese dragon coloring page
japanese dragon coloring page
Lilt Kids Coloring Books (Author) Paperback. $5.79 2 New from $5.79. Japanese Dragon Coloring Pages Book For Kids is full of awesome dragons! Any child who loves dragons will love the beautiful flying creatures found in the pages … 0

Dragon Coloring pages. Select from 65041 printable Coloring pages of cartoons, animals, nature, Bible and … 1

May 28, 2021 · Dragon coloring pages are black and white drawings of fairytale creatures. Japanese anime coloring pages are a fun way for kids of all ages to develop creativity, focus, motor skills and color recognition. Dragon ball z coloring pages. Download and print these japanese coloring pages … 2

Pin on Fabric Printing 3

Download 74+ Japanese Dragon S Coloring Pages PNG PDF File - Creative Free PSD Mockups | All 4

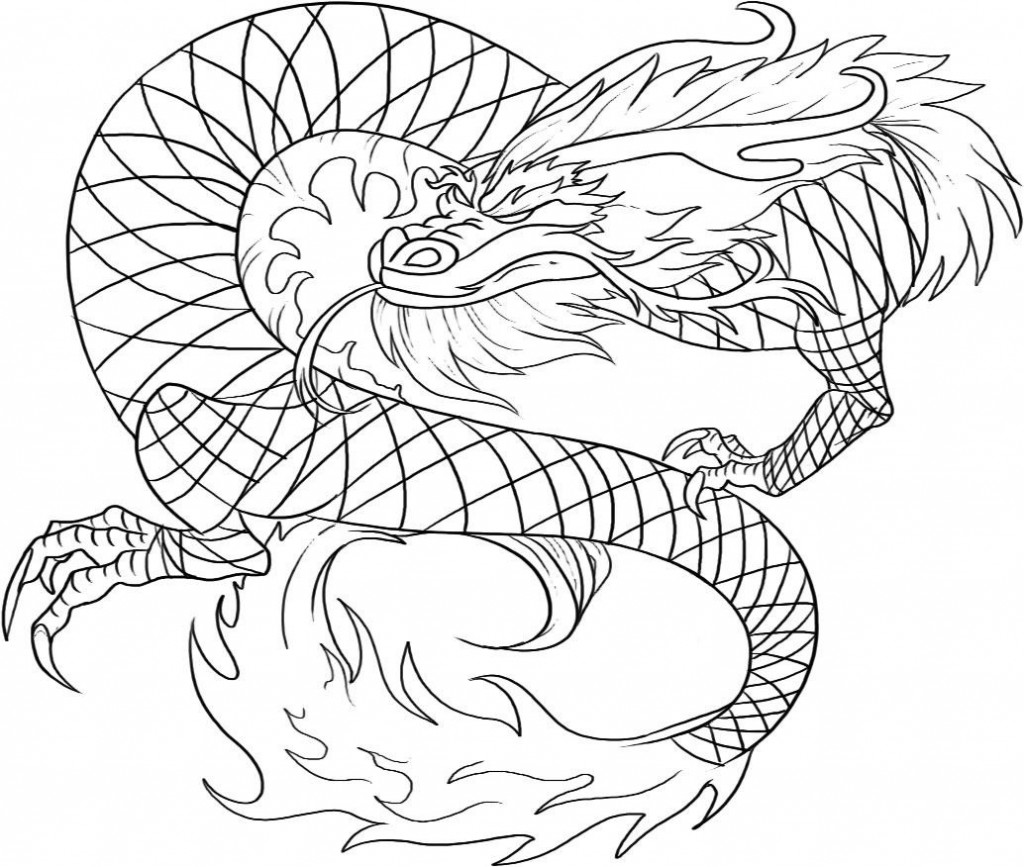
Tattoo dragon | Tattoos - JustColor : Discover all our printable coloring pages for adults, to 5

Japanese Dragon Coloring Pages #halloweencoloringpages Japanese Dragon Coloring Pages from 6

Soulmetalpodcast: Japanese Dragon Coloring Pages 7
Japanese Dragon Coloring Page at GetColorings.com | Free printable colorings pages to print and 8

Japanese Dragon coloring pages | Coloring pages to download and print 9

Asian Dragon coloring page | Free Printable Coloring Pages 10

Pin on Designs 11

Angry realistic dragon | Dragon coloring page, Dragon illustration, Japanese dragon tattoo 12

Click to change the View | Dragon tattoo colour, Small dragon tattoos, Japanese dragon 13
Japanese Dragon Tattoo Coloring Page - Coloring Home 14

dragon asia 2 | Dragon coloring page, Animal coloring pages, Coloring pages 15

Japanese Dragon Inked version by bsguru on DeviantArt | Japanese dragon, Dragon tattoo art 16
Dragon asian style - Dragons Adult Coloring Pages 17

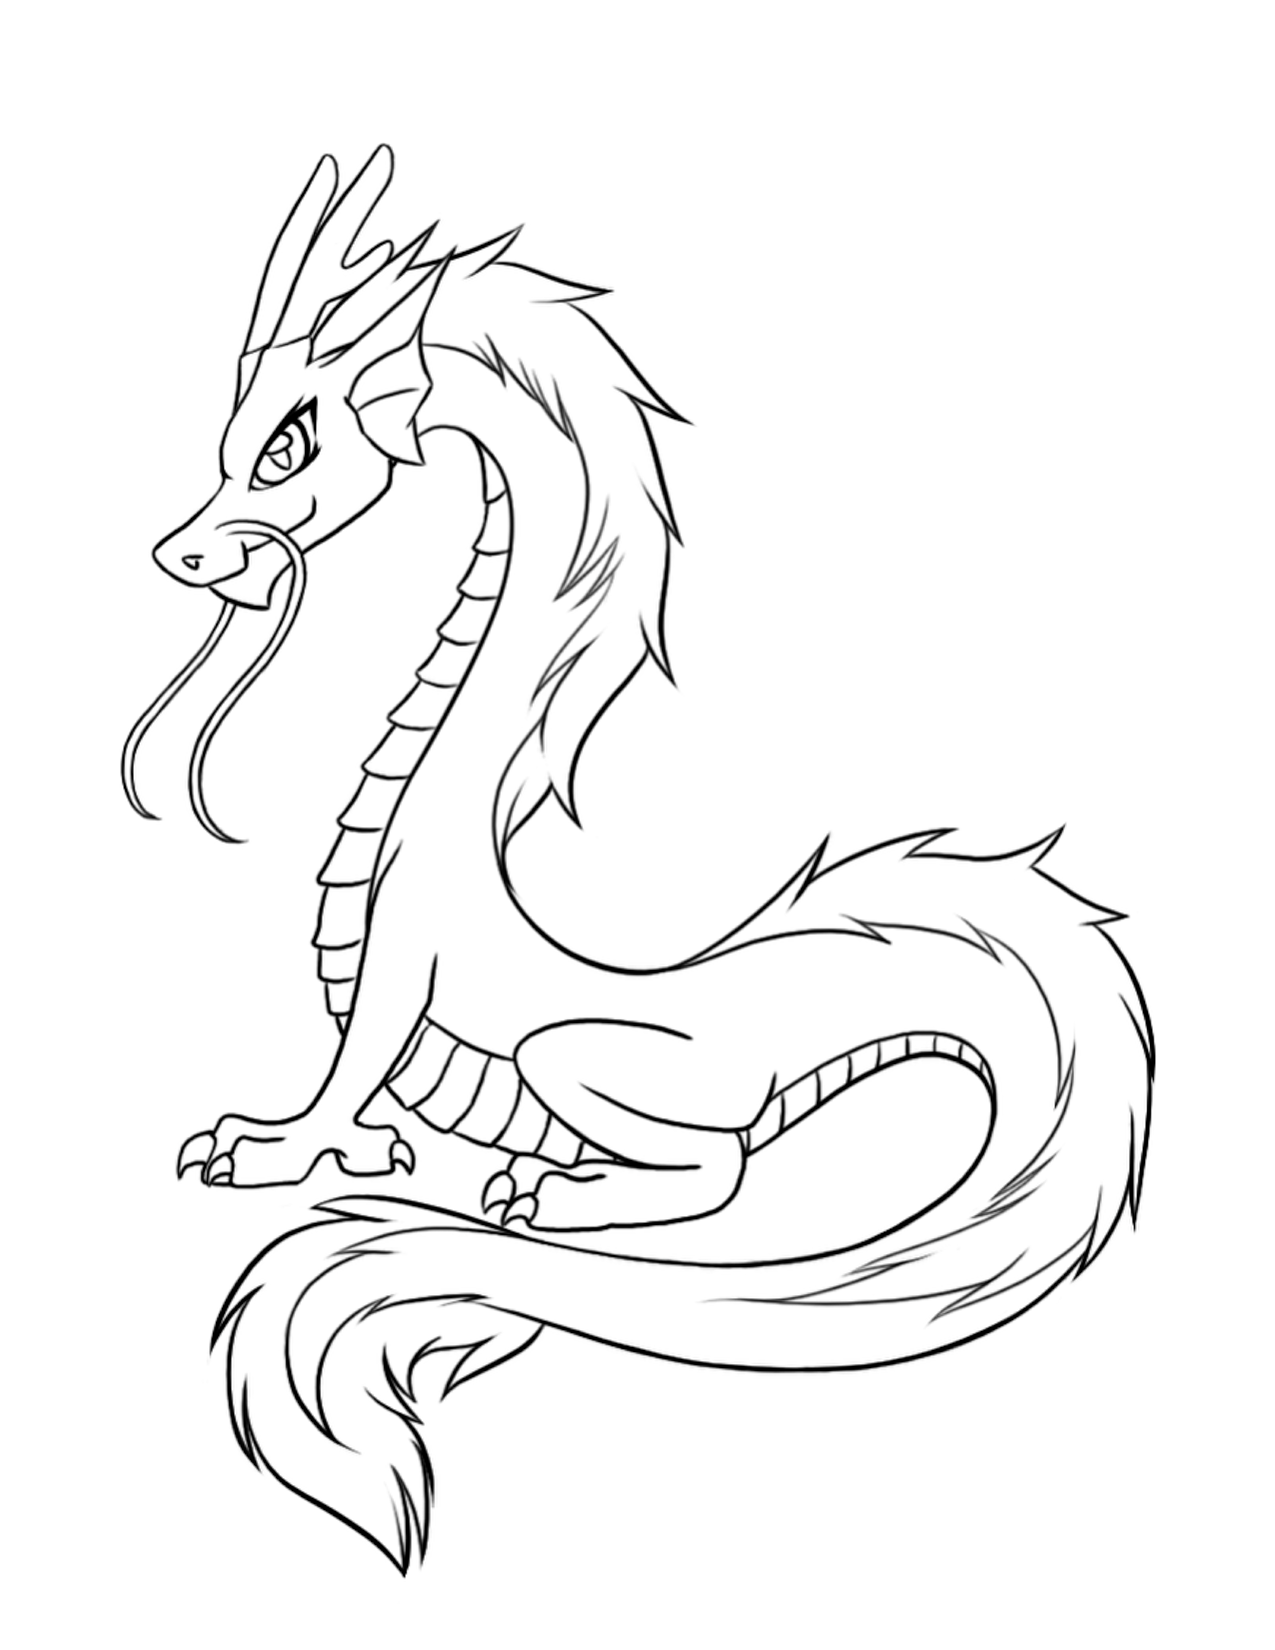
Japanese Dragon coloring pages | Coloring pages to download and print 18
Free Printable Dragon Coloring Pages For Kids 19

Japanese Dragon Line Drawing at GetDrawings | Free download 20
Soulmetalpodcast: Japanese Dragon Coloring Pages 21
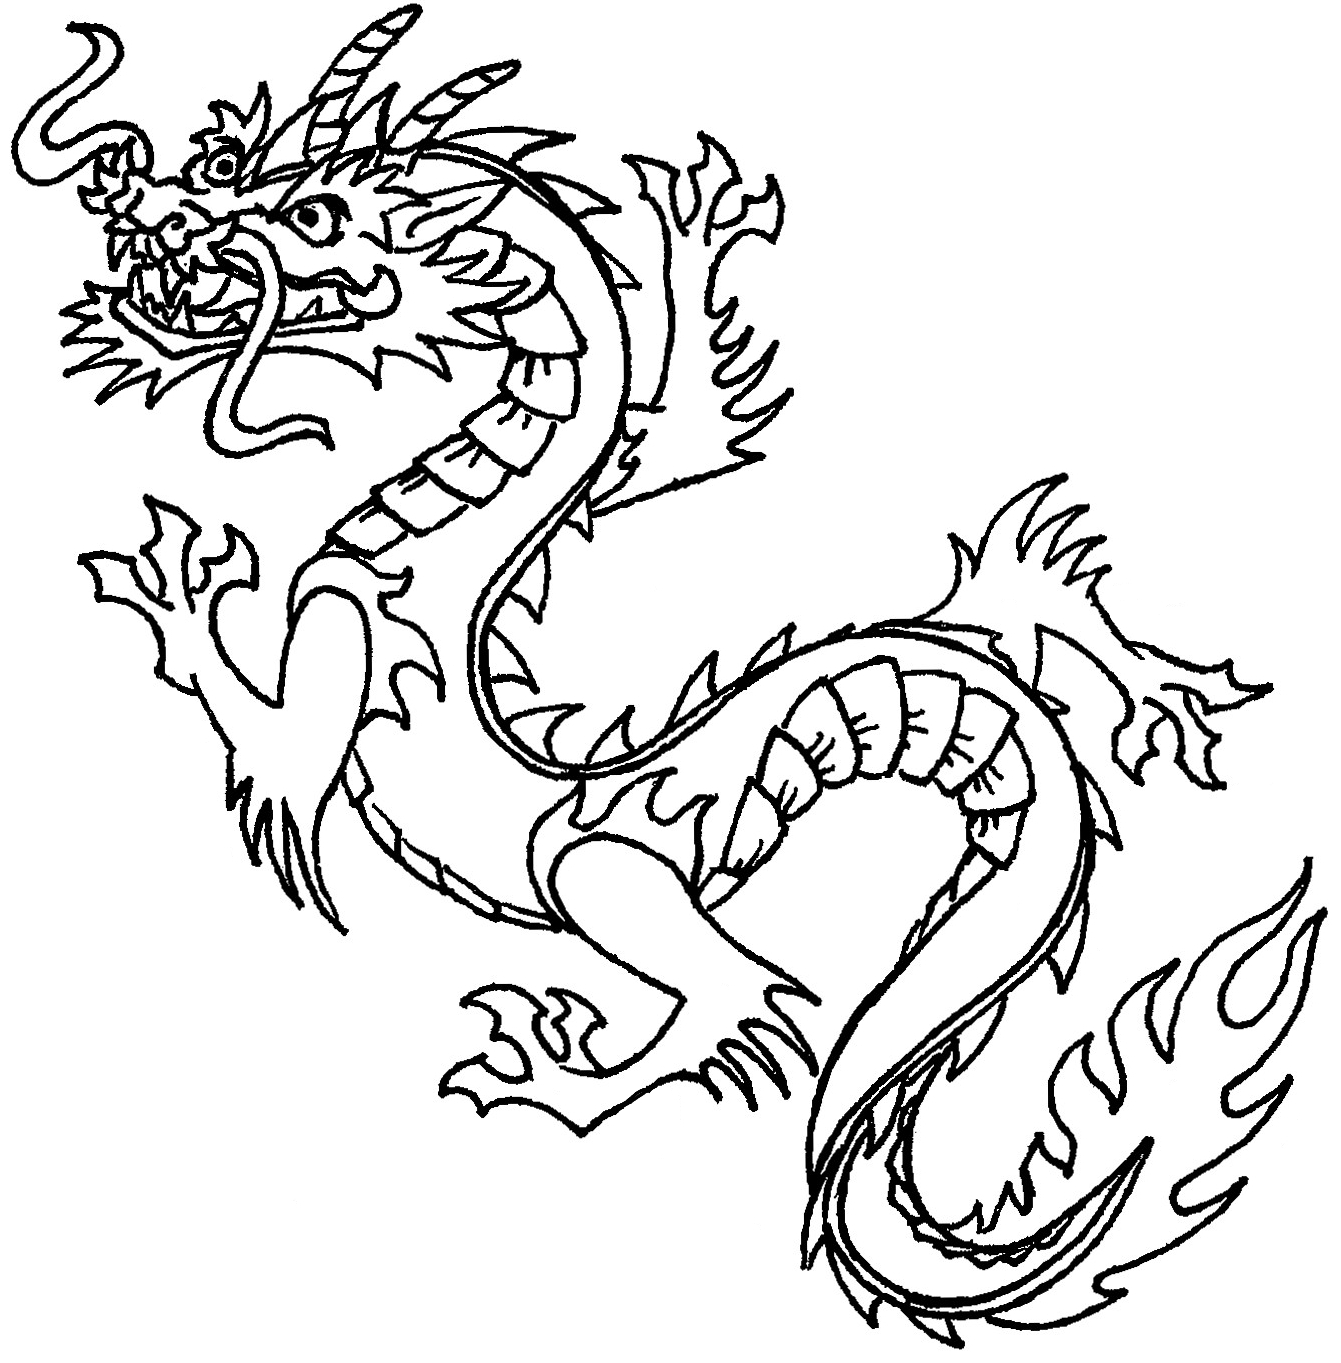
Chinese dragon coloring pages to download and print for free 22
Simple Chinese Dragon Outline - ClipArt Best 23

Design options at Memories & Mischief | Drachenmuster, Schablone designs, Drachenmaske 24

Pin on school 25
Free Printable Chinese Dragon Coloring Pages For Kids 26

Chinese Dragon coloring page | Free Printable Coloring Pages 27

Dragons | Dragon artwork, Dragon drawing, Dragon tattoo designs 28

Chinese Dragon Adult Coloring Pages | Realistic Coloring Pages 29

Japanese Dragon coloring pages | Coloring pages to download and print 30

Sketch of a dragon | Small dragon tattoos, Japanese dragon tattoos, Dragon sketch 31
Japanese dragon coloring page - Coloringcrew.com 32
Japanese Dragon Coloring Page at GetColorings.com | Free printable colorings pages to print and 33

Japanese dragon coloring page - Coloringcrew.com 34
[Music], hey people what's going on i am the, broken puppet and welcome back to my, drawing tutorials it was your first time, to my channel make sure you click, subscribe i've got hundreds of tutorials, that can really help you guys out but, for now people can get a really cool, dragon's, you know tattoo style full body i'm, using pencils and we're using sharpies, windsor and brush markers and a unipin, fine liner for detail bits, so you can copy along with any how you, want you know just all you need is paper, and a pencil, really so here we go people so i'm going, to start off with just drawing a basic, kind of sort of idea the concept, sort of layout and kind of go from there, so i'm going to start off with the head, so i want the head to be roughly in this, location so i'm going to draw a circle, like this, it's gonna be the basic spot of the head, and your circle around here, this is gonna be where his nose is gonna, go and another circle just here, for the back part of his jaw and then, just comb this line down like this, another little circle just down here the, bottom part of his jaw is going to be, two little lines just they're gonna have, two little horns just come off his heads, just like this, so this is the basic rough very basic, sort of shape of the face, in between this bit here gonna do a, little oval shape and a circle, and another circle make sure to get, between it if there's not a gap between, it you've done it over too small to, begin with, you want to make sure there's a little, gap between there you know just a little, bit smaller than what the actual wires, are, or around the same sort of size as long, as there is a little gap in between, so now we've got this done i'm going to, sketch out roughly where we want the, body to go so i want this, very simple kind of basic line to begin, with so when the body's going to curve, out here, it's going to curve up around i think, let's have you loop, inwards it's going to curve back around, this way, it's going to curve outwards and i think, loop around, and kind of come back like this so i've, got this nice kind of flow to it and it, kind of feels out of space, let's get you see everything we're doing, there we go so it's going to be just, kind of rough sort of space, um as you kind of get back i'm going to, draw another line now just kind of widen, this up so i kind of get the full body, shape so, just go around that line with two lines, on the outside bits, just kind of get a sense of the actual, body width, now once you sort of finalize roughly, where you kind of roughly want it, so i'm going to cut around there and, then as it gets to the tail you kind of, get thinner as to get towards the tip of, the tail, but um yeah just kind of make sure you, kind of get towards the end of the body, before you start getting dinner really, now very very important, there we go everyone's got this done, you've got to work out where you want, the arms and legs to go, now the arms and legs know so kind of, radium sort of angle so we've got the, body around here, you want to give enough space before you, start the arm the arms kind of start you, know so around here, won't be too roughly set around this, kind of section of this part of the body, you know a bit further down, if you don't start like here he'll be, way too short just wouldn't look right, you want to make sure we've got a little, bit of neck before you start doing the, arms and stuff, so this just kind of kind of sit here so, i'm going to have this body bit, you know i might have a hint of his claw, coming out this way so i'm going to do, one, two just three little lines just here, just so i know that's where the claw's, going to go, these are going to come out here so i'm, going to have this part of his arm, bending back and then one two, three little claws just kind of there so, it's kind of filling this kind of, swallow, kind of martial art kind of sort of pose, so squeeze your arm kind of backwards, just going to come around here and once, we get around here i might have a leg so, i'm going to get a circle just here, circle at the back and i can go into, some claws they're going to go there and, last i might have his leg kind of sort, of stretch out at this angle, come around over here i will just come, around so you can kind of see that bit, as we do it, if i just turn this a touch, [Music], zoom it out a little bit, [Music], all right i think we're golden there i, think that's got the right kind of angle, now, so now we've got it done we've got a, whole body in here so now we've got this, i'm going to go to start with the face, and detail that and just come around, just slowly to start detailing stuff, like that you know we don't want to go, too crazy detail to begin with, um just cause you need to make any kind, of corrections so let's start off with, the face, so we start with say the nose because, that's always a good point to kind of, start with, so inside that oval shape we've done, there and create a circle just here, circle about the width of it another, little circle in the background, just here, so this circle is going to curve around, this sort of shape just around here, i'm going to curve up curve down, this one's going to curve up through, here and then create a little once in, the background, just to create a second nostril around, the back, now a real simple way of doing it but, really effective calm down the center, bit just here, and just the very front just here the, tip of the nose just create a little, v-shape just for now, we're gonna have like a little kind of, front beard coming off of that section, it's just good to kind of mark it out so, you kind of know where that's going to, be, [Music], he's going to have a little whisker, coming over here so i'm going to bring a, little whisker because come around this, section just here for now, so you're going to get this kind of wavy, line coming off then just bring a second, line just kind of bring that back, like so we're gonna get another one off, the other side, so it's gonna mark a little sort of, shape just there, and now we're gonna start i'm gonna, bring this kind of little beard shape so, it's basically a zigzag pattern so we're, gonna get this line i'm gonna create, this, zigzag can come across around, this nose and come across the other way, like so so you've got this nice kind of, sort of round zigzag pattern around this, nose, having little loops coming back from, this nose come here, now when we get to the eyes we've got, these two sort of circles you know the, first thing you want to do is kind of, create, the bit it's going to go around your, eyes so these eyebrows section so we're, going to create this little loop, so curve around and cut this through, that circle shape, that's very important in this kind of, angle you want to make sure you get a, frown that cuts through the eye, reinforce your underneath and create, little lines underneath if you want, just there now next this one you want to, have one or two just in between, just kind of sort of tell the center, part of the face and then again just for, the other eyes create another line to, kind of cut through it, like so underneath i'm going to create, one loop so you go just to bring that, down, and just create a second part of that, circle for the other eye just there, around this side very similar to the, bomb they're going to get a zigzag, pattern, just coming around there, and around there once you've got that, down the top of the headlight bring this, little curve back here quite a little, kind of bump, it's going to curve around just there so, god top part of the head is coming, around, you can extend these lines coming back, here and you can have little lines come, off the back of that as well if you want, just for extra detail, and what's got that done we've got a, circle here for the back part of the jaw, around here just where the two circles, meet make sure this is behind the eye, low, i'm going to create a little tooth i'll, say a little too if you're going to put, a big tooth, make sure it sits behind your eye like i, said very very important, underneath there you want to create a, little bump and that's what kind of, towards the front, so it basically creates the cheekbone in, this kind of area just here, you can have a little sort of in a, cheekbone around the back if you can see, it you can't really see too much because, of the whisker that kind of covers it up, but uh come around here now i'm gonna, get to this bottom part i'm gonna bring, this line coming, down and when we get into this oval, shape want to create a little loop just, coming up, like so you want to create this sort of, shape this sort of line like this, okay a little more dip just in here come, a bit of an angle to this, just around this one to create a little, secondary line just mimicking it and, it's going to create like a lip, so it's going to bottom there so, basically the teeth are going to go to, the bottom, now inside this i'm going to create a, fang in that corner just there i'm going, to go one two three four little circles, into another fan just there now once, again, i'm going to create his tongue i want, his tongue to kind of come out his mouth, a bit so i'd like to make a long tongue, on mine so, it's nice wavy line kind of coming out, and curving back into the mouth like so, now for the background bit you want to, kind of bring back this mouth line come, like this, and whatever sort of space you have, still so you know on show behind the, mouth you want to sort of join up, as if it was kind of going out towards, the back of the heads so just kind of, you know follow that sort of shape going, that way, around the bottom part of the chimney, another zigzag motion, so coming down here i'm going to kind of, rotate it has come around that sort of, chin, as i get to here it's going to get, smaller and this line's going to kind of, curve off, come this way and then we kind of go, into the zigzag motion, and this is going to curve around that, two so this two is kind of a foundation, for this kind of curve this kind of, curve is going to go around that two, section just there, of course back here i'm going to create, it here so bring this line back here i'm, going to create this it's going to curve, outwards, come up like this and create a little, bump and then little loops underneath it, let's create it here, now you can create a second here if you, want if you can kind of see enough kind, of room, but you don't often see that you know, it's usually just the one here you see, in most dragon designs, you don't often see the second deer i'm, coming off back here i'm going to create, these horns, i'm going to create this line kind of, coming out i want to create this line a, bit kind of sort of jaggedy i don't want, it to be too um, straight you know kind of like a sort of, bone sort of texture so i'm going to, make a little bit crooked a little kind, of bent, i'm going to get to the bottom quite a, little kind of sort of spider just off, the edge just there, dude on both sides one two coming up, there, once you've got it started you can go, into your pen now so i'm going to get me, sharpie out to begin with let me get one, with fresh sharpies as a touch a bit, thinner, there we go i'm going to go to face, detail now just focus this nice and, clearly once i've got the face detail, because i want this in the front i know, i want on the front so i'm going to go, with pen now, and then we saw pencil and of arrested, body and kind of decide what one in, front of my one in the back, so yes get a sharpie to get everything, just done nice and neat, [Music], just like this take your time with it, i'm pretty quick with my line work you, know i don't feel like you have to go, same speed, you know it's not a race, it's all about the end products, [Music], get a little bit bigger, get a little secondary bit of the, whisker come off the back just there, run his eyes get the eyebrow, so by the hair i'm going to bring curve, line back go back just create a little, secondary line just there, a little third line's coming bumping, back to grab back pile of heads, and a little part of the ear just there, i'm not gonna do the bottom bit just yet, because obviously this whistle is gonna, sit in front of that section, [Music], come back create that back tooth a, little line detach just around it, secondary fang get that tongue, coming out of the head now you can, create the tongue inside the mouth, if you want i just i like to do my, tongues on them quite long, um yeah it's just what i like to do, and then come around this bottom bit, just get a spike pattern, [Music], as you kind of get around this edge i, like to make them longer, and then make them shorter for this, little section just here, then we're going to bring this back, and then again just make them longer as, they start to come around the back part, of the jaw, [Music], like so then once you've got that last, bit of the knife the last bit of the ear, because that kind of sits behind it, bring in those horns now like i said i'm, going to make these lines a bit kind of, sort of wavy i don't know perfect neat, it's going to feel kind of bony now you, can make them perfectly smooth if you, want i just don't like them smooth, um i don't know why it just kind of bugs, me when i smooth, so i'm going to get that there and just, here i'm sitting inside by the mouth, wanna be forgotten quite this little, curved line just there, and i'm gonna grab me unicorn fine liner, and a few little little line details a, little bit thinner than the sharpie, so it's going to come in this there i'm, going to get these little people, there's a little people just there one, just, there and i think i might do i'm gonna, do some little sort of pan just, every now and again, i get this kind of broken effect coming, out through this horn, so if you look kind of cracky kind of, line just coming through, nothing too crazy though that'll do it, for the face, and now i've got the face done i'm going, to come back in start sketching the rest, of the body, i'm going to start off with this initial, back part we have just here, so this time's going to curve up, come around here go down this way, so once we get to here the body is going, to start in the bottom part so as we get, here i'm going to create these curves, so i want these curvatures coming up, this way, and they're going to fade by the time we, get to here because at this angle this, body is then going to kind of go behind, it, and once we get to about here i'm going, to bring this line across like this, bring this down this is where the body's, going to kind of rotate and then the, belly's going to be on show again, so once you get to about here and i'm, going to carry this line coming through, [Music], that will come down that way so you're, going to get a slight, kind of rotation to it now as we get, down to here you can see a lot more sort, of kind of scales i'm sure if you want, i'm not gonna fuss about those in a, minute and i'm gonna do i'm gonna get, slime it's gonna kind of go down the, center of his back, so you kind of you know use your, imagination for this and understand, where it kind of goes because obviously, the belly sort of shows on here, so as the body shows on here this bike, then comes kind of rotating it goes on, to the back, and across this line we're going to, create this pattern so it's basically, this kind of oval spike, that will slowly rotate and create this, nice kind of pattern all the way down, his back, you just need to make sure that it's, sitting in the right kind of angle and, kind of, follows through on our back bit, and once you've got that done just make, sure you kind of got your whiffer on, everything like i think i might want to, bring these, little bits just out a tiny wide bit, just here, now if you want quite a wide sort of, front, and i can go there i said this back claw, is going to kind of fit behind this bit, it's not going to go in front of it, so now we've got that section in there i, can then sort of go over the pen, and get that bit in there we'll go, section by section every time i know, there's a section that's going to fit in, the front, we'll just go and do that, [Music], it's going to keep going over the, sharpie now, keep these about the same sort of size, if you can, sometimes it can be a bit tricky, especially as it starts to kind of, rotate, just kind of keep them going until they, pretty much disappear behind, the body, [Music], line up here on the back, disappears to nothing, [Music], buddy is coming under here, each time i stop it i'm going to sort of, stop with a pen so get this sort of, slight sort of chunky little bit just on, the tip of the uh, edge i'm just gonna nice little effects, when you're down the belly at least, i'm gonna create this little kind of, wave dip just in the center, so eventually it kind of rotates and, kind of switches sides, just keep that motion going, until it's behind, a little back bit for the body just kind, of going behind there so you see you've, got this really nice kind of rotation, now to this body bit, which is pretty much exactly what we, kind of want, and once you've got that done we're, going to bring it across now so as it, comes this way, and i said it's going down to the first, bit of the arm so this arm's going to, kind of curve back, so we've got this oval shape here and, then we've got this sort of shape here, and it's going to curve down so i'm, going to show you how to detail this and, how to get everything, looking right for the hand so i'm going, to create this little bump sensation, just here so it's kind of a little bump, it's going to curve back just here you, know this kind of forearm bit just here, it's going to sort of come up further, now i kind of want to sort of sit behind, here so it's kind of got this all those, sort of joint elbows sort of section, just here, and off the back of this we're going to, create, some spikes just like we've done for the, eyebrows and stuff it's going to kind of, sit there, we're going to have these sort of scales, that's going to come through the body, and it's going to come across this sort, of shoulder bit, but as you kind of get to this part here, we might just have it just on the front, of the forearm come down towards the, fingers you'll see as you sort of pin, that one in just exactly how that kind, of works, and now i've done these oval shapes i'm, going to do this kind of sort of line, like so so i've got one oval, able three evils i kind of got a weird, rotation so you've got one going this, way one that way one that way, i start with the bottom one and because, the angle he's there i kind of want, these kind of claws to kind of come a, bit kind of backwards i think, and then our front one maybe a little, bit full so kind of get a nice kind of, rotation to the fingers, so we're going to bring that from that, line create a little spike like this, and just across the bottom we're going, to create a sort of bump sort of circle, sort of shapes, you want a very sort of kind of curvy at, the bottom of the fingers and then very, sort of straight and kind of angular, on the top part of the fingers and as we, can again here go a little secondary, bump sort of tells the sort of back of, the palm, and it goes there, bring this line come up again a bit kind, of angular, get that sharp kind of claw in there and, the bottom bit nice and kind of sort of, curvy, straight angler get the claw, kind of bumpy going on towards the, bottom of the fingers, so now that arm's going to sit in the, front so i'm going to go repent now sex, everything nice and clearly, [Music], so again we've sort of done this little, kind of curve line here just to sort of, show how this kind of harm sound assists, here, having that backwards just there and, then you're going to bring this down, here i'm going to create this look on, the curve just coming off of each one of, these, little scale thing we're going to do, here we're going to do that scales with, a thinner liner low so i'm not going to, deal with this kind of pen, the bottom part of each kind of claw on, the bottom part of hand you want to be, nice and kind of sort of curvy and, smooth, [Music], so we get to about here we want to, create these, spikes just sitting behind that, create that claw just here, [Music], and the top part of the land we're going, to make very kind of angular, coming back so you want it to be like, pretty much most mostly made with sort, of straightest kind of sort of shapes, the bottom part very kind of sort of, curvy the idea is that very kind of, fleshy at the bottom, and then kind of scaly armored on top, [Music], so we've got that in there and what's, going on i'm going to get me um, a little in the pin fine liner and just, show those little kind of scales we're, going to put in there, so i'm just doing a foreign bit first, i'm going to come backwards, so i'm going to create this kind of loop, i'm looping around this, [Music], as i get to the center part of hand i'm, going to create one big loop, start there and then each finger is, going to have little loops just kind of, curving backwards, from the tip of the finger, make sure to kind of cover them back, from the finger they don't really look, wherever it goes the other way, in my opinion so come back like so, so you kind of get a nice kind of scale, build up coming off of there, off the shoulder gonna get some scales, coming through here um i'll put these in, there for now but we're gonna, show you how to do the rest of the body, scales um for this one we're gonna start, with semicircle, semicircle just keep building off the, center, you want to keep them fairly small you, know on a dragon you don't want the, skills to be too big, you know like when you're on the koi, fish then turns quite big because your, idea is the koi fish is fairly small but, where the dragon is quite big you want a, fair amount of skill you don't like you, know, hundreds of like circles across but, we say you know if like you might start, wrapping around the body you want to, make sure you kind of feel about, like five or six if it was kind of, wrapping around it, and just keep repeating that pattern and, kind of fill in that kind of shoulder, section just there, so now we've got done going back to the, pencil and go start working on the rest, of the body now so, as these kind of bits going around here, you might get a little hint of spikes, just in the back just here, you know just pattern just on the back, you know you might get a hint of which, come out there because that's where the, back is kind of going to be on show, and this body is going to kind of rotate, around this way, and again i might have that sort of, under section of the belly, curving i'm kind of twisting in this, kind of section, so it's going to come down here i'm, going to have the belly on the bottom, we've got this lick i want this belly to, kind of sort of tuck so it kind of goes, underneath this leg bit so when we do, this leg, where it starts here and make sure this, belly that comes here tucks underneath, it, i think it's always just a good practice, to try and keep the belly on the bottom, um you know you can sort of start, twisting around when the body kind of, goes on top but, you know to me it just always looks nice, and sort of clean and smooth when it's, on the bottom bit, keep that same pattern work we've done, there so quite a little curve and create, a little dip just down the center of the, belly, now until you kind of get to here and, you can't really see it too much don't, worry kind of sort of start creating, little just, kind of semi-circle shapes you know but, while it's on show create a little kind, of curve in the center, it's a really nice you know just simple, little touch, there's a lot of detail to it so coming, back for this leg now, i'm going to bring this okay coming, backwards like this it's going to bump, back up, [Music], just come here i'm going to get this, fair texture coming off the back of this, leg, and this floor is going to come down so, you're to get little lines to cover like, this i want this sort of, association like really fairly kind of, forward-ish, so i'm going to create one claw like, this, one claw like this and one like this, a little curve in between each one just, kind of sort of join up the sections, [Music], and just put in your claws at the end of, them like so, now same kind of principle you know, we're going to kind of make this very, kind of angular because you can see in, the top part of the scales, and whenever we see the bottom bit we're, going to create a nice kind of simple, kind of curve, just to kind of make it look less so you, know um a bit more kind of flesh, than it is um kind of scaly it's going, to start off with a backpacker leg, so you can cut this kind of bump it's, going to tuck into there, you want this bit here so your idea is, you want this kind of legs all coming, back in this way, so i'm going to create this little kind, of loop just kind of tells that kind of, angle, great little spikes come around there, bring these lines down towards our front, bit, claws just like so, so it's made a nice kind of angular sort, of section whenever it's kind of sitting, on where the scale of it's going to be, and if you can see the under bits kind, of create a nice kind of curve, you want this curve underneath bit just, underneath here because you're going to, see a little bit of flesh underneath the, toes, just there i can join up, and you get the same sort of thing once, you do the um little scale bits with a, thunder pen, we'll do that a second get the rest of, this body in here now, so just keep these lines coming, just burn them up around, that's kind of covered back it's gonna, put a little hint of those spikes we see, just in the background, not melee just a couple, just bringing the rest of his little, body just underneath here, [Music], just as a sort of tucks underneath that, leg remember the sort of tuck underneath, that leg, [Music], and when you've got this leg sort of, here i think i'm going to have this sort, of secondary legs going to come here so, around the same sort of pointing back, it's going to curve, around this way it's going to curve up, in these toes, [Music], i'm going to kind of come in there i, think i like that kind of angle it's got, a nice kind of sort of stretch to it, [Music], look at that ramen i must get this body, part here so i want this body part to, kind of sit in front of this section, so it's going to curve around like this, and just keep just coming back, like this bring that body, and again i think i'm going to keep, bringing that body, and the forward so as we get here you're, going to switch the underbelly, and that's going to go towards that, bottom section so it's just keeping that, body you know underneath, this is going to wrap up here, i think this again we're just going to, curve around, bottom section just coming down like, that so it's got this really kind of, nice kind of flow, sort of zigzagging like this which i, really quite like, so i've got that done i'm gonna get this, part up back so, remember that sort of spike pattern come, up here i want to make sure we include, that, i'm gonna see that coming off of here, and then where this back part down here, is you're gonna see across that back, until it slowly disappears and then, continues, on this bottom part that'll come just, down there, so you can see kind of how it sort of, flows and it's got this nice kind of, rotation, and the reason i got this body kind of, going this way is again it makes it feel, that body's going towards the back, you know if it's your rotation it feels, like it's coming forward you know like, here this sort of kind of sort of brings, this a bit kind of forward so this bit, here kind of bounce forward, and then this bit kind of goes back you, know i tend to use the belly as a way so, you know telling which direction it's, kind of going, see what's got that done i was going to, get this body bit curving underneath, here, leaping around these little sections, just like so, remember as we start getting down the, body these sections are going to start, getting smaller, [Music], let's keep this better going, [Music], until we get to the vampire switches, sides, just like saying this but it's kind of, against like a nice kind of sort of, undertale pattern so the body can kind, of end, so around there the underbelly, bringing that back just carving around, so it's taking a nice kind of shape now, it's really kind of starting to come, [Music], together, just keep it going, and just remember to kind of get here, it's going to start going kind of behind, us they're going to start seeing less, and less of that spike, as it goes around the back just there, [Music], just bringing this up around that bit, this gets a nice kind of curve at the, bottom, just down there so i've got this nice, kind of rice, rotation really sort of showing off this, sort of body shape now, it's now gonna die i'm gonna come back, in do the rest of the arms now so do the, arm here, and the leg over this side so start off, this leg, so this legs a nice little curve off, like this this top part is gonna kind of, sit in front i'm gonna create this, little dip, just where the ankle is gonna sort of, bend touch, i'm gonna get this or curving off to the, front of the toe, there's a little sort of circular bits, underneath where it's nice and kind of, smooth, remember to kind of sort of texture you, want, and this toe is going to come a little, bit off to the side sort of stretching a, little bit kind of quite a bit different, kind of dynamic to it, [Music], just kind of like so and if you can see, and kind of get a little bit of um, the hair texture towards the back just, there, so again it's going to come with a pen, now, let's keep going over this so get the, top out of this claws nice and kind of, those little angular underneath, the floor in there little circles, circle bits just come in there, and i can kind of go behind that section, just there, and then the front part of the, hand over here so it starts there so i'm, coming this way he's kind of stretching, out, i might have these kind of fingers, really kind of sort of stretching out i, think, change the angle that i told you, originally, so hopefully it's going to spread out a, little bit, you look kind of sort of wet between, them you're kind of going to see like, the under part of the hand this time, all right so it's going to give you a, bit of a different kind of perspective, on them, on the claw so you're going to have, three dot over shapes great little, circle on the center, and kind of work your fingers off for, that a little curve in between sort of, join them, and you're gonna have a bit more sort of, kind of sort of curved section, underneath i'm gonna see too much of the, scale so i'm gonna show you what i mean, so i'm gonna get this hard edge just, here just around the tip of it, around here then it's going to be much, more kind of sort of curved as it's, underneath, as you can see much more the underside, of the hand, then you definitely have a section, [Music], you guys don't want to sort of loop in, here and grab a few looks or curves, inside if you want, [Music], for you guys, there we go so now we're done i'm going, to get my rubber, it's going to rub out all that pencil, work that we don't need, because we don't need those sketch lines, [Music], now, [Music], oh got a little bit back just i forgot, to do that, [Music], let's get rid of all that pencil if you, can, [Music], there we go i like to use a putty rubber, she's generally what i used to use, but feel free to use any kind of rub you, have that's just pretty much where we've, got ham really, so yeah it's going to get those little, another spikes just uh, i'm not going to carry the whole way, through because i'll say where it gets, kind of small you're not going to see, too much of those, and as we get ready right into the tip, of the towel i'm going to create this, [Music], firework on a spike pattern, [Music], i'm going to create this, [Music], zigzag just going to cover around the, tower just over there, now we're done i'm going to come back, here and i'm going to use you to pin, fineliner, um if you want you can kind of sketch, out some basic kind of guidelines sort, of a way to put where to put the scales, and to do that you basically want to, create like a zigzag kind of pattern so, you're going to, well across that pattern so across the, body you're going to bring these, straight lines coming across, just bloody kind of rotating a little, bit as you kind of come around, like so and then what you want to do is, sketch the other way now, keep them nice and about the same sort, of distance apart don't go, too different with the lines, and then what you do in between each one, of those where you kind of got your box, shape you want to create each little box, shape into a curve, so you wanna do a little curve inside, each one of those, semicircle curve, [Music], and this will really help you kind of, achieve the right kind of rotation as, you kind of go around the body, now because a lot of people are fine, gonna get a bit struck a bit sort of, stuck with the scales when it sort of, rotates too much, you know the straight bits are fine when, you're going up the body like this it's, fine, a lot of people kind of sort of don't, breathe not to do when i kind of get to, the section i'm gonna get into a second, so as you saw start to rotate, see as we start to get here, [Music], the trick is when you've done that sort, of zig zag pattern you want to try and, stick, quite firm to it just make sure each, kind of sort of semi circle is kind of, fitting, within those shapes, you're not strained too far from me you, straight a little bit just don't go too, crazy, you'll lose your pattern and if you lose, your pattern it's gonna be really hard, to, kind of keep it going, just keep it going, [Music], until you all the way through, [Music], moving away to the other side, and you get a nice kind of curve to your, scales, now there are a few different ways of, doing it i just find it's a very, and the easy way of doing it, let's get a few little edges in the, background bit, and again i'm gonna get to this um part, down here make sure you kind of get the, right kind of sort of rotation to these, so i said you wanna make sure that your, curves kind of come back, [Music], off the fingers, once it gets about here and this guy's, coming down this body arm, a little a few little detail which is, coming off the center part of the arm as, soon as we've done here, just to sort of show the kind of curves, under the fingers, it's nice sort of show that kind of sort, of kind of fleshy sort of shape to it, just don't go too overboard with it, so you've got those little scale bits, just around that part of hand just there, then this bit create these coming back, just like so start off with the finger, bits, [Music], just here and what i'm going to do is, just kind of reset the other way, [Music], i'm going to say i'm going to create, this one so big circular one and it's, all kind of kind of link up to that, another scale pattern just in here, just coming down just like kind of thigh, section, [Music], just like so anybody want to get like, this guy's come down the rest of the, body now so just come the way down to, the bottom, [Music], now you can use the um the crosstatch, pattern that i sort of recommended you, guys, you know i'm just going to go like this, i'm used to doing this so it doesn't, really make too much difference to me, so i'm going to sketch these in if, you're feeling brave you can go for it, but if not, just create a guideline the guideline, makes a lot easier, now but once you've kind of sort of, drawn scars a few times you kind of get, into the swing of them, now you kind of get your hand motion for, the rotation, and what i try to do when i get a little, session like this i then sort of try and, divide it into two, so when it comes it sort of goes into, the sort of like you know fire bit so, i'll leave a little gap just on here i, don't connect up the lines, now so i get here and i kind of connect, it i feel that sometimes um, this button look just feels like a, continuation of the rest of it, i don't want i want this tire to feel, separate i want it to kind of feel like, it's um, in front of it and not just merging into, the background, so let's carry that on through there, once you go into this bottom bit great, because of those fingers, [Music], these fingers, and because it's kind of very sort of, front forward you're going to see this, kind of pattern, [Music], like this kind of fitting in that gap, [Music], once you've got that it's going to carry, this sort of circle just kind of way, through now so, it's a bit tedious this you know but so, take your time with it it's worth it you, know because um, if your skills just be kind of uneven, it's just going to kind of ruin the, whole thing, so it's worth taking the time to make, sure your scales are nice, and even, just keep building them up section by, section, and the way we join this bottom part, here is fairly straightforward because, it's, very straight so we haven't got to worry, too much about too much, or twisting you know which is like the, difficult part with scales, you'll see here as a kind of sort of, comes like a nice sort of dead straight, edge, so it's all kind of generally flowing in, this direction there's not much bend to, it, [Music], i'm trying to keep building these out, and once we've done this done the um, snake once you've done the uh, dragon i've got a little bit background, as well so i'm gonna have some sort of, clouds and stuff i think, i'm nothing too crazy just a little bit, of background, just kind of give you guys an idea of, what you can do for the background, building these up, [Music], just keep going, [Music], now you can make your scales get smaller, as you get towards the tip of the tail, but to be honest i quite like to keep, the scales, roughly the same size throughout most of, the design, i might shrink it down just a fraction, but um not when those ones are sort of, like, start making the scales go really kind, of miniature i just don't think it looks, right, you know i just prefer keeping a pattern, fairly symmetric fairly same size the, whole way through, [Music], it's going to go there and then it's, going to pick up on this last bit just, come around here, and just putting what you can you know, if you can't fit the whole scale in, there just kind of put half scales, you know until you kind of get the, russell shape building through it, [Music], now you generally usually kind of get to, a point where you think it's kind of, like a little kind of v-shape than a, circle, v-shaped in circle it's gonna go through, to the edge, so once that done we pretty much got all, the basic part for the dragon done now, [Music], let's get in there so get the whole body, so again this camera kind of just rise, bit annoying, [Music], there we go, so now we're done i'm going to come in, i'm going to start off with the black, and gray shading to begin with, um for this i'm going to use wednesday, and brush markers i'm using a gray set, so you've got a cg4 to the cg1 it's, basically like a dark, light a dark medium to light light sort, of colors, most of you know markers you buy will, generally have the same sort of thing, you've got a nice kind of gray scale set, so i've got these ones i just need me, black and i need my last gray one which, is, there we go so i'm going to start with a, black and gray to begin with and then, we'll come in with some color afterwards, but yeah it's just easier we start with, black and grey first, and then we'll be done well when we're, done we've gone to the background rather, so let's start with the black, so quite a bit of this um on the scales, we're going to go black on one side, and get slowly lighter as we get towards, the other side so say here i'm going to, start black on this side, i'm just going to use sharpie for the, pure black bits just makes it easier, so i'm going to join to each scale just, here, [Music], leaving a little highlight edge just on, the outside edge bit, just like so, [Music], come in here do the same thing i want to, do is as i get further out, i'm going to start making that circle, smaller, see here you know the circle's going to, be about this size and this one that's, about half the size on the next one, this will help kind of create a nice, kind of gradient as you come across, it's going to be bigger on this side and, then smaller, as we go to this side, [Music], now it's a nice kind of classic way of, sort of getting um, this cool kind of gradient to the scales, now it takes a little while doing this, actually got a lot of scale to go, [Music], through, yeah it's going to keep flying this the, whole way kind of through, looking for this first section and i'll, show you what i'm going to do with the, grays, on the scales, get smaller further you get towards the, belly, so you've got this nice kind of grading, bit towards the top section there now so, what i'm going to do is come in i'm, going to use a, i'm going to go for the fourth one i, think, and then i'm going to bring the gray so, it's basically bringing each kind of, scale up to the same kind of sort of, points okay the same kind of little, highlight, i'm using the gray over the top of those, kind of black areas, so we're basically filling in the scale, but a lot of it's going to be now with, the gray, because your idea is you want to get the, same kind of fullness to each kind of, scale, but having the ones closer to the belly, with more grey she's going to create a, nice kind of highlight, now it's just really effective you know, when you get towards the end it just, gives up a really effective pattern, [Music], now it's too tedious for you you can, just um just shade the whole thing in, you know don't worry about leaving a, little high highlight, well likewise you showed the whole thing, and just got like a white pen or a white, pencil, and then just add a little highlight, across the edge of those, that's always another option as well, if i was painting this then i would, definitely do that, so just like that as you can see they've, got a nice kind of same kind of fullness, but yeah, different sort of shades to kind of, achieve that, so that's how we're going to do the, scales now i'll talk to you how you can, do we're going to talk to the scale bits, i'm going to come back and start doing, in the face, so as you can see i'm not going to use, too much pure black i don't want to sort, of make the face, too dark there's going to be a few, little sections i will do but not many, so a little bit of black just in this, mouth, and just underneath that tongue, so i'm going to put those black in again, side to side just over the top like this, using the marker i'm just going to blend, that out, and just work my way through the markers, just to keep blending out and use a side, to side motion now side to side motion, is much much better, for achieving this blender, just like sorry so see i got a nice kind, of fade inside the mouth now, and now for the rest i'm going to mostly, use, the other gray shades because i said i, don't want too much pure black in here, so the idea is i'm going to go quite a, bit inside a lot of the facial details, leaving a little highlight, across certain sections i'm going to, come here across most part of his head, so it's still spaced above the eyes not, over these zigzag patterns like so i, want to color those in color, i'm going to bring this up like this do, this little top section just here, and i'm going to fade a bit lighter in, the center of the head i don't want to, go too dark for the whole thing, just mainly kind of achieving this on a, dark, edge effect this gray, so there's so we've got that sort of, like gray tone across there, then coming in now with this lighter, tone, i'm bringing this across this whole, section just here, just working over the edges to kind of, get it nice and smooth, and blend into it just like that so, you've got this kind of nice kind of, gray effect in the face, same thing on my nose now so we're going, to go over the nose leaving a little, highlight edge, [Music], just around there get the other nostril, bring it up and then a little bit just, underneath the, whisker a tiny bit of sunlight your eye, and just here as you kind of get around, the back of the eye towards back by the, mouth, then usually have a grey so just kind of, blend it out, like so so just trying to achieve this, nice little gray tone throughout the, whole of the face, the only time you're going to sort of, not do that is when you get this sort of, spike here it's because the spikey, arrows are one color, so a little bit just gonna get a little, bit just underneath that chin, just a fraction, come down i'm going to blend that and, come down to the lightest blend as well, so i'm going to fade this pretty much to, nothing now, so if you use the lightest gray it will, pretty much just go to nothing, you know it'll make your page look a, little bit darker to begin with but give, it a chance, to dry up and as it dries it will pretty, much fade, to nothing so that's it for the grain of, face, you know the rest is going to be pretty, much in color so it's got great time, just, there, so the rest of the face is pretty much, going to be sort of color sort bits, so now we've got that done should i go, for the rest of the body i'm going to, autograph black and grey first so now, i'm just going to go in there do the, rest of the scales, and um yeah then we're going to color, [Music], afterwards, [Music], so, [Music], [Music], [Music], [Music], cool so now this stage you kind of got, all the scales in there so just kind of, spread through that, the same sort of pattern so again the, black in there and using the gray just, kind of build up from the edges, until you kind of build it up once, you've got this sort of stage you know, that's in there but you've already seen, a minute a lot of it kind of feels like, it's all the same kind of sort of thing, you kind of feel as it kind of laps in, places so what we're going to do is use, some some nice gray sort of shades to, kind of separate these sections, so basically like here we're going to, got this face here we've got a little, bit underneath the face i want to, separate this section here, so what i'm going to do which is a, little bit pure black, just looking from around there and use, my gray tones i'm going to sort of shade, out from that now so i'm going to shade, out, and over this body part it's going to, show over so many scales, [Music], like so, you see i'm going to create this dark, section underneath there's now so we can, sort of tell that that sits in front, and everybody kind of helps sort of tell, that sort of story i'm going to do this, pretty much anytime anything kind of, sits behind i'm going to use that sort, of you know technique, so where this sort of leg kind of sits, over this bit just here, just there we'll just put this in front, here a little bit of great tone just, behind there, just going around where this bit kind of, says but i'm gonna figure out he's a bit, of kind of gray, push it around this kind of foot this, little kind of sort of toe section just, here so spits in front, [Music], but this is behind here, where this is behind there, now simply take me but just really kind, of help brings everything else kind of, forward, so now we've got it done i'm going to go, and start doing a little bit just on the, under parts of the body so, these other parts of the arms and the, legs, so that's one little bit of shadow very, similar to kind of how we sort of done, the facial shape, so a little bit of shadow just near some, of the edges, i'm going to put a few little dark bits, not too many i'm going to go a bit, lighter than i did on the face, so don't go too dark on this section, [Music], just bring this up in a few little areas, just like this, a bit similar to around here just around, the key sort of points, and using a lot of times kind of blend, those out, [Music], it's just a kind of show that kind of, folds in the skin, [Music], you want to bring that gray over most of, this section, it's going to really help when we sort, of put a color in just kind of sort of, tell the difference between, the sort of shades and sort of sections, that we want sometimes you know we know, sometimes the bowl color looks really, good and we're going to have a solid, bowl to over the body, but these kind of other parts of the arm, i kind of want a bit of sort of, structure to them, not too much where it's sort of taken, away from the element of what it is, but enough just to sort of tell a bit of, difference between, the edges the inside bits and just a, little kind of bumps and details, inside this one just there, it's now got down just here just as we, get towards the top spikes, i'm just going to put a little bit of, shadow just over half of them so bring, the line up to the center bit, and as those are going to fold just kind, of like fade out to nothing, [Music], we share just on these ones just there, like so, and once you are done that's pretty much, all the black and gray that goes into, the body, so this stage you're going to start, thinking about colors now i know what i, definitely want to have red in there, i want to have my amber i might use a, little bit of fabric possibly just for a, few little bits i'm going to use, a pink and i'm going to use a, lighter pink as well it's going to blend, out, certain parts of the flesh so it's going, to go into my pale pink, and then i might get color in the eye so, somewhere just possibly a little blue or, a bit blue i haven't quite decided on, that yet, probably know that one more one you know, because you've got quite a lot of black, in there you want these kind of nice, little bowl colors to use now because it, really sort of counters up against it, i can pretty much kind of sort of, dragons any kind of way you want um but, for me, especially when you've got a dark body, like this you know dark uh scales, you know a red underbelly is just, perfect it just works perfect, so what i'm going to do is just get red, honestly on the belly section, like this bring it up, and leave a little highlight edge just, around the side parts, [Music], this red is just called berry red um i, use it most my videos it's my favorite, kind of like red marker to use i really, love this red, i'm going to get to the edge you know, just towards the inside body that's, going to curve around and loop around, [Music], just like so, keep this coming it's completely red, i've missed some scales in here, without those, [Music], yeah i absolutely love a red underbelly, dragon i think it's just the best color, for it, [Music], now the only time i sort of change it, and that's maybe if i'm using a, different kind of color in the body like, if i'm using say um blue scales, i'll often add say an orange on the, belly because uh, blue and orange are complementary, um by complementary i basically mean, every color's got you know one colored, up basically the opposite end of the, spectrum it just matches up perfect with, it, so yeah blue is orange you know just, makes really nice kind of pair, you know for me like you know kind of, like this like black and red it's just a, match made in heaven it's just, perfect, just keep building these up, this news you can i got a little bit, quick here should be going a little bit, more slowly, a few little edges aren't quite as, perfect as i want them, now majority is pretty quick for the, tutorials now you've got remember if i, was doing this to say like a commission, piece or like for a tattoo, i probably put in say quite a few more, hours in one putting on this you know, it's, you know i kind of you know i like to do, it this way because i kind of the, freedoms bad sort of draw like this and, i like drawing like this, um but yeah if i was doing it as a, professional piece it takes me a lot, longer, [Music], if there are little mistakes don't be, yourself you know there's nothing wrong, with that you know no one's perfect you, know it's, human error it's always going to be one, little mistake in, everything you do you know nothing's, ever going to be 100 perfect, and if you beat yourself every time it's, not you're going to like be beating, yourself up for the rest of your life, you know because, nothing's ever ever going to be like 100, perfect, [Music], and to be honest i think that's where it, should be, perfection should be something we strive, for but shouldn't a bad achieve, next space if you achieve perfection, then what else you got to do, kind of makes everything else boring, after that actually achieve that the, best you can get, to me the fun's in the journey, [Music], now it's nice getting to the top of a, ladder but you know, on the ladder should be the fun part, [Music], [Music], can be red so i want the tongue to be, red, [Music], just like that and that'll do it for the, reds, so i can put that red down now and next, thing i'm going to come up with is going, to be me orange, well yeah it's called amber so it's more, of a yellow than it is an orange, i basically want to use this on all the, kind of spikey areas we've done, [Music], so it keeps coming around here, just looking up again it just makes a, really nice contrast against, the darkness of the body, like so it's got a bit yellow in there, let me get that let's pipe something, back at the elbows, there i'm also going to have this, come across that spike at the back, just keep building that cross getting, all those little spiky bits, [Music], i'm going to have it also, [Music], that's it for this tail, i will have enough color in here as well, just put a base yellow to begin with, [Music], i might have some like red flicking down, into it, [Music], so once you've got that color done oh i, can't forget it was going to be um, lilac gonna have that i was going to try, like it's called lilac it's not in china, lilac, it's a little bit just over that lip, nothing crazy i'm going to get this, really cool sort of blue color it's um, uh cola aqua, i'm gonna put this in the eyes i think, yeah i really like that for the eyes, and then under the arms and in between, there's a bit of toast there's kind of, little fleshy bits just here, i'm going to get this pink i'm going to, work this over those darker areas, now you want to soap and you want this, to be like a really kind of bling in in, your face kind of, pink just a nice kind of muted one, [Music], i'm going to go over those kind of gray, areas that we put on those other parts, of the body, and then the rest of it we haven't got, i'm going to use like um, an even lighter pink and kind of just, sort of fade it out so it's got like a, hint, pink now i'm just going to add like a, hint of color here we're not adding, a luminous kind of color it's going to, give a bit of a fleshy sort of time, yeah so this one's going to go the rest, of those kind of areas, in this pale tank, [Music], [Music], those little bits and then i'm going to, get, the red and the blue i'm going to put a, little bit inside the mouse kind of, quite like a purple, so i want this background part of the, mouth just to, some reds, and using that same blue use for the, eyes i'm gonna go over that it's gonna, turn it kind of purplish, [Music], a little bit yellow just down those, whiskers, a few little areas i need to add with, the black so you got a little section, just here in between i was going to, block this section, out, [Music], section scale they're just going to put, in these scale bits just here, just those little bits just there's, gonna bug me if i don't have those, now i want to get this cinnamon pudding, it's like a sort of brownish tone, just in those horns and the uh fingers, and stuff, right yeah it's gonna flip this nice, cinnamon tone down, [Music], i'm gonna go from the top and the bottom, of the horns, [Music], a little bit just inside the teeth just, a little flicker there not too much just, little flick, just a flick from the edge of the, [Music], fingers, just dropping markers everywhere, [Music], just there behind those scales, that's it for the color so next we're, going to do now is get some clouds in, the background, [Music], so i'm just getting a cool gray to begin, with, just blend out, [Music], there's tones just into that horn there, we go, so that's pretty much it for the color, so now i just want a little bit of, background to get a few little cloud, areas just kind of bring them out a, little, bit so to do this i'm just going to get, my light tone to begin with and just, kind of plot them out roughly where i, want these, so i'm going to get these little, semicircle shapes, they're very inside some smaller some, bigger, [Music], it's gonna put some head up front so i'm, just behind it just quite a couple of, little layers and i'm gonna sort of, shade inwards from them, so the idea is it's sort of semi-circles, you're just gonna build up from, semicircles, and every now and again you can get this, little spiral once you undo here, [Music], it's going to spiral around, down here, and just keep playing those and just so, it kind of fills the space up around him, [Music], a little hint of response in the, background just there, nothing that's nice it's got like a nice, kind of build up behind him so just, brings them out, and so now we've got that done i'm going, to come in with i'm going to use, i think thirds gray tone and going down, from that, it's going to kind of dark from the edge, parts, kind of curve downwards i'm going to go, gray around the edge just like that, and just went way down between them, i'm going to fade them off to nothing, [Music], just like that so you kind of got this, kind of sort of faint kind of gray tone, you can go darker if you like you can go, a bit lighter if you want, now because of that dark dragon ears i, want to go fairly light with this bit, now it's always a we're sort of trying, to think you know what's too much, darkness what's too light, and if you've got a lot of dark you want, to kind of sort of brighten sections up, now you've got a lot of shades you want, to sort of darken them i've got a lot of, um lights you want sort of dark areas if, you want a, lot of yeah getting tongue tied if you, have a lot of dark areas, you want to go light if you've got a lot, of light areas you want to go dark and, the idea is kind of make contrast, contrast is key, so inside that little spiral i'm just, going to just fade around the edge, and just kind of fade out as we get, towards the inner areas just like so, [Music], and just keep this going for all of it, let's get around there and just do a, little bit by bit you know because, obviously if you leave it too long, um the marker is going to and you're, gonna have a hard time, sort of blending those out again so just, do a little bit by little bit, until you kind of get everything done, now don't try to take on too much at one, time, next it will backfire, [Music], just keep pulling it out and it comes, again before you know it, it comes together a lot quicker than you, think, the background's always worth thinking, about you know because sometimes it can, really help make an image and really, bring that detail, as you probably see from this it just, kind of gives it a nice another, dimension behind it, [Music], you know how many glare that is i think, it's just really kind of helping, bringing that even more, you know and if you don't know what to, add to your dragon in the background you, know stuff like, clouds is really good water waves um, little kind of sort of lightning bolts, are usually really conical as well, you know little flowers that little, cherry blossoms are really nice, you know just kind of sort of think of, that sort of stuff as background you, know it's you don't go too kind of crazy, too complicated, now just try and think if you wanted to, be sort of in the air you know so you, want some clouds you want to be on the, earth so a bit of water, you know if you want to sort of just, make it a bit more kind of colorful, and flowers are the way to go, [Music], yeah just trying to just try and think, what kind of sort of setting you want, them in, just use those to sort of like kind of, tell the story of it, a little bit of grades in those, background areas, [Music], let's put up the last little bits, this last little spot just here, [Music], [Music], a little bit pink just like here because, i've got to do that a little bit, and dark gray, just a little bit here just behind this, kind of mouth area, just there, and just double checks make sure you, haven't missed any little bits i missed, a couple of spikes just up there, just give it a good looking over, and then if you're happy with it cool it, there and you're done, that is how you draw a dragon people, i hope that's helped you know i'll do a, few more if you like this one you know, there's, so many ways you know sort of drawing, dragons you know it's just one way of, doing it, but yeah i hope you enjoyed that make, sure you drop it like if you can you, know likes and comments are just really, helpful these things you know these, videos can be seen by a couple hundred, people a couple hundred thousand, it just really depends on how many likes, it gets and how many comments it's just, the way youtube works so, if you can it's really appreciated if, not just cheers for watching the video, people you know i appreciate it, but for now i'm a broken puppet and i'll, see you next time peace
Reddit Images 65
![Imperial Japanese Navy light carrier Ryūjō (龍驤 Prancing Dragon) underway on sea trials at Satamisaki-oki, 6 September 1934. Colorized image by irootoko_jr. [1000 x 1280]](https://i.redd.it/bfkwc45worj91.jpg)
Imperial Japanese Navy light carrier Ryūjō (龍驤 Prancing Dragon) underway on sea trials at Satamisaki-oki, 6 September 1934. Colorized image by irootoko_jr. [1000 x 1280] 0

Just finished this Japanese Garden coloring book page! It took FOREVER!!!!! 1
Dragon Coloring Page 2

Done by Hector Ruiz in Columbus, Ohio, USA. What (traditional Japanese) color should i make my dragon? Thank you! 3
My planner/ journal has these cute mood tracking coloring pages. This is next month’s page. It’s dragon themed! 4
![[ART] Honey Trap Shared House Color Page in Dragon Age issue 11/2022 to promote the release of Volume 2](https://i.redd.it/fm6801r03ks91.png)
[ART] Honey Trap Shared House Color Page in Dragon Age issue 11/2022 to promote the release of Volume 2 5
![[ART] Debut color page of When I Said, “I Want a Beautiful and Rich Girlfriend,” a Girl with Circumstances Showed Up (Young Dragon Age issue 12)](https://i.redd.it/fluem862fpk91.jpg)
[ART] Debut color page of When I Said, “I Want a Beautiful and Rich Girlfriend,” a Girl with Circumstances Showed Up (Young Dragon Age issue 12) 6

Turn The Page - 10 colors Japanese anime pixel art is minted on FND 7
For the colored pages usually at beginning of each volume: Why does the official English release have black/white pages when Japanese is originally colored? I can understand to save cost for printed edition, but digital releases? 8
Just finished another page of the coloring book. Page 6… I believe 9
New to Coloring Pages! https://www.etsy.com/listing/1195680618/printable-coloring-page-dragon-eyes?click_key=994e4b1a850a9e7c7d56198e5c1907afd0f1cd3d%3A1195680618&click_sum=b24cb5be&ref=shop_home_active_1 10

Screenshots from: Talons of pyrrhia. This game has a looong way to go before it can be considered good as at the moment it has a very small map, only three tribes, no coloring or name options and a lot of holes here and there. but both the dragon models and terrain are very good. 11
page coloring for ch 171. 12
Konomi coloring by @Shazayumart (chapter 93 cover page) 13

Dragonling Adventures! Every dragon has a unique story and coloring. They're only made once 🐉 14
![[No Spoilers] Digitally colored the cover page (not the actual cover of the book itself) of the Life Is Strange coloring book](https://i.redd.it/cdncsa6chuu91.jpg)
[No Spoilers] Digitally colored the cover page (not the actual cover of the book itself) of the Life Is Strange coloring book 15
![[Other] who is this villain on my son’s coloring page? It’s driving me nuts!](https://i.redd.it/ihia4i1szvi91.jpg)
[Other] who is this villain on my son’s coloring page? It’s driving me nuts! 16
Show more , Show more


Comments
Post a Comment