32 jackson pollock coloring page
jackson pollock coloring page
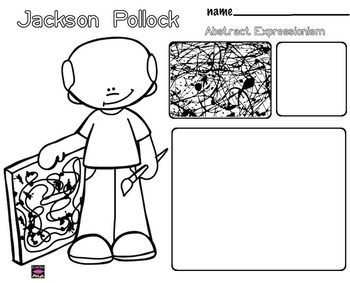
This coloring sheet is a great way to get your children active and ready to learn about the artist 'Jackson Pollock' More Jackson Pollock art materials for your classes If you and your class … 0

Nov 10, 2021 · Jackson Pollock Coloring Page / Jackson Pollock Colouring Sheet / Posted by fhermis tonodie on Rabu, 10 November 2021 Download this adorable dog printable to delight … 1

Jackson Pollock, Famous Artist Informational Text Coloring Page Craft or Poster 2
Tate Liverpool, 30 June–18 October 2015. Head your 'Jackson Pollock' display with this lovely themed banner! Features our own illustrations to help brighten up your classroom, and clearly … 3

Color through history's most famous and influential artists!This "My Art Museum" Jackson Pollock packet includes:Short Artist Biography Coloring Page (filled & blank)Artist's Famous Work … 4
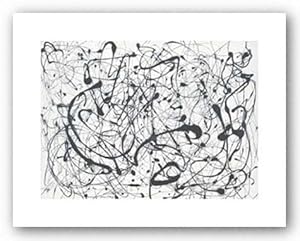
Amazon.com: (11x14) Jackson Pollock Number 14 Gray Art Print Poster: Pollack Print: Posters & Prints 5
Jackson Pollock Art History Printable Coloring Sheet/Coloring Page by KDCurbie $1.00 PDF This coloring page features famous artist Jackson Pollock and serves as a fantastic starting point … 6
The best free Sensational coloring page images. Download from 245 free coloring pages of 7

Jackson Pollock Coloring Pages Sketch Coloring Page 8

Jackson Pollock Coloring Pages Sketch Coloring Page 9
30 Jackson Pollock Coloring Pages - Free Printable Coloring Pages 10
Tuesday Tunes: A Playlist for Jackson Pollock - The Experiment StationThe Experiment Station 11

Preview: “Calligraffiti: 1984-2013” @ Leila Heller Gallery « Arrested Motion 12

30 Jackson Pollock Coloring Pages - Free Printable Coloring Pages 13
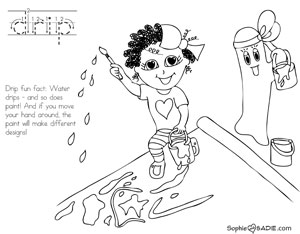
Coloring Page: Drip Painting and Jackson Pollack | Sophie and Sadie 14
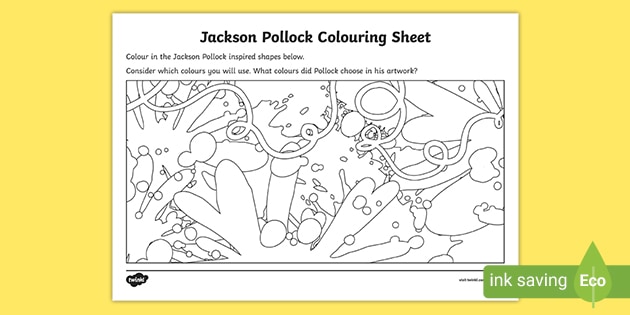
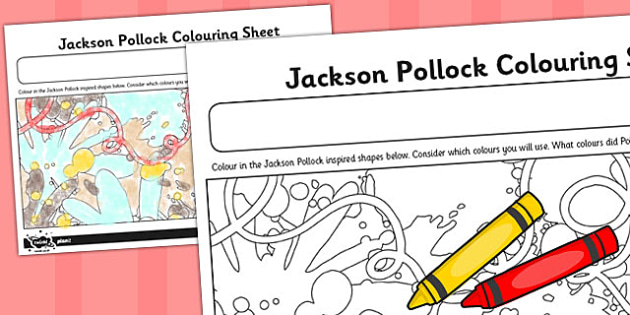
Jackson Pollock Coloring Sheet - color, sheet, jackson pollock 15
Jackson Pollock Coloring Pages Sketch Coloring Page 16
Jackson Pollock - Meet the Artist - Artist of the Month - Mini Unit Printables 17

Zaverack, L / Miss Zaverack's Art Worksheets 18

Jackson Pollock Coloring Page Fresh Letter P Panda Color by Number in 2020 | Animal coloring 19

Jackson Pollock Coloring Pages Sketch Coloring Page 20
30 Jackson Pollock Coloring Pages - Free Printable Coloring Pages 21

Jackson Pollock | Jackson pollock, Kunst ideen, Zeichenvorlagen 22

Jackson Pollock Kendall Conrad | Blog: Photo | Jackson pollock, Drawings, Pollock paintings 23

Jackson Pollock paper doll | Jackson pollock, Paper dolls, Pollock 24
 Jackson Pollock.jpg)
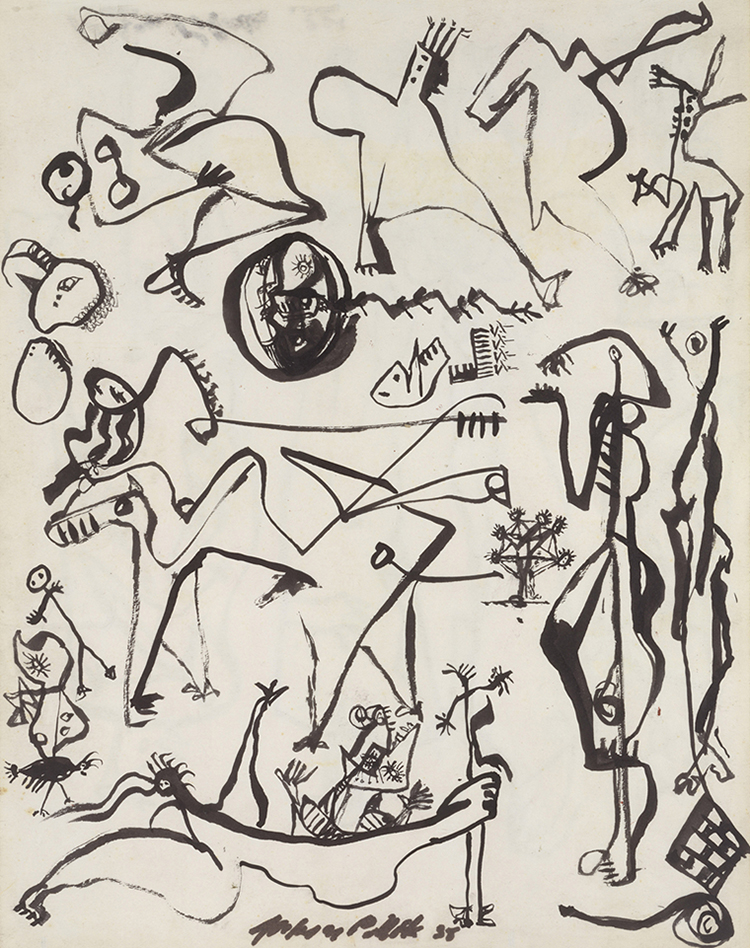
Jackson Pollock Drawings 25

Jackson Pollock Coloring Page Inspirational Jackson Pollock Style Stock S & Jackson Pollock 26

Jackson Pollock Coloring Pages Sketch Coloring Page 27

Jackson Pollock | Untitled, (1949) | Tecniche di pittura, Pittura, Drawing 28

Jackson Pollock sketch by dilmarjunior on DeviantArt 29

CHUMMADRAW: 447_Jackson Pollock: Paint what you are! 30

Jackson Pollock (1912-1956) Drawing Sketchbook : Lot 170 31
Jackson Pollock Coloring Pages Sketch Coloring Page 32

Jackson Pollock Coloring Page Inspirational Jackson Pollock Style Stock S & Jackson Pollock 33

Abstract Comics: The Blog: From a grid sketchbook 34
hey you for one Cody here and if you're, watching this video means that we've, reached 1500 subscribers and first off I, just want to say thank you again for, even watching my videos but second I, just appreciate all the support I've got, over the last year I think I gained over, a thousand this year which is pretty, nice saying is how last genuinely had a, couple hundred so it's not a huge huge, amount but it is a lot of growth, comparatively so I'm very grateful now, as a reward basically I said that once I, reached 1500 subscribers I would do, another large pollak style painting and, so here we are the canvas is right here, right below this the camera and it's, gonna be a 4x5 painting so pretty large, and we're gonna paint it outside but, first before we go outside to actually, do the painting and I will try to, narrate this video now that I have a, microphone it might be a little easier, I'm gonna try to narrate the whole, process as we go whereas before I would, just kind of talk to the camera in, between or I tell you what was going on, beforehand whatever we're gonna try to, actually I'm gonna try to narrate the, whole process as we go lastly before we, actually go outside and start painting, obviously I need to show you what we're, gonna be working with today as far as, the tools and the paint's that I'll be, using to make this Jackson Pollock, inspired painting so let's head over to, my table I'm sure you as a top down, where we're going to be using today and, then we will get to the actual painting, [Music], [Music], okay so these are the colors we'll be, working with, we've got kind of a dark purple here, I've got a turquoise white black gold, silver and whitish gray so it's a really, light gray that looks pretty cool, because it's separated so because it's, been sitting for a while, it's separated now what we're gonna be, doing I'm gonna go ahead you guys up, here we're going to be doing the, background now I'm gonna sit you up, because I'm gonna go ahead and stir my, paints while we're sitting here I'm, gonna explain what's going on with the, colors so we're going to be using the, this grey that I'm starting now and the, silver that's in the back so looks like, we got a little Fleck of something so, we're gonna be using the silver and the, whitish grey as the backgrounds so what, we'll do is we'll pour them on and we're, gonna pour them right on the canvas and, kind of mix them around probably with a, rubber squeegee to give us a tone of, background and then we will use the rest, of the colors as the actual topical, colors and they I don't feel like, there's enough contrast so I think I'm, gonna go ahead and add this gray and, we're gonna put that on the background, as well so we'll kind of do that we'll, do the background and then we'll come, back in and we'll set up the paint to be, used for the actual painting and there, we go we got a nice little star burst of, color so I'm gonna go ahead and move, this white aside cuz we're gonna come, back to it so we're gonna go ahead and, give this a good stir I haven't actually, used this one so it's a little little, thick give it a nice mix, all right now these homes are gonna be a, little thicker because I'm not gonna, dilute them we're just gonna put them on, a canvas and kind of fill the canvas, with the colors and then when we, actually get to the colors for the, painting those colors actually will be, diluted all right so I think that's, pretty good, those are stirred some of the throw some, gloves on and then we are going to head, outside and do the base couple, let me get these on right now we've got, to put these on when working with house, paint or gloss enamel because it is, super messy oh all right, real quick before I go any further let, me explain what paints I'm using this is, gloss enamel this is dunn-edwards it's a, local paint brand this is gloss enamel, so essentially it says right there, high-gloss al-qaida so this is gloss, enamels the type of paint that Pollock, used in essence right it's not exactly, the same but in essence it's the same, this is just an eggshell paint actually, so this is actually just regular house, paint that I'll be using for the, background reason is is this quality is, really good but also I have the paint I, kind of want to use it up and then here, we've got metallic PPG silver base so, this is actually something I got at Home, Depot so you can actually get the, metallic the gold and the silver at home, people at least I can it mine, so those are what we're going to be, using for the background the rest of the, paint for the actual painting again the, metallic is the PPG metallic but the, rest of these are all gloss enamel so, those are all from dunn-edwards they're, all high-gloss basically how's me so, alright now that we've got that, established let's go, had outside what's up the canvas and we, will paint the base coat okay so as you, can see I already have a small canvas, down the reason is because I'm hanging, on my driveway my driveway if you can't, tell is already ruined so I tend to, paint outside when I can now it is super, cloudy outside so I'm really hoping that, it doesn't rain that would kind of, complicate things a little bit but, anyway we're gonna go ahead and proceed, I've got my canvas here so here is the, big boy all right so we're gonna open it, up and lay it down and so the little, canvas that you saw on the ground is, actually for balancing it out likes, leveling it a little bit so it'll help, it so that the paint doesn't just all, run one direction like the band all, right, so Michaels special everyone I think, that's actually pretty good, looks like stop off screen a little bit, now you guys can see the whole thing, perfect so I'm just gonna check it real, quick and see if it's level I've got a, little bit of noise, all right so it's still a little high, this other side so what I'm gonna do is, I'm gonna put a little bit of cardboard, on earth so again this is to even it out, because the driveway is sloped so that, when we paint all the paint doesn't just, run off okay all right so we've got our, canvas ready now we can kind of move, into actually getting some paint on, there for the background and then, letting that dry again hoping and, praying that it doesn't rain so we're, just going to put quite a bit of paint, in one area so we're gonna kind of fill, this area here and then we'll put a, little bit more on this side yeah I, think that's pretty good if we need to, have more we can but that's always, easier to add more than this take it, away, kinda like cooking now alright so now I, put our dark grey on and we're going to, do Eastham out here I'll go ahead and, put some up here as well maybe over here, in the corner, it's almost like we're making the fall, excel painting already right but that, isn't what I'm trying to do here to be, honest although we will pretty much be, using sticks and some other things all, right so this light gray is really light, lighter than I thought, compared to the silver which almost, looks like it's kind of it's probably, hard to see on the camera here but, that's okay so I'm gonna do quite a bit, here in this corner over here alright so, now we're going to go ahead and move, this paint around and see if we have, enough on the surface so that the whole, thing is covered so we're just gonna, pull these things out, okay so this isn't giving me the look, that I want so we're gonna switch it up, actually going to use a brush so let's, just brush a lot of my brushes our room, because if you can kind of see it a lot, of these brushes are room because the, gloss enamel is it's just so thick and, it likes to doesn't like to come out of, stuff, well Fleck of something in there alright, so we're gonna go ahead and just kind of, I guess we're going to end up with a, really dark gray background which I, guess is okay so I kind of like this, technique anyway, [Music], using the brush to make a background I, just like the brush look that it it, creates especially if you have more, colors kind of overlapped in one area, now if I just wanted a solid background, I would just kind of paint over itself, and and allow the colors to mix but I, don't want a solid color I want some, kind of texture on the background so I, actually starting to kill my hand a, little so if I'd used a little bit more, paint I probably could have got some, more flattened out of it, what that's how it goes yeah well kind, of touch up and I think the whole thing, is covered so that background actually, yeah yeah pretty happy actually with the, background if if I just sold this, painting by itself it actually be pretty, pretty nice so let me go ahead and I'm, just gonna show you guys before we start, adding stuff to it what the background, looks like hopefully I'm not covering, the camera so it's got a lot of waves in, it you can kind of see just the, individual brushstrokes here so yeah, again not bad actually, alright so we're gonna go ahead and head, back to the table so we can set up our, other colors for the actual painting, alright so now that we're back in here, we're gonna get a couple of mixing six, got that and that you get two more okay, so what we're gonna do now is we're, gonna set up our colors to go on the, actual canvas so we're going to mix them, and then we're going to put them in here, and we're gonna dilute them so our the, paint normally when I do these I leave, the paint a little thick, I do dilute it to get it to move but a, lot of times I don't let it be too ruddy, I'm thinking of letting it be a little, bit runny ER today than normal when I do, this Pollock style painting the reason, for that is you get more movement so if, you leave it, like this like say I don't dilute this, at all it's going to give me a lot of, lines but it won't give me a lot of, splash but if I do dilute it too much, then it becomes just drops instead of, mines so you kind of have to find a, balance of how thick you want it to, create the effects that you're trying to, achieve so let's talk about the tools, that we be using today I'll probably be, using paint sticks but I've also got a, couple of of those I've got this thick, piece of wood that I pulled off of a, counter that my father-in-law have made, that just deteriorated over time so just, a thick piece of wood to create some, thicker lines I'm also gonna try a, baster I've tried it before in the past, and it didn't work out it just kind of, fell apart this feels a little sturdier, than the one I used before it's gonna, ruin this baster so my wife will, probably be pissed cause she doesn't, want me to use it but also we'll be, using this the the painting sticks I do, have a stick that I can use because, Pollock also used old paintbrushes so we, couldn't use an old paintbrush like the, back side of it but I'm thinking of also, using an actual be brush paintbrush so, I've got an old paintbrush that's pretty, pretty stiff the bristles are all kind, of baked together so I might actually, use that and then the back of this, paintbrush so those are the tools we'll, be using today to actually make the, painting so right now what we're gonna, do is we're gonna go ahead and stir, these and my right arm is already, killing me from I'm doing the brushwork, but we'll go ahead and give these a stir, all right I don't know if you can see it, there's like this one hasn't been used, at all so it's kind of separated I, actually don't think this is the color I, thought it was primitive plum yeah I, thought this was a darker purple but you, know we're gonna go ahead and use it, we've already got it opened this one's, actually a pretty pretty thin one, already, see the thing is is that these paints, even though okay so like these are both, I bought those stock right you can buy, why'd you can buy Blackstock but oddly, enough the paint's aren't the same, thickness so it's like the same amount, and everything the same type of paint, but like white is a super thick pink for, some reason I don't understand it, but it just it's just super thick right, out the gate but then like this color, was really thin so you know you don't, have to use as much water on these, thinner paint because they're already, centered I I don't know what's up with, that like I don't I don't know what the, deal is with house paint that you know, some paints are thicker than others I, know that when I went one time they told, me that because they're like the dye or, the base they have to use to make the, thing that's pretty much why but I guess, I don't I don't make paint so I know, exactly how that works okay we're gonna, finish stirring our paints here yeah the, white is like super thick and I've even, diluted it already but it's just it's, like I don't know the pain is just, literally thicker something so or, it just makes it more challenging okay, last thing we will do gold and then we, will go ahead and put the paint into, these cups and we will these these cups, are what we're gonna be actually, painting from not the dr. big gallons, actually I think I have some minicams, to be a little more maybe I sent it away, to some old paint cans okay so this way, we can you know be a little more, authentic at least aesthetically it'll, look that way all righty so we've got, all of our paints mixed so cool now what, we're gonna do is we're gonna go ahead, and pour dang it stupid label we're, gonna pour some of these paints into, these cans and then we're going to, dilute them so, can you guys see all of this cool I'm, gonna move everything back over just to, make sure you guys can see it oh okay so, we'll go ahead and pour that in there, and I don't know how much we'll actually, need so I'll probably go like a third of, the can and this label is coming off but, I have a feeling that the paint sticking, to itself it's probably gonna keep it, out of there, all right so we're gonna set that aside, fill this one okay selfies on the side, will do that's one already was gold fill, that with some gold again I I really, like gold is of color so I use a decent, amount of it and that black and white, which we're gonna need quite a bit of, black and white because I generally do, black and white as the base kind of like, the the first layers oh there's a big, chunk in there I guess part of the the, top of the thing there this oh it's a, toothpick interesting not even sure I'm, not even sure how that ended up in there, unless it's just a piece of dried paint, no no it's definitely a toothpick all, right and then we will go ahead and do, black so that about half way I'm sure, we'll use all these ones, now Pollock if you've never really, studied any of his work yet a lot of, black and white in his paintings a lot, of black and white strokes so that's, what we're gonna do give me a second I'm, gonna get drink cool so we're gonna go, ahead and dilute these now these our way, that you can see the different paints, cool alright so now now we're just going, to do again enough to make it runny but, not too much where it's just gonna, create dots and you can see this is kind, of thick right it runs off and it's, pretty it's pretty send out already well, we're going to add just a little bit, warm if you've ever really looked at, Pollock's work you know he has a lot of, dots like a little like splashes and, stuff which indicates that the paint was, really thin one but also he really had, to throw it to get it to splash and the, ways that you did I feel like this is, pretty good that's pretty soon you can, see it's just running off pretty easily, so I think that this lawn is probably, pretty good, alright so now we'll move on to purple, you can see this one's already kind of, thin like I said we're gonna start, adding a little bit of water and that's, probably plenty mix it up you can see, now let's just kind of give it a nice, little stir and that's pretty you can, see it you can tell basically when, you're doing the paint you can tell how, thin it is one when you're stirring so, like this one I can feel the resistance, of the paint while I'm just airing it, but two you can see how slow it's, dripping off when I pull this up okay so, it's it's moving but it's gonna move a, lot more once I add some water to it now, obviously if you're using oil-based, paint you would use thinner not water, but the paint's that I'm using are all, latex paints or water-based all right so, really get that work down move it off so, it's thinner but it's still not as thin, as I want it to be this thick how thin, it is is up to you and it really comes, down to just kind of messing with it, over time to kind of figure out what it, is that you're trying to do okay so, that's pretty good I don't want you know, water but I do want it to move very, easily all right so now you can again, you can see the white is kind of it's, coming off in a steady stream but we, really want it to move and the white is, a little thicker than the black one so, I'm really kind of break it down to get, it to about now actually here I think I, just added too much water I think that, that's actually gonna splash quite a bit, but that's okay we'll just use it anyway, because I honestly don't think that, Pollock's out there measured every one, of his his colors I think he just kind, of knew what he was trying to accomplish, you know diluted it to that and we're, not him so we don't know exactly what, you did we can just do what we want, because it's our thing all right perfect, all right friends so now we've got our, paints all mixed up all kind of ready to, go I think I'm gonna do a little bit, more to you because I didn't and really, put a lot in there I'm gonna go ahead, and have that just a tan water give, those a nice little stir yeah we're off, to the races, hi friends so I'm gonna go ahead and, move the camera back over to the canvas, and we will get started with this, painting, our eye friends I've got my paint and my, tools here and I've got them off-screen, again we're gonna start with black and, white because Pollock had the most black, and white in his paintings and also just, doing this myself i I just really liked, the balance that having black and white, does so we're gonna go ahead and start, with the baster and kind of see how it, does it makes like a suction noise, listen that's pretty interesting like I, said I last time I you that it didn't, really work what seems to be kind of, working I guess I don't really like the, design it's making but I do I I kind of, do like that splash right there alright, so we're getting some decent movement, I'm gonna say that this probably isn't, my favorite tool so I'm gonna set that, aside and we're gonna go ahead and we're, gonna move to using this big stick that, I've got here I need to find some to set, those give me a second okay cool, alright so we're gonna try this big, stick and see what kind of results we, get here all right so I'd like to, explain something you can see that, there's lines and there's dots the dots, is because it's too thin so when you, pull it off you can see that it's not, even creating a string so if it was, thicker it would create the, strings that you see here more often, so that is from the wiping really, thinned out but that's okay thanks, that's still I kind of like the, consistency it's gonna create some, vibrancy and you can see that I can make, the arc if I snap the paint and that's, what's giving us things lines, it's from snapping if I go really fast, it just creates dots but if I kind of go, slow slower this is what's going to, create the those wide really line large, lines right so the slow movements is, what gives you the lines the slow, continuous movements the quick snaps is, what gives you the dots so for future, reference okay well it's plenty of white, we're gonna move on to black and we're, gonna try this harden brush we're going, to dip that in there and I kind of like, kind of like the way that it's going, actually, [Music], [Music], now I can snap it and get some splashes, - or I can kind of side throw it and get, sparks that kind of erratic splash it, makes if you kind of snap it it's kind, of the more it's more what I like to see, in these types of paintings so I like to, do that the snaps okay now here's the, problem that we're running into before I, even continue you may or may not be able, to sit and I don't want to touch the, camera because I've got paint all over, my hands, but the paint's are starting to settle, okay so because they're still wet these, panes are starting to kind of absorb, into each other so we can do one of two, things I could leave it and just stop, where I'm at and let these layers dry, because that will create the distinct, layers if I keep going then the cars, will just continuously overlap, themselves and they'll start to pool now, if it was warmer outside and it didn't, look like it was going to rain I'd, probably let them dry and we would, continue them however because I think, that it's going to rain, and this painting is going to take a, long time to dry because it's not hot, outside today I'm going to continue okay, and I also want to I want to be able to, finish this painting for you guys on, camera so we're gonna push through it's, going to unfortunately make those, lawyers kind of bleed together but the, idea of the video is to show you the, painting from scratch now what I would, recommend at this point if you were, making one of these is to do one or two, layers let it dry so that it it creates, kind of a firm layer for you to continue, working on unfortunately here I can't do, that because I can't I have nowhere to, put this painting in my house or my, garage so I don't have a safe place for, me to store it while I'm waiting to you, know continue so we're gonna have to, push through so we're gonna move on a, gold, the only real tool that I have left to, use is as the back of the paintbrush but, that's not going to heal this much, because it's so thin we can use it too, if you want to get some tiny flecks like, I don't know if you can see the little, tiny flecks but yeah you can use it to, create really thin lines but it's really, no different than using the paint stick, for the thicker lines which is what I, like to do anyway so from here on out, I'm gonna go ahead and just use the the, stir sticks of the paint because, honestly that's kind of my favorite tool, for making these paintings anyway, because really it gets it holds the, paint it's large enough that you can, kind of control it and you get a decent, amount of paint with each kind of flick, right and so we're gonna kind of throw, the paint here and that's going to make, those erratic lines, [Music], all right make sure that the goal does, evenly distributed so we're gonna just, kind of throw some gold so a little bit, of drops right around the edges here, actually like the balance of this, painting a lot actually, okay so now we'll go ahead and throw in, a little bit of accent with our, turquoise and our plum and I don't I, don't really want a whole lot of it it's, really just to kind of break it out, [Music], alright more think around the edges, all right cool, now we'll kind of do our final color, here the plum and same thing we're not, going to do a whole lot just to kind of, give it some contrast, [Music], okay so essentially now that all of that, is on there what I would normally end, with is the black and white and I'm, gonna go ahead and do that but just know, that because the painting like the, colors are starting to pull together, essentially what's gonna happen is, you're gonna lose a lot of this the, distinct colors and layers because we, didn't allow it to dry and so it they're, those basically those colors are going, to pull together so if you make these, paintings like I said I've talked about, in other videos and you want those, distinct layers which you probably will, go ahead and let it dry if possible you, know do it somewhere where that's not, going to be an issue or if it was you, know summer and this painting was going, to dry and you know a few minutes that, it wouldn't be an issue like my neighbor, is driving by, and you can probably tell that the, colors are just kind of getting absorbed, I'll show you once we're done which I'm, actually down now because they weren't, dry they're starting to absorb into one, another it's a lot easier during the, summer when those colors are drying in, minutes well overall we're done so let's, go ahead and take a look and we'll talk, about it so this is the final piece it's, a that's the whole thing a lot of, different kind of workings here all, right so ultimately I think the the, colors were fine the background was fine, everything was good about the painting, except for the fact that the layers were, able to dry so it's really unfortunate, that I had to do it today, just because you guys aren't gonna be, able to see those distinct layers, unfortunately however I wanted to get, this video done for you guys and I, didn't know when I'd have a chance to be, able to so you know that's it, but you guys did get to see the, techniques and stuff and kind of the, tools so hopefully when we're able to do, the next one you know maybe it'll be a, little warmer and we can allow those, layers to dry but uh that's it guys that, is the whole painting I hope you enjoyed, the video at least for learning purposes, and that's pretty much it guys I, appreciate you and I hope that you have, an awesome rest of your day, you take care god bless you guys in the, next, [Music]
Reddit Images 75

Activists vandalized a Jackson Pollock painting; no one noticed. 0

Hard mode: Jackson Pollock's Magenta color-matched to Place palette, 100x102, reference scaled to 500x510 1

Jackson Pollock, Number 18 1950 2

Wake is Jackson Pollock 3

A woman who's makeup was applied by Jackson Pollock 4

Art gallery fails to notice after protestors cover Jackson Pollock painting with soup 5
Rob Zombie Portrait 'rob zombie portrait, painted in the style of jackson pollock and van gough.' 6

I like it, it's like a Jackson Pollock piece but with wire. 7
Jackson Pollock, Convergence (1952) 8

Batman drawn by Jackson Pollock 9

Sad: Climate Activists Vandalize A Jackson Pollock But No One Notices 10

Jackson Pollock meets Lisa Frank. Swipe for the before. 11

Climate Activists Vandalize A Jackson Pollock But No One Notices 12

Jackson Pollock painting of jesus 13

This is probably just me, but in Opus, from 5:35-onwards, that section reminds me of The Flame by Jackson Pollock. The combination of Issac singing about the rising flames, and black country, really stuck out for me, and the anxiety and chaos that this album produces also helped 14
Sad: Climate Activists Vandalize A Jackson Pollock But No One Notices 15

Jackson Pollock, anyone? PS I know know what nail polish tastes like… 16

Sad: Climate Activists Vandalize A Jackson Pollock But No One Notices 17
See more, See less , See more, See less


Comments
Post a Comment