25 how to create a coloring page
how to create a coloring page
Create coloring book pages by Aktanova | Fiverr 0

Make Your Own Coloring Pages From Photos Free at GetColorings.com | Free printable colorings 1

How to Make a Coloring Book | Coloring books, Coloring pages, Kids coloring books 2
Instant PDF Digital Download Coloring Page Hand Drawn | Etsy 3
Create a stunning adult colouring page in vector for you by Tehmeena_a | Fiverr 4

How To Create Coloring Pages at GetColorings.com | Free printable colorings pages to print and color 5
Create Your Own Coloring Pages With Your Name at GetColorings.com | Free printable colorings 6

Colouring Pages on Behance 7

Make Any Picture A Coloring Page With iPiccy - iPiccy Photo Editor Blog | iPiccy Photo Editor Blog 8
Turn Your Photos Into Coloring Pages at GetColorings.com | Free printable colorings pages to 9

Colouring Pages on Behance 10
Crafts,Actvities and Worksheets for Preschool,Toddler and Kindergarten 11

Coloring pages on Behance 12
Kids-n-fun.com | Coloring page Quiver dragonfly 13

Unusual | Coloring pages, Photo editing programs, Color 14

Coloring pages on Behance 15
Kids-n-fun.com | Coloring page Koi Koi 16
Lisa frank animals coloring pages download and print for free 17

Kids Coloring Contest Rules – Emperor Kids 18

Very Detailed Coloring Pages Printable at GetDrawings | Free download 19
Butterfly Coloring Pages for Adults - Best Coloring Pages For Kids 20
Kids-n-fun.com | Coloring page Quiver Bumblebee beetle 21
Kids-n-fun.com | Coloring page Quiver toys 22
Kids-n-fun.com | Coloring page Enchantimals Enchantimals 14 23
Free Valentines Day Coloring Pages for Adults - Easy Peasy and Fun 24
How To Make Unicorn Frappucino Starbucks Coloring Pages Printable 25

Pin on aramalar 26
Kids-n-fun.com | Coloring page Quiver shapes 4 27

Free Coloring Pages for Girls and Boys | 123 Kids Fun Apps 28
Holidays Coloring Pages - Best Coloring Pages For Kids 29
Getting Started with Printable Coloring Pages – Favoreads Coloring Club 30

From Photos to Coloring Pages 31

creating a coloring page - YouTube 32
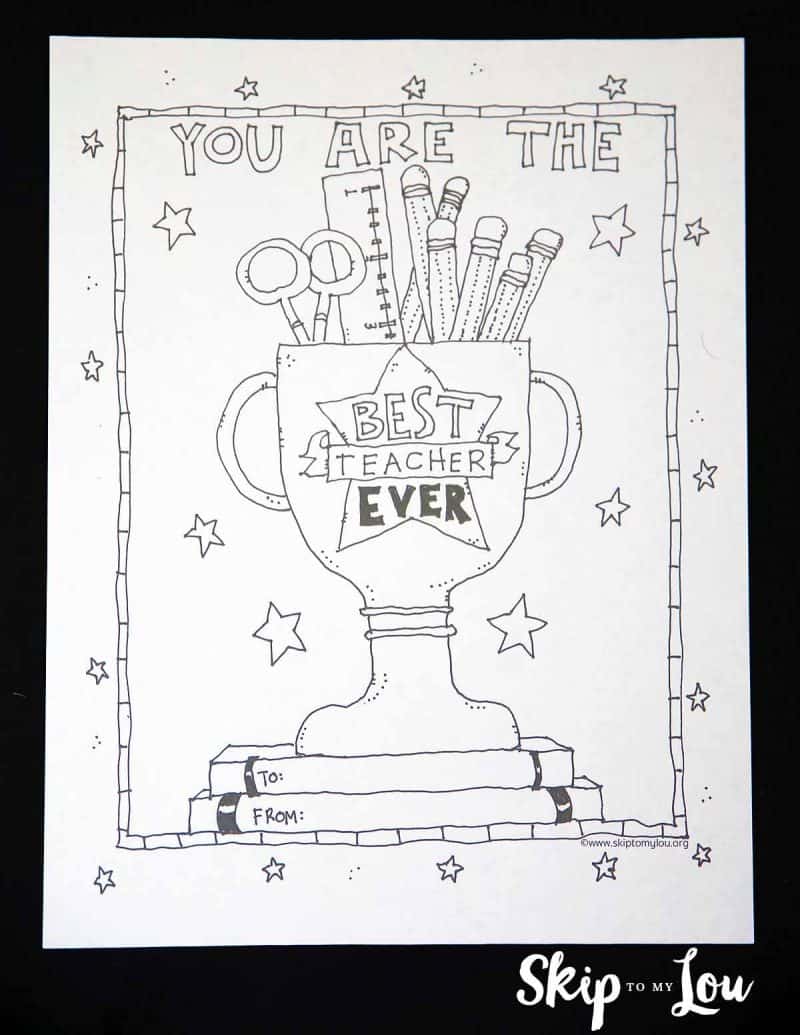
Best Teacher Coloring Page for the BEST teacher EVER! 33
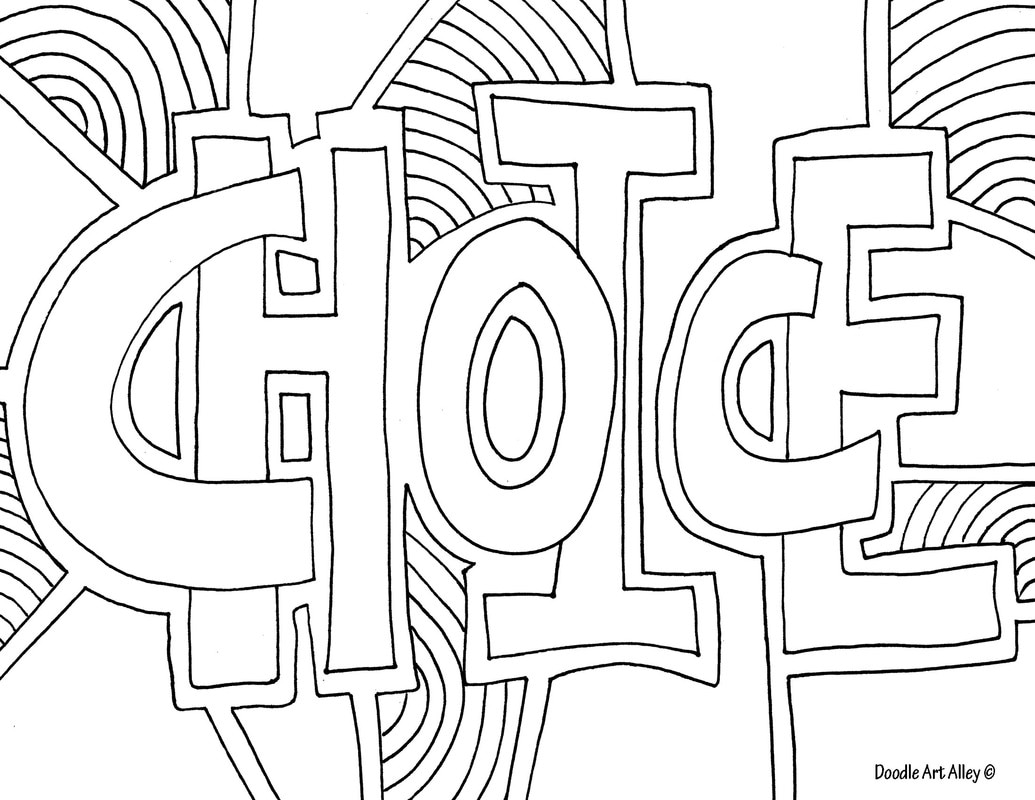
Word Coloring pages - DOODLE ART ALLEY 34
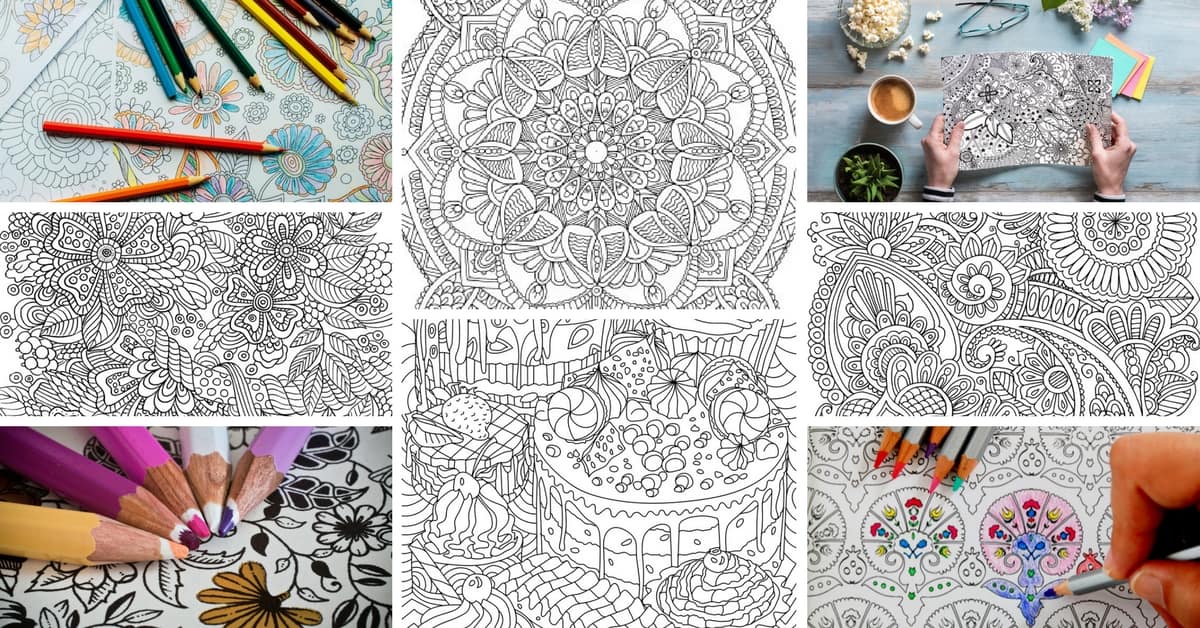
hey there and welcome to another edition, of low content publishing for beginners, my name is Rachel Harrison son so today, we're going to be talking about coloring, books coloring books have been a hugely, popular style of low content book on KTP, the last couple of years really really, started to explode a couple of years ago, especially in the adults coloring book, niche and you know this is something, that a lot of low content publishers, have really wanted to get into and the, thought of actually having to outsource, it can feel like it might actually be, really really expensive and you know, just cost prohibitive to do so but today, I'm gonna show you a little tutorial and, teach you how to create your own, coloring books in a really short amount, of time and you can even do this at zero, cost just by using a free imagery that's, already out there and a free vector, editing software like the one I'm going, to show you in this tutorial so let's, just dive right into the tutorial okay, so you're gonna need three things, to make your own coloring book the first, thing is you're going to need a vector, graphic that's what you're going to be, editing you're going to need a vector, editing program I'm going to show you a, free one here and of course you're going, to need a program to put it all together, and for a free version I'm going to, recommend canva so vector Z is a pretty, good free site to get free vector images, from they've got a really wide selection, and they've got some free and paid, options available and they're free, options are pretty decent so once you're, here at vector Z you can just type in, whatever you're looking for and I do, recommend choosing some sort of a theme, at first you don't create a really, generic coloring book you want to have, some sort of a theme whether it's, animals or dinosaurs or you know, whatever it is I'm just going to use, animals as an example, so whatever you're looking for you can, just type it right into the search bar, and then what you're gonna want to do if, you're looking for a free imagery then, just go over to the left menu here and, just click on free license and that's, going to filter out anything that's paid, now you do want to keep a few things in, mind when searching for images to choose, for your coloring book you want to, choose images that are simple and, preferably already have an outline, around them and just have a solid color, on the inside anything that's more, complex than that, even though it may actually be workable, it's probably just gonna be a little bit, more hassle than it's worth so you want, to find something that's already simple, at the outset so that you don't have to, put a ton of work into it so just as an, example here I'm just going to click on, this guy this is a pretty complex set of, illustrations there's a lot of shading, in there a lot of gradients and things, like that that's just going to be too, tricky to deal with so we want to steer, clear of anything like that things, that'll work well are things like this, this one has just got outlines and solid, fill colors so that would be workable, something like this would probably be, pretty easy, if you wanted to go a bit more complex, you could even do something like this, this obviously looks like a far more, complex illustration than the last, couple I showed you but this one still, has solid fill colors and outlines so, this would still be workable now I've, already gone through and I have selected, this illustration for myself now there, are two ways you can go about this one, is you can select files that only have, one illustration per file you can decide, how many pages you want your coloring, book to be and then you can just round, up that many images if you want to make, this even easier then you can look for, files like this where there are multiple, illustrations in one file then you can, just download the one file and the great, thing about something like this is that, all the illustrations in the file are, going to be a similar style so that's, something to kind of think about if you, are just downloading files with a single, illustration on each file you're really, going to want to pay attention to if the, Styles all look cohesive between them, one way you can do that is you can just, look for images that have been created, by the same artist and then oftentimes, even though they may have multiple files, with a separate illustration on each, each file because they've been done by, the same artist they will actually have, a similar style to them because you do, want this to look cohesive at the end of, it oftentimes though you can find a file, that has five ten or even twenty or more, smaller illustrations within the file, and those are great if you can just, download one of those and have enough, images in there to create half or even a, full coloring book that's fantastic okay, so once you've chosen your image we're, going to download the image now you are, able to edit images directly in vector Z, they've got the back DZ editor and if, you wanted to do that you could just, click on this button right here and that, would take you to in in browser vector, graphics editor but I'm not going to, recommend it for this because there are, a couple of key features that the vector, Z editor is missing and that's going to, just make things a little bit more, difficult for us so we're going to, ignore, that for now it does have some good, features though so if you wanted to play, around with it be my guest but for now, I'm just going to download this vector, okay so the next step here is we need to, have a vector graphic editing software, now if you've got illustrator at home, that's great that is definitely the, industry standard when it comes to, vector editing software but if you're, looking for a free alternative there are, a few different options out there some, definitely better than others now for, this tutorial I tried out probably about, five or six different ones and each one, seemed to have a different failure at, some step of the process the one I did, find that's probably going to be the, most useful that does everything that we, wanted to do is grab it this is a pretty, powerful vector editing suite and it's, got everything that we are going to need, there is a free version and a paid, version but the free version does offer, everything that we need so that's great, now if you're looking for something that, is a true replacement for illustrator, that is free you can check out Inkscape, I did not do that because Inkscape is a, bit of a pain to use with a Mac so if, you are using a Mac it's gonna be a, little bit of a pain you have to, download additional software to allow, Inkscape to work on your Mac so I just, didn't even want to go there, this I thought was kind of a nice, compromise it's got everything we need, and we're totally gonna be able to get, by on the free version so once you're, here you can just click try it now and, then you can just go straight to get, started now first thing we're gonna do, is we're gonna set the size of our, document so it's a good idea to just, keep in mind what size you want your, final coloring book to be for me when I, think about kids coloring books anyways, they're usually about an 8 by 10 or an, eight-and-a-half by 11 or something like, that so I'm just going to go ahead and, I'm going to choose 8 by 10, going to hit create, now just a quick side note here you're, gonna see at the bottom this trial 15, days left don't worry about that, as soon as you sign up for this Gravett, designer it's gonna just kick you, directly into the pro version and then, when the 15 day trial is over you're, just going to have some of the features, removed you don't have to enter any, information on this you're not entering, a credit card or anything like that so, you're just being given, you're just being given the full suite, of features for those first 15 days and, then at the end of it you'll be asked if, you want to sign up for pro and off the, top of my head I can't remember I think, it's a monthly subscription and if you, don't want that fine you can just stick, with the pared down version and you, should still have all the options that, we are going to be using for this, tutorial so now what you're going to, want to do is you're going to want to, import that file that you just, downloaded so I'm going to go to file, open local file I'm going to click the, folder that I download it and you're, gonna see a dot a is VG and a jpg you're, going to want to use the dot SVG and, we're gonna click open and now our file, is ready to be edited, now one thing you'll notice is even, though we set our initial page size as 8, by 10 once you upload an image it's, going to just take on the size of that, image so unfortunately we are going to, have to set that size again not a, deal-breaker just a little bit of a pain, so we're just going to go over to the, right here - page size and first make, sure the unit is in inches and we're, going to go over to here and we're going, to have 8 by 10 again now we're just, going to select that and resize it to, fit, next thing we're going to do is just get, rid of this cream-colored rectangle we, don't need that and because I'm not, super keen on working on a transparent, background all the time I like to have a, solid color I'm going to go back over, here and I'm just going to click on the, white background color and now I've just, got a solid background to work against, next thing we're going to do is we're, going to create the amount of pages that, we're going to need here so in my file, I've got six separate illustrations I'm, going to want one of these on each page, so I'll go to create six separate pages, that's going to be really handy when it, comes time to export all of these, illustrations it's going to export them, all individually and then we can place, them all individually into our actual, coloring book file so I'm going to go, over to the pages palette here and I'm, going to hit the create new page button, five times so I've got six pages then, I'm going to toggle this switch which, puts us into multi-page mode and I'm, going to go up to this button fit all, and now I can see all the different, pages all at once, and then I'm just going to put each, illustration on its own page, now we can toggle in and out of, multi-page mode whenever we want so I'm, going to be working on this page now so, I'm gonna toggle out of multi-page and, now I'm just on single page, next thing I'm gonna want to do is I'm, gonna want to scale this up now this is, where I'm just gonna mention another, little bit of a quirk here because we're, using a bunch of free software's it's, not going to be as seamless of a process, as if we were just using illustrator, straight into InDesign so just a couple, of things to be aware of because we're, going to be using canva to create our, actual coloring book file canva does, accept SVG files but they're pretty, finicky with them so what I recommend, when it comes time to export this we're, going to export it as a JPEG so that is, why we need to scale this up to the size, that we want at the end of it now so I'm, gonna scale that right up if a coloring, book is about 8 by 10 then I'm gonna, want it probably at about that size once, I'm happy that the final size is about, what I'd like it to be now I can go, about actually turning this into, something that we can use for a coloring, book so first I'm gonna select the, illustration then I'm going to go up, here to the ungroup button I'm going to, click that and now all of its separate, components are going to be available for, me to edit individually so I'll just, select the first shape that we're going, to work with here okay so we're going to, just go over to the fills button here, don't click on that eyedropper we don't, need to worry about that right now, you're just going to click on the actual, colored circle and we're just gonna go, down to white then we are going to go to, borders same thing but we want that to, be black color fill is the default, option so we're going to hit that and we, are just going to choose black, now that black line is pretty weak so, we've got to want to beef that up a, little bit probably to about 3:00 we'll, see how that looks you may even want to, try four you can just play around with, that depending on your illustration so, this is essentially what we're going to, do to each one of these components and, that is how we're going to get the nice, black outlines for our illustration now, if you want to speed up the process what, you can do is just select all of the, objects at once and do what I just did, with that first object now chances are, some of these objects are going to be, treated slightly differently so you'll, then want to go in afterward and make, any small adjustments that you see fit, so I'm just going to grab them all we're, going to go to Phil's we're going to, make all of the Phil's white and then, we're going to go to borders and color, Phil will make all of them black, and again we're going to choose think I, had four all right so that's a great, start but as you can see there are a, couple of things that don't quite look, right here so the eyes and the nostrils, those actually look better as solid, black with no border so let's adjust, those again actually I think the mouth, as well so we've selected all five of, these separate shapes here we're going, to go back to fill we're going to choose, black we don't want any border at all so, we're going to hit zero all right so, that's looking good again now another, thing you'll notice is that the ears are, now appearing to be in front of the face, when we want them to be behind the face, so we're going to select all of the, components of both ears you're going to, go to the top toolbar here, and there's these send forward and send, backward tools we are going to send them, backward now depending on how many, layers this particular illustration is, made of you may have to hit this, multiple times until it gets behind the, layer that you want it to so if nothing, happens with the first couple of clicks, just keep going and it will happen, eventually and you'll see to the left in, this layers palette you'll see them, actually moving down okay so now they're, finally sitting behind the head so now, this first illustration for your, coloring book is finished and we can, move on to the next one so again you can, just toggle a multi page here and if you, want you can go to fit all okay and now, you can just move on to your next page, so let's look at something a little bit, more complex we'll head down to this, bottom page here we'll just toggle out, of multi-page mode so that it just, brings up this one page and again the, first thing I'm going to do is I'm just, going to scale it up to how big I think, I want it on my 8 by 10 page, so that looks about right again I'm, going to click it and I'm just going to, ungroup it and again if you want you can, just select all the components at once, apply the same a fill and border and, then just go back and fix anything that, doesn't look quite right so once all the, components are selected I'm going to go, back to fill I'm going to choose a white, fill and a black border, and then I'm going to make the border of, four points, okay so again it's a good start but we, need to do a little bit of manipulation, here so I'm going to start by grabbing, those eyes, you, and this portion of the beak and I think, this grass too, I'm going to choose a black fill for, those, and I'm going to get rid of the border, altogether now I've just taken a, screenshot of the before of this picture, so I can kind of compare it to what I've, got going on with my edited illustration, here so as you can see this green patch, was actually consisting of two separate, shapes so that looks a bit off so what, we're going to want to do here is just, combine those to make it one shape like, it is in the one below and to do that, we're going to use what an illustrator, would be called the Pathfinder tool but, in Gravett, you're going to choose create compound, shape, and you're going to click that and that, will instantly combine the two shapes so, I'm going to get rid of this now I'm, just going to zoom in a little bit and, just take a look and see if anything, else needs fixing here so that's looking, a bit weird it looks like there's some, sort of layer order thing going on there, so again I'm going to bring that to the, front, there we go now that's sitting on front, I'm just actually going to nudge that up, a little bit this is sort of a weird, thing that was going on here now that's, covered up okay so now that we're, getting into the nitty-gritty detail, here I'm going to zoom into this area, you can kind of see it's not quite, attaching quite the way we want it so, I'm just going to click that and I'm, going to head over to the borders panel, here and I'm just going to click on the, advanced stroke settings I'm going to go, to joins and I'm going to hit round we, do that that just kind of caps off that, edge there you can see before it was, just kind of cut at an awkward angle, straight up and down when you hit around, it just gives a nice round end to it and, that obviously looks a little bit better, again we've got a little bit of an, awkward area in here, so I think I'm just gonna move the shell, down a little bit just to get rid of, that and then that top part of the shell, can come down as well so that now looks, pretty good and now I'm just going to, move on to the next illustration now, what you can do before you export these, is you can select the page and we're, gonna head over to the page palette over, here and we're gonna click this button, trim canvas that's just going to trim, the canvas down to the size of our, illustration now you might be confused, at this point because we went to the, trouble of actually creating pages that, were the size of our coloring book the, only reason we did that is because of, the challenge I talked about earlier, where if we're importing this into canva, we're going to have to do it as JPEGs so, I wanted to create 8 by 10 pages in the, beginning just so I knew how much to, scale up these illustrations if you're, working in a program other than canva, then you wouldn't have had to worry, about page size at all throughout any of, this process but since we're going to be, using canva today I created my pages at, 8 by 10 so I could scale them up to the, size I wanted them to be so that when I, export them as JPEGs they're going to be, at the final size and the reason I'm now, fitting the page to the selected artwork, is just to make the file smaller so, these are the two that I've done so, these are the two were going to work, with now a good idea before you export, all of these as well is to just name, your pages which we can do in this, palette so the two I'm really concerned, about are the pig and the chicken and, then we're going to go to export so file, export advanced export you're going to, have all the different pages here with, the names that you've given them we're, going to select jpg only because we are, going to be using canva if you're using, a different program that isn't finicky, with SVG you can just keep it as an SVG, what you don't want to use is PNG PNG is, not for printing so that's not going to, be suitable for us, keep the size as is JPEG quality we want, to the highest possible and background, we'll just leave that as is and we'll, hit export all and that's just going to, wind up your downloads folder so next, thing we're going to do is we're going, to head over to canva and if you haven't, signed up for canva go ahead and sign up, for a free account we're going to create, a design with custom dimensions again, I've decided to choose 8 by 10 I'm going, to hit create design, and I'm gonna start uploading my files, so we'll go to uploads you can either, drag your images right into here or you, can click upload an image it's going to, be in the zip file so you'll have to, unzip that first and I'm going to choose, Pig and I'll just plop that in there, once it's in this panel I can just drag, it right onto my page so if you just, drag it you'll know that it's centered, because you're going to get this, vertical line here same with if you kind, of move it up and down slowly you'll get, that pink crosshairs that's going to, tell you that it's perfectly centered in, your page and then we're going to add a, new page, we'll throw our chicken in there, you, you, alright that is centered, and if you want you can just select all, of them at once, we'll just grab these other pages that, we didn't complete and then you'll get, all of them uploading at once and again, you're just going to hit add new page, for each page of your coloring book and, of course if you want to add a page it's, beginning with some sort of you know, this coloring book belongs to or any of, your copyright information you can do, that in here so I've added this blank, page if I want to put this at the, beginning I can just click this move up, button here now that's at the front I, can click the text icon here and we'll, get a bunch of different type treatments, that I can choose from which is great, these type palettes are great for, getting some really nicely, professionally designed font pairings, without actually having to do any of the, work yourself so once you've found a, type treatment that you like you can, just click on it and it'll end up right, in your book and then you can just click, right in there and you can change the, text to whatever you want now obviously, you're gonna want to choose something a, little bit more exciting than that but, just for example say can you get the, point and of course if you want to add, anything else to your coloring book, pages while you're in here feel free you, know maybe instead of just having the, illustration maybe you want to have a, word in there as well, for this one I don't know what is this a, chicken we will just call it the chicken, for now anyways you get the point you, can just add whatever you want in here, and I just keep in mind the minimum, number of pages for a book published, through KDP is 24 so you're gonna need, at least 24 of these illustrations and, then obviously keep in mind you're gonna, want to do a cover as well which I also, recommend doing in canva and you can, check out my video on how to create a, cover in canva if you're not sure and, once you're ready to download this you, can head up to the publish button here, first off you could change the name of, the file here the coloring book or, whatever you want to call it and then, we're going to hit publish and you're, going to want to download this it's, going to suggest PNG which you, definitely don't want scroll down to PDF, print high-quality you're probably not, going to want a bleed on this because, most of the images are going to be, contained within the document and you're, going to want to make sure that all, pages are selected then you are going to, hit download, so here it is here is our coloring book, the first couple of pages anyways so I, hope after this tutorial you can see, that it's probably not as difficult as, you might have thought it is to create a, coloring book on your own using, completely free software and free images, now I showed you a pretty basic version, here using really simple illustrations, you can absolutely get a little bit more, complex than this you might have to, spend a little bit of time just playing, around in whatever program you're using, to get the hang of it but this is kind, of you know the bare minimum of what you, can do and if you're doing something, geared towards kids like this one then, simple illustrations like this are, perfect of course adult coloring books, are all the rage now so you might want, to think about slightly more complex, illustrations which obviously still, doable it's just going to take a little, bit more time to edit all of those, outlines and fills and get the outline, of the drawing and removing those color, fills but at the very least I hope you, now feel confident in your ability to go, out and attempt one of these for, yourself no matter how simple or complex, you want the final product to be again, after trying probably about five, different free vector editing software's, over the last couple of days Gravett was, the one that I thought was the best in, terms of its functionality and the, different features that it offers I have, heard that Inkscape is probably closest, one to illustrator that you'll find for, free but again if you're on a Mac like I, am there's some third-party software, that you've got to download which just, was a bit of a pain in the butt so I, just didn't want to go there if you have, questions on anything I've done in this, tutorial feel free to just leave them in, the comments below and if you attempt, this on your own then you know let me, know how it goes and if you run into any, problems or whether or not you are happy, with the final results alright thanks, guys
Ask HN: I need your help. Trying to develop secure and anonymous emailhttp://securmail.launchrock.com/
Hi guys, I have a problem and I need your help: me and a couple of my friends decided to create a web service for free anonymous and secure mail after hearing about the NSA debacle(Lavabit closing his doors). We created a launch page to get email for people to try out the service as beta tester. Just go check it out and if your are interested, signup.
If you have suggestions, don't hesitate. We are working hard to build something great and useful for everyone. If you could share the service to help us out too, it would be awesome. Thanks
Really, it all comes down to how you want to protect your data. Now that we know Google's been working with the NSA and other email services. There aren't many options left for secure email.
Ever since news of PRISM broke, there's been a lot of confusion and denial about exactly how the NSA is getting the data from the companies that have been collecting it. Now Google's fessed up to the details, and it's unsurprisingly simple: by FTP or even by hand.
With what we are building, it would be basically impossible to do. Built on AES-256 Encryption and Host Proof Hosting, ensuring that your sensitive data is never accessible to anyone but you. We never have your un-encrypted data. Even if our servers were hacked your emails would be safe and when you delete an email, it is not recoverable(US DOD, 7 passes). We do not log any traffic or session data. For this reason, we’re unable to identify any user of our service.
Here is the launch page: http://securmail.launchrock.com/.
,Launchkit.io is shutting down July 31 – Do you need to migrate your services?tl;dr - Launchkit is closing down and we have a replacement - apptoolkit.io
If you used any of the Launchkit services and need a new platform for them, we'd hope you'll take a look at AppToolkit.io
Right now we have:
Screenshot Builder - You can make a single screenshot set for free, or get a pro account and make as many sets of screenshots as you need and annotate them. Multiple phone types you can place your screenshots in (including horizontal) and plenty of font and color options. Pro - $19 a month
https://apptoolkit.io/screenshots/
Website Builder - Create an app landing page from your app store data. Multiple templates and also a pro version that lets you add more features to your website. Pro - $9.99
https://apptoolkit.io/websites/
Review Monitor - Have your new iTunes reviews sent to you via email or slack. Currently free, but going to create a pro tier for more than 5 apps tracked and also add in more channels where your reviews can be sent. Free
https://apptoolkit.io/reviews/
Cloud Config - Edit your app features from the cloud. Hide features until you're ready for release, change settings, do what you want without needing to resubmit your app to iTunes for approval.
https://apptoolkit.io/config/
Super User - With the AppToolkit SDK, you can find out who your best users are. We track how often each user opens the app and how long they stay in it (along with some tracking of events). This tracking is very resource efficient, and shouldn't be noticeable at the user end at all. You can target super users for extra attention, easter eggs or review prompts (your best users are probably going to give you the best reviews).
https://apptoolkit.io/users/
SDK (Cloud Config and Super User) - Free for the first 1000 MAU, $0.001 per MAU above that (so $10 a month for 11,000 MAU).
If you'd like to try the Screenshot Builder or Website Builder, email me at info [at] apptoolkit.io and I'll give you a half off for 6 months coupon..
,Launch HN: Payload (YC S22) – Headless CMS for DevelopersHey HN, my name is James and I founded Payload (https://payloadcms.com/) with two close colleagues, Dan and Elliot. We're a dev-first headless CMS [1] that's half app framework and half CMS—we're closing the gap between the two. You can check out our demo here: https://demo.payloadcms.com.
Imagine you're going to build a new SaaS app. Would you think of building it on a headless CMS? Probably not. To devs, "content management system" is usually a swear word. If a team of engineers gets assigned a CMS project, it's less than thrilling. Engineers want to avoid roadblocks, write code, and build things they're proud of—but existing CMS's get in the way of that left and right with their third-party integrations, point-and-click schema designers, code generation, etc.
Rather, you'd build your backend on an app framework like Django, Laravel, etc., for good reasons: ownership over the backend, better access control, customizable auth patterns, etc. Typically, headless CMS are super limiting; you'll end up fighting the platform more than having it help. But, with app frameworks, you're often left to roll your own admin UI, and that takes time. Not to mention building CRUD UI gets old quick after you do it a few times.
That’s where a headless CMS could shine, because they instantly give you admin UI that non-technical teams can use to manage digital products. That saves a ton of UI dev time— but without an extensible API, headless CMS's are far too limiting. They're designed for marketing teams, which usually only need the generic basics: log in, create a draft, preview the draft, publish the content. Go back and update some pages. Define editor roles and localize content. If you need more than that, you'll soon be out of luck.
Payload is different because we treat developers as first-class citizens. We provide the best of both ends: a powerful and extensible API and a fully customizable admin UI out-of-the-box. All with a developer experience that we obsess over, because we want it ourselves.
Payload is code-first, which allows us to get a lot of things right. We give you what you need, then step back and let you build what you want in TypeScript. You'll understand how your CMS works because you will have written it exactly how you want it. Version control your schema and use your own Express server. Completely control the Admin panel by using your own React components. Swap out fields or even entire views with ease. Use your data however and wherever you need thanks to auto-generated, yet fully extensible REST, GraphQL, and Local Node APIs.
Since it uses your own Express server, you can open up your own endpoints alongside what Payload does. In fact, you can extend just about everything that Payload does. It's MIT and open-source, fully self-hosted, comes with GraphQL and REST APIs, and completely customizable.
We realized the need for Payload while we were building the corporate website for Klarna. The Klarna engineers we were working with were among the best in the world, and while they evaluated headless CMS options, they saw restrictions in how all of the normal contenders "black-box" away the API. They wanted to build their CMS, deploy it on their own infrastructure, and truly "own" their CMS. They fell back to using WordPress. When that happened, Klarna inadvertently shined a spotlight on the CMS market and pointed out a significant void in proper code-based, developer-first CMS. There was no one to give them the developer experience they needed. That's what got us started working on this.
It might seem like a CMS is just a wrapper around a database with a nice UI to show different field types—but in reality, it's a lot more complex than that. We obsessed for years around how to build a proper API that minimizes breaking changes, but still exposes a simple way to extend everything. When you start to introduce things like field-based access control, field-based conditional logic, localization, versions, drafts, and autosave, the task becomes a lot more daunting. Doing it right requires a significant development investment—especially if you want it to perform at scale in addition to removing roadblocks at dev time.
It seems like every day, a new headless CMS pops up. But when you filter down to those that are completely self-hosted, the options quickly dwindle. And then when you remove the confused point-and-click "no-code" (argh!) GUI nature of the existing options, the options narrow to one: Payload.
Our users have built quite a diverse set of apps on Payload. We've seen a virtual events platform, a broadcast platform, SaaS apps of all shapes and sizes, video games, and an Uber-like snow plow service! There are over 1,000 projects in production as of last week, and we can't wait to see more.
Open source has been incredibly helpful. We've gotten significant PRs and our community has gone above and beyond in their contributions. We did not anticipate the level of skill and involvement that we are seeing daily from our community.
Our business model is based on two things:
1. Enterprise features like SSO, audit logs, publication workflows, and translation workflows. Of course, as Payload is open-source, you can build these functions yourself, but enterprises are opting to pay for our official functionality and SLAs rather than rolling it themselves.
2. Cloud hosting. Now that Payload 1.0 is released and ready for production after more than two years of development and dogfooding, we've shifted focus to building a deployment platform for Payload that will deliver permanent file storage, database, API layer, and CI. It will be the easiest way to deploy Payload, but not mandatory to use—much like the NextJS and Vercel model.
You can get started in one line by running `npx create-payload-app` or you can try out our public demo at https://demo.payloadcms.com. The code for the demo is at https://github.com/payloadcms/public-demo.
We would love to hear your feedback. If we don't have something, we'll build it. If there's a sticky spot in the DX (developer experience), we’ll fix it. Looking forward to hearing what you think—and thank you!
[1] Quick refresher: CMS stands for "content management system" and headless just means API-based, with no restrictions over where you use the content on the frontend..
,Launch HN: GoLinks (YC W19) – Internal short links for teamsHello HN!
We’re Jorge, Kevin and Sean and we’re building GoLinks (https://www.golinks.io).
GoLinks is a platform that allows you to easily manage and share links by letting teams create a short link for any internal URL within a company. These links are easy to remember and share, so you don't have to bookmark or copy and paste them in emails.
Each day we use and share hundreds of links to get our jobs done, without considering how long it takes to access and share these resources. It’s one reason why many of us leave tabs open in our browser: we don’t want to spend the 5 to 10 steps to navigate back to that important page. With GoLinks, you’ll be able to deep-link directly into any application with just a simple keyword entered into your address bar. This allows links to be conversational. For example, one employee can create the keyword “go/review” to point to the annual review page in Workday. Later in a meeting, that employee can mention, “Remember to visit go/review to fill out your annual reviews!” Now anyone in that meeting can remember and access the link “go/review”, without digging through their email or Slack.
Golink systems are commonly used in many big tech companies such as Google, Linkedin, Twitter and Airbnb, built by internal tools engineers in those companies. These systems have become an integral part of the way tech companies share internal links.
When we started our careers in tech, we would often visit each other for lunch at these tech companies and we began to notice the same go/links everywhere. In the hallways, cafes, break rooms, posters. fliers and TVs, there would be these keywords prefixed with “go/” that allowed employees to quickly access information on their devices. The employee could enter a shortened URL like go/food into their mobile browser, or desktop, and could access the lunch menu for that day. An easy and simple concept, but an extremely powerful method for internal communication.
Although these systems are ubiquitous in large tech companies, we noticed there was nothing on the market that catered to startups, midsize, or non-tech companies. Companies usually don’t have the time or the resources to build sophisticated internal tools, so we set out to create GoLinks as a Service.
The challenge was building an internal tool for companies that may not have any internal infrastructure. For example, large tech companies have infrastructure so when you connect to the company Wifi or access the VPN, you can access the internal company network. This allows users to access the “go” domain on the network, which resolves the deep link redirection. For smaller and midsize companies, employees might be 100% remote or working in a coworking space, or maybe the company never got around to setting up an intranet. We had to build a product that did not rely on assuming internal infrastructure.
We were able to replicate the functionality of an internal network, and the simplicity of a short-link redirect system, by creating browser extensions for each of the popular browsers. The extension would proxy the “go” domain to our server and we authenticate and redirect the user to the correct location. Now coworkers can be on any network and any wifi, and as long as they authenticate in their current browser, we can find their company’s internal links.
We are startup-friendly—anyone under 10 users can get started completely free—but our main initial focus is on enterprise clients.
If you’ve ever used our GoLinks or any company's golink system, let us know how it’s changed your daily workflow. Thanks for reading. We appreciate your ideas and feedback!.
,Moo.com shuts down Flavors.me (acquired 2012)Hello,
With regret, we’ve made the decision to close down Flavors.me.
Due to a change in strategic direction, we've decided to move resources to focus on other digital projects and MOO's core heartland - helping businesses of all sizes look their best with beautiful printed products.
We fully appreciate how frustrating this is and hope you understand that we’ve deliberated over this decision for many months. Recent issues with Flavors have forced us to look very carefully at the service we provide and we no longer feel we can offer a robust service into the future.
We’ve already disabled new sign-ups and in the coming months we will begin to retire parts of the service. Due to this, we will be closing all free subscriber accounts on 31st March 2017. You are more than welcome to continue using Flavors until this date, but we’d encourage you to start looking for an alternative solution.
Below are a couple of suggested tools for building an online presence, from companies that we know and trust will provide a solid platform and a good customer experience.
Squarespace: We are excited to offer 10% off Squarespace for your new website. Try Squarespace for free, and when you’re ready to launch, get ten percent off your first purchase with the offer code FLAVORS10. This offer is effective through March 31, 2017.
About.me: A simple way to create your free, one-page website in just a few minutes. There are paid upgrade options available if you want to use your own domain.
As it isn’t going to be possible to automatically migrate your existing Flavors content, if you have any questions please feel free to get in touch with us via support@flavors.me
Best regards,
Flavors Support.
,JackTheDonkey.com. A Socially Responsible Social NetworkHi there,<p>My name is David Katz and I have recently launched a social network called JackTheDonkey.com. JackTheDonkey.com is the community where your time online supports the charity of your choice. Or what some call, a socially responsible social network.<p>Jack donates more than half of all ad revenue generated by an individual's time online to their choice of more than 20 charities from across Canada and the US, and now the UK to the tune of 1.1 cents every impression (paid at par depending where the charity is registered...or at least that is the theory...the advertisers to date have been friends and family so I have been covering the 1.1 cents myself).<p>The number of impressions and how you create them is up to you. Simply sharing, viewing or commenting on pictures or 'deep thoughts' makes cents!<p>Jack also takes a 'softsell' approach to keeping the charities top of mind among existing supporters, while trickling into the consciousness of potential supporters, as the charities' Twitter feeds have recently been incorporated into their supporters' personal profile pages...viewable to the community.<p>Yes, the name will always sound a little untraditional, but JackTheDonkey.com is working to connect with individuals who are traditionally unengaged from anything remotely related to volunteerism and fundraising.<p>There is another key component to the site that we are rolling out in the near future which will provide an additional stream of funds for the charities on jackthedonkey.com.<p>Please join us: http://www.jackthedonkey.com/Register1.html (and remember to check your spam folder for the activation email).<p>Attached is a copy of my first piece of press that I was able to generate locally earlier this summer:<p>http://null/redirect?url=http%3A%2F%2Fwww%2Ecjnews%2Ecom%2Fimages%2Fstories%2FHeebonics%2FJune_25_09%2Epdf&urlhash=PfME&_t=disc_detail_link<p>Attached are also links to a couple reviews of Jack that were posted recently on a couple startup related sites:<p>http://null/redirect?url=http%3A%2F%2Fstartupmeme%2Ecom%2Fjackthedonkey-jacks-every-visit-of-yours-to-support-your-favorite-charity%2F&urlhash=yJkm&_t=disc_detail_link<p>http://null/redirect?url=http%3A%2F%2Fwww%2Ekillerstartups%2Ecom%2FSocial-Networking%2Fjackthedonkey-com-support-a-charity-the-social-way&urlhash=p3FU&_t=disc_detail_link<p>www.JackTheDonkey.com is free for the charities and members of the community, but not for the corporate sponsors/advertisers. For corporations, this is what many now refer to as 'cause marketing for the web 2.0 generation'.<p>Thanks in advance,
David Katz
twitter.com/inyourfacebook.
,Failed for the past 12 years as an tech entrepreneurBack when I was 24, I pretty much hated my 9-5 job because of lack of control over my destiny, the limit of earnings and growth and the idea of going to the office every single day. I realized I could start something of my own.
So I started to look for something easy to do work on that would not consume a lot of my time. Blogs were a rage back then and multi-million dollar exits were quite common. I bought a domain and installed WordPress and started blogging after my working hours. I started a technology blog in the hope to replicate the success of Mashable and Techcrunch. I spent about 4 hours every night covering tech news about companies and social media in general.
2 years passed and I burned out myself. Traffic to the blog was flat and I was not making any meaningful money. I shut it down.
A few months later, I started a website that pulled information from Amazon and displayed dresses in a fancy and intuitive website. I opened a Facebook page, spent a lot of time marketing it and eventually made a grand total of 2 sales in a span of 3 months.
I decided to give up.
The very next year, I decided to build a note-taking web app that was a mash of Google calendar and a to-do list app. The idea was that people would see today's schedule by default and they would easily add and manage tasks.
I hosted it for a few months and lost interest due to a lack of customers.
After taking a break for a year or so, I decided to do something ground-breaking. I built my version of Facebook Groups/Slack that would allow people to share something interesting with others. You could create groups and add/remove people from them. The UI was fancy and a few of my friends and family loved it.
A few months after running it, I shut it down. I found it hard to justify its existence since everybody else was using Facebook groups and with the rise of mobile apps that allowed seamless sharing, my application made no sense.
Sensing an opportunity in media space again, I then started a news aggregator website that aggregated news titles from hundreds of outlets storing thousands of news articles per day. The website was smart enough to cluster the news articles based on topics which, Google news does well. People loved it and it got great reviews, but it was not growing fast enough.
And like earlier, I ran out of patience after 6 months and I shut it down.
After multiple failures, I decided to take a longer break. I had pretty much given up my entrepreneurship journey knowing there was no way I could build a reasonably successful business.
A year passed and I started to feel uneasy with myself and my day job.
So, I built a stupid web app that cleaned new articles by stripping them off of ads and showing only the relevant content. I shared it and got no real feedback from others. Nobody cared.
That's where it hit me, why not pivot to and a link management platform? I thought it's so easy to build and manage it. I could feel the tingling in my body. I built https://blanq.io/ with the excitement of a toddler.
I was so wrong.
I spent the next 1 year building the landing page, the entire web app plus some extra features in a hope that it will take off.
For the first 18 months, I had no paying customers. I put everything into this. All my previous experiences of failures and learning went into building this platform. "How could I fail?" I thought.
I then decided to stick to it and give myself 3 years to decide its fate.
On the 19th month, my efforts started to pay off. I landed my first customers then 2nd and then 3rd.... and so on. It's been 8 months since then and I now have 10 paying customers using my platform almost every day and growing every month.
My learning:
1.Don't quit too soon and don't be too hard on yourself.
2.With each failure, you do get better at not failing.
3.You improve at everything as time passes - marketing, programming, sales, operations..
Reddit Images 34

How To Create Your Own Coloring Page Online | Coloring Time-Lapse 0

Eve L. shared with us this beautiful coloring of the Lechaim page from the coloring book. So today we have a post about Lechaim! Cheers to that, and to you Eve for sharing your lovely creation 🙂 What does Lechaim mean? and how do you pronounce it perfectly in Hebrew? Let’s check it out. 1
Absolutely loving these digital coloring pages from durianaddict. It’s nice to not feel the pressure to create my own art and just relax coloring. Printed on 110 card stock, prisms colored pencils. 2
Haha I found some coloring the page reads Leo,Donnie,Mikey love to go to library Raphael is a little confused on his book he can't figure out how to read yes Nikita is my real life name 3

About every other month or so, our elderly neighbor will drop off a page to my wife from his coloring books. Here's her collection on our fridge so far. 4

Create your own unicorn coloring page 5

How half assed did EA be to create fifa 22 create a club mode ! The red marker are my banners and the black marker are Valencia banners, see that blank white cloth hanging from the stands and the funny part is my team color is not even white 🤦 6

Learn How To Create Linkedin Business Page And Make Most Out Of It 7

Tutorial for beginners in Inkscape: How to create a coloring book for children 8

It's a great guide to create a cottagecore room - how to create a cottagecore aesthetic room - cottagecore decor, bedding, accessories & color palette 9

Set out on an enhancing journey of coloring through the beautiful Hebrew language & Jewish culture. Relax, immerse, learn, & create your own unique art & gifts. Click our pinned post for link to order or search “Learn Hebrew” on Amazon 10
Tutorial for beginners in Inkscape: How to create a coloring book for children 11
Colored a page from my wife’s book. 3 observations: Very relaxing, I need more colored markers (good ones), I need to learn how not to have the darker areas :) 12
See more, See less, How to make your own printable coloring pages?, How to make your own printable coloring pages?, How do you make a coloring page from a photo?, How do you make a coloring page from a photo?, How to make coloring pages from photos?, How to make coloring pages from photos?, How to quickly create a coloring book from scratch?, How to quickly create a coloring book from scratch? , See more, See less, How to make your own printable coloring pages?, How to make your own printable coloring pages?, How do you make a coloring page from a photo?, How do you make a coloring page from a photo?, How to make coloring pages from photos?, How to make coloring pages from photos?, How to quickly create a coloring book from scratch?, How to quickly create a coloring book from scratch?


Comments
Post a Comment